

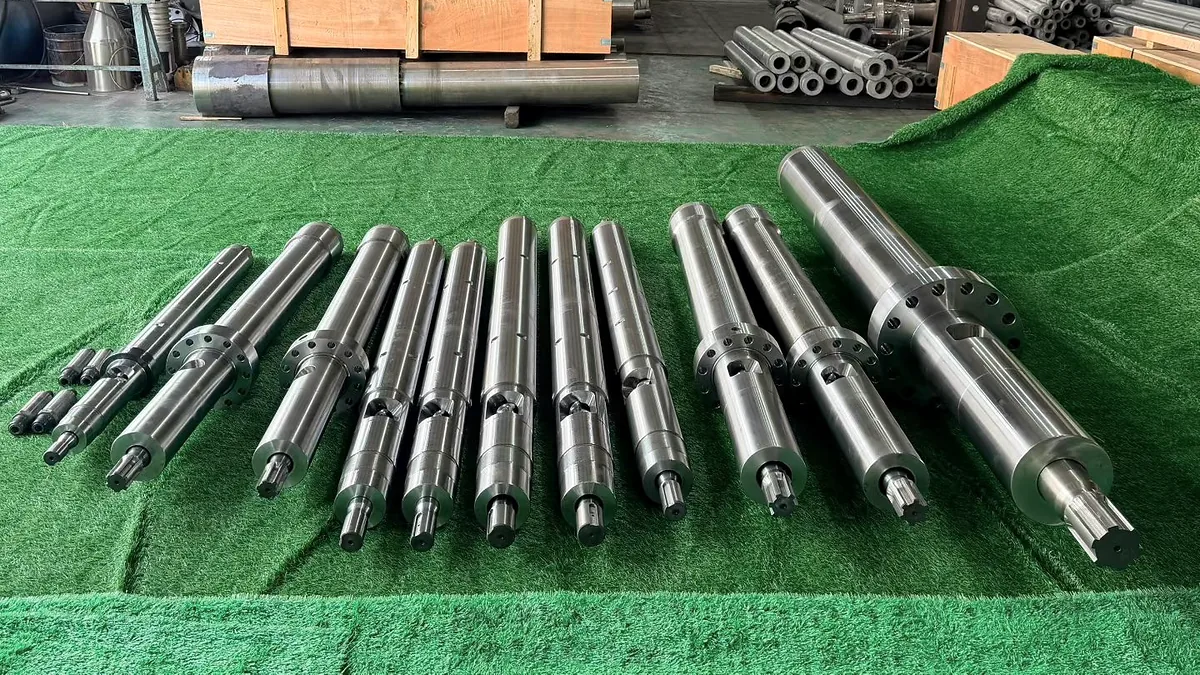
What Is an Injection Molding Purging Compound and Why It Matters
Imagine you just finished a production run of black ABS parts, and the next job calls for white polypropylene. You feed the new resin into the hopper and start cycling shots -- but five, ten, twenty shots later, dark streaks and specks still show up in every part. The barrel looks clean from the outside, yet contamination keeps bleeding through. This is the exact problem an injection molding purging compound is engineered to solve.
An injection molding purging compound is a specially formulated thermoplastic material designed to clean residual resin, colorant, carbon deposits, and degradation byproducts from the barrel, screw, nozzle, and hot runner system of an injection molding machine. Unlike virgin resin or regrind, purge compounds contain active cleaning agents or high-performance base polymers that displace stubborn contamination far more efficiently than production resin alone.
What Exactly Is a Purging Compound
At its core, a purging compound is a cleaning material -- not a production material. That distinction matters. When operators attempt changeovers by simply running the next resin through the barrel, they are relying on a purging material that was never designed for cleaning. Virgin resin lacks the scrubbing chemistry, viscosity profile, or thermal behavior needed to dislodge carbonized buildup clinging to screw flights and barrel walls. It is, as one industry analogy puts it, like washing greasy dishes with plain water and no soap.
Commercial purge compounds, by contrast, are purpose-built. Some use chemical reactivity to soften and dissolve degraded polymer films. Others rely on high-viscosity formulations that generate mechanical shear to scrub metal surfaces. Many processors also use pre-measured purge packets for consistent dosing, which removes guesswork and helps standardize the cleaning process across shifts. Whether the formulation is chemical, mechanical, or a hybrid of both, the goal is the same: get the barrel genuinely clean in fewer shots, with less wasted resin, and in a fraction of the time.
Why Injection Molders Rely on Purging Compounds
The pain points are familiar to anyone who has run a molding press. Black specks appear in light-colored parts. Color carryover ruins the first fifty shots of a new run. Streaking persists long after the previous resin should have cleared. These defects trace back to carbonized material accumulating in dead spots within the plasticizing unit -- the check ring, compression zone, nozzle tip, and anywhere flow stagnates long enough for resin to degrade.
The cost of ignoring these issues adds up fast. Every contaminated part becomes scrap. Every extended changeover eats into machine uptime. Processors using only virgin resin to flush a barrel often burn through multiple machine loads of material before parts run clean, and even then, hidden residue in low-flow areas can break loose mid-production and trigger a new round of rejections. An effective injection mold purging compound addresses all of these scenarios by targeting contamination at the source -- inside the flow path -- rather than simply pushing resin through and hoping for the best.
This article is built as an operator-level training resource. In the sections ahead, you will see exactly how these compounds work inside the barrel and screw assembly, how to match the right compound to your resin and machine, and how to execute purging procedures that actually eliminate contamination rather than just relocate it.
How Purging Compounds Actually Work Inside the Barrel and Screw
Knowing that an injection molding purging compound cleans the barrel is one thing. Understanding how it cleans -- the actual mechanism happening inside the plasticizing unit while you stand at the operator panel -- is something almost no training manual covers in detail. Yet this is exactly what separates a successful purge from a wasted one.
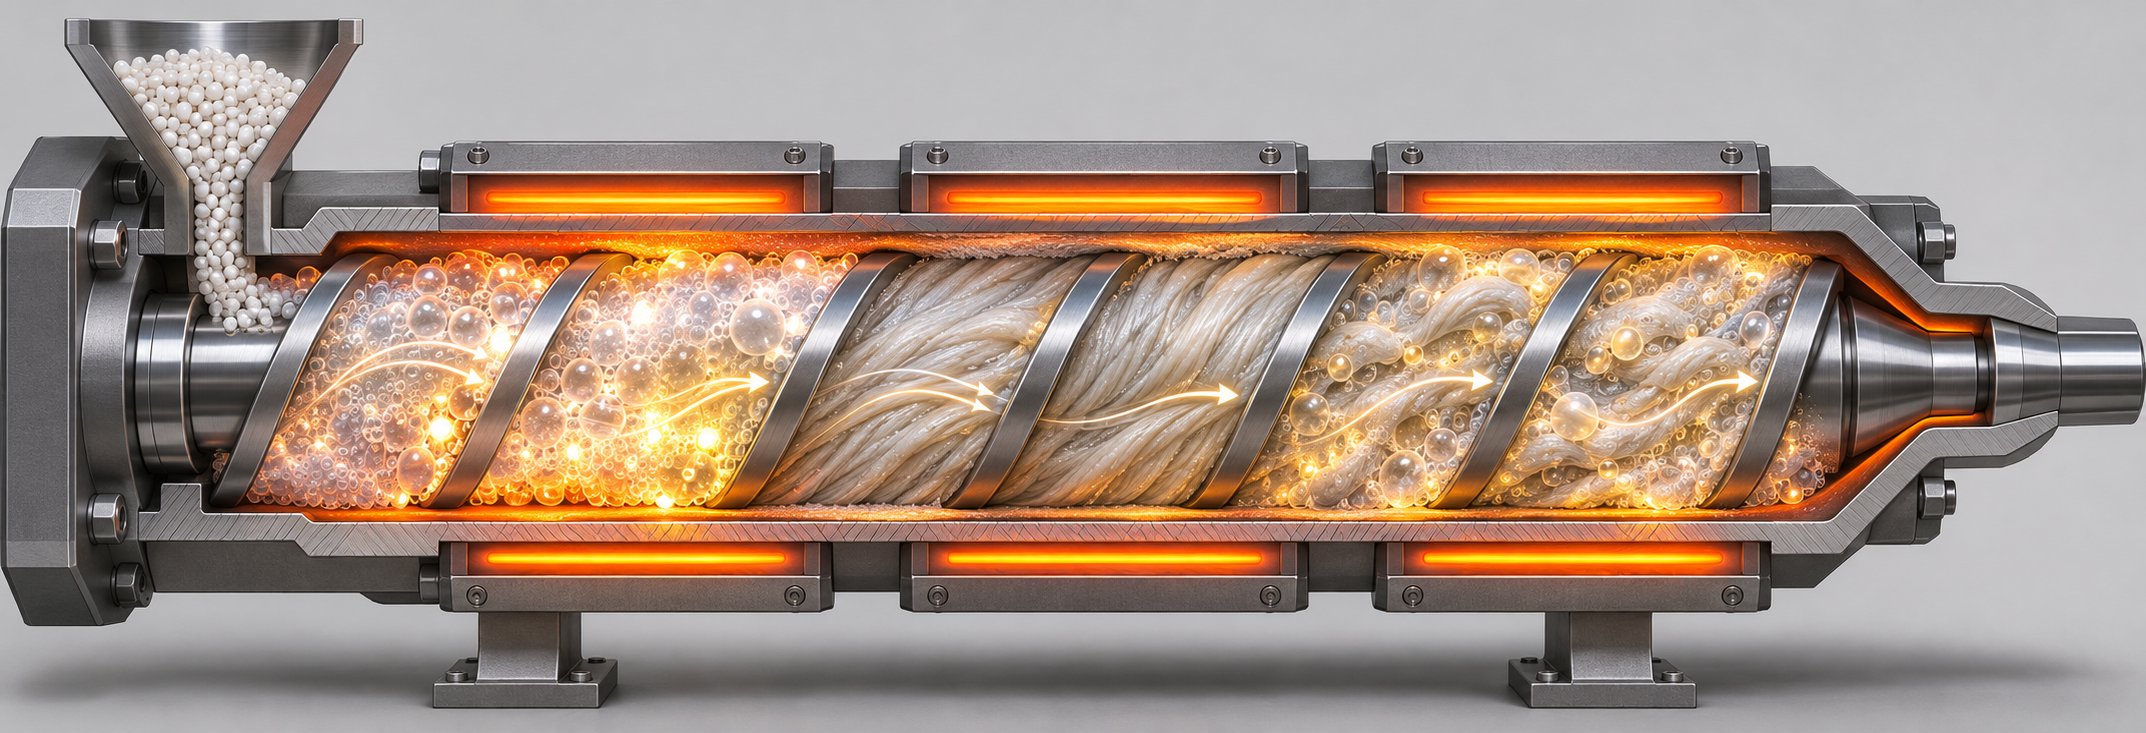
Picture the inside of your barrel during production. Molten polymer flows through the feed zone, gets compressed and melted in the transition zone, and travels through the metering zone toward the nozzle. Along the way, resin contacts every surface: screw flights, the screw root, barrel walls, the check ring assembly, and the nozzle tip. Wherever flow slows down or stagnates -- in the corners of screw flights, behind the check ring, inside compression-zone dead spots -- polymer sits longer than it should. Over hours and shifts, that stagnant resin degrades. It carbonizes. It bakes onto metal. And it becomes the source of black specks, color contamination, and streaking that standard resin flushes cannot reach.
Different purging compounds attack this contamination through fundamentally different injection molding purging methods. The three primary mechanisms are chemical action, mechanical displacement, and hybrid approaches that combine both. Each one interacts with barrel geometry and contamination differently, so understanding the distinctions helps you choose the right tool for the job.
How Chemical Purging Compounds Clean the Barrel
Chemical purging compounds contain reactive purging agents -- typically foaming additives, surfactants, or reactive components -- blended into a carrier resin. These agents remain dormant at room temperature. When the compound enters the heated barrel and reaches processing temperature, the chemistry activates.
Here is what happens step by step. As the compound melts and moves through the screw flights, the reactive agents begin generating gas -- usually through controlled decomposition of a foaming additive. This gas expansion does two critical things. First, it increases the volume of the purge material, pushing it into tight areas that a standard melt stream would bypass: the gaps behind the check ring, narrow channels near the nozzle tip, and dead-flow pockets in the compression zone. Second, the expanding gas creates micro-pressure against the barrel and screw surfaces, helping to lift and loosen carbonized films and degraded polymer layers that cling to metal.
Simultaneously, chemical wetting agents in the formulation reduce the surface tension between the contamination layer and the metal substrate. Think of it like a degreaser on a kitchen surface -- the chemistry breaks the bond between the baked-on residue and the steel underneath. Once that bond weakens, subsequent screw rotations and injection shots flush the loosened contaminants out through the nozzle.
Chemical purging compounds are especially effective against thin, baked-on deposits -- the kind of contamination that mechanical scrubbing alone struggles to reach. They excel in machines with complex flow paths, including hot runner systems, where screw-generated shear is absent. However, they typically require a brief soak time at temperature to allow the chemical reaction to fully develop, and operators sometimes need an additional cycle of production resin to displace any residual purging agents before starting the next run.
How Mechanical Purging Compounds Displace Residue
Mechanical purging compounds take a completely different approach. Instead of relying on chemical reactions, they clean through physical force -- shear, pressure, and friction generated by the screw's rotation against high-viscosity material inside the barrel.
These formulations are engineered to be denser and more viscous than typical production resins. When a mechanical purge enters the barrel, it forms a thick, cohesive mass that fills the entire flow channel -- from the deep root of the screw flights all the way to the barrel wall. As the screw rotates, this high-viscosity plug generates significantly more shear stress against metal surfaces than a standard polymer melt would. That increased shear physically scrubs carbon deposits, residual colorant, and degraded resin off the screw and barrel walls, much like the soft-scrub action described in industry publications.
The effectiveness of mechanical purging compounds depends on their ability to maintain contact with every internal surface. Because they are formulated to resist easy flow, they do not simply channel through the center of the barrel the way a low-viscosity flush would. Instead, they push outward, filling screw-flight corners and applying pressure to the check ring area where contamination loves to hide. The displaced contamination gets carried forward in the purge stream and exits through the nozzle as visibly dirty shots that progressively become cleaner.
Mechanical compounds are popular for routine color changes and material transitions in injection molding because they work quickly, leave minimal residue of their own, and do not introduce chemical byproducts into the system. They are often the go-to choice when operators need a fast, reliable clean without special preparation steps. Liquid purging compounds, by contrast, occupy a niche role -- their low viscosity makes them useful for reaching narrow channels in hot runner manifolds, but they generate far less mechanical cleaning force in the barrel itself.
Hybrid and Foaming Compound Mechanisms
Hybrid purging compounds merge both strategies into a single formulation. They contain a high-viscosity carrier resin for mechanical scrubbing action and reactive purging agents that activate at processing temperature to deliver chemical cleaning simultaneously. The result is a compound that physically displaces bulk contamination through shear while chemically loosening the stubborn, baked-on films that mechanical action alone might leave behind.
Foaming compounds represent a specific subset of this hybrid category. Their formulations include blowing agents that generate controlled gas expansion inside the barrel. The expanding foam reaches dead spots -- behind check rings, inside manifold channels, around valve pins -- where neither pure mechanical force nor standard melt flow can effectively penetrate. This makes foaming compounds particularly valuable for machines with known stagnation areas or complex internal geometries.
To put all three mechanisms side by side, here is a quick comparison:
- Chemical purging compounds -- Primary action: reactive agents soften and lift deposits through gas expansion and chemical wetting. Ideal use case: heavy carbon buildup, baked-on degradation, hot runner systems. Temperature behavior: requires activation at specific processing temperatures; soak time improves results.
- Mechanical purging compounds -- Primary action: high-viscosity material generates shear and physical scrubbing across all barrel surfaces. Ideal use case: routine color changes, material transitions, quick changeovers. Temperature behavior: operates across a broad range; some formulations span approximately 175 degrees F to 752 degrees F.
- Hybrid/foaming compounds -- Primary action: combines mechanical displacement with chemical reactivity and gas expansion for dual-mode cleaning. Ideal use case: severe contamination, complex screw geometries, machines with persistent dead spots. Temperature behavior: requires temperatures sufficient to activate the chemical component while maintaining mechanical viscosity.
Selecting among these three mechanisms is not a matter of preference -- it is a matter of matching the cleaning action to the specific contamination you are dealing with and the machine geometry you are working inside. A quick color change on a simple screw design calls for a different compound than deep carbon removal from a machine that has been running engineering resins at elevated temperatures for weeks. Even details as seemingly unrelated as travel logistics -- whether you are coordinating compound shipments to a plant near an econo lodge martinsville va or a facility across the country -- matter less than ensuring the compound you select actually matches your barrel conditions.
The mechanism, however, is only half the equation. The type and form of purging compound you choose -- granules, concentrates, liquids, or specialty blends matched to specific resin families -- determines whether that mechanism can perform at its full potential inside your particular machine.
Types of Purging Compounds and How They Compare to Alternative Methods
You understand the three cleaning mechanisms -- chemical, mechanical, and hybrid. But walk into any supplier's catalog and you will find dozens of formulations in different physical forms, different base chemistries, and different temperature ratings. Meanwhile, someone on the shop floor is still pushing virgin HDPE through the barrel and calling it a purge. Choosing the right approach means understanding both the types of purging compounds available and how they stack up against the alternative cleaning methods that many plants still rely on by default.
Purging Compound Types by Form and Chemistry
Purging compounds differ not only in their cleaning mechanism but also in their physical form and base-resin chemistry. Both factors influence how effectively the compound reaches contamination inside a specific machine geometry.
Physical form matters more than most operators realize. Here is why:
- Granules (pellets) -- The most common form. Standard-sized pellets feed easily through hoppers, screw flights, and check rings on virtually any injection molding machine. They melt predictably and work well for barrel and screw cleaning across a wide range of shot sizes. Most mechanical and chemical formulations ship as pellets.
- Powders -- Finer particle size allows faster melting and better penetration into tight clearances. Powder-form compounds can reach narrow screw-flight gaps and thin-channel geometries that larger pellets might bridge over before fully melting. However, powder handling introduces dust and feeding consistency challenges in some hopper designs.
- Liquids -- Low-viscosity liquid formulations are designed to flow into restricted areas that high-viscosity materials cannot reach -- particularly narrow hot runner manifold channels and valve-gate assemblies. They sacrifice mechanical scrubbing force for accessibility, making them a specialty tool rather than a general-purpose solution.
- Concentrates -- A concentrated purging compound is blended with a carrier resin by the operator before use, typically at a specific let-down ratio. Concentrates offer flexibility because you can adjust the cleaning intensity and match the carrier to your production resin. They reduce shipping weight and storage space, but require accurate blending to perform consistently.
Beyond form factor, the base-resin chemistry determines which processing temperatures and resin families a compound can handle:
- Polyethylene-based compounds -- Effective for low-to-mid temperature applications (up to roughly 450°F). PE-based purges are commonly used when processing polyolefins, styrenics, and some flexible resins. Their wide availability and low cost make them a shop-floor staple.
- Polypropylene-based compounds -- Similar temperature range to PE-based options but with slightly different melt behavior. PP-based formulations are popular in packaging and consumer-goods molding environments where polypropylene is already the dominant production resin.
- Engineering-resin-based compounds -- Built on high-performance carriers like polycarbonate, nylon, or specialty polymers, these compounds tolerate processing temperatures above 500°F and sometimes exceeding 700°F. They are essential for shops running PC, POM, PEI, PEEK, or other high-temperature materials. Using a low-temperature purge in a high-temperature barrel accomplishes nothing -- the compound degrades before it can clean.
The takeaway is straightforward: form factor determines where the compound can reach inside your machine, and base-resin chemistry determines whether it can survive the thermal environment long enough to do its job. Getting either one wrong means wasted compound and a barrel that still is not clean.
Purging Compounds vs Alternative Cleaning Methods
Many shops still purge injection molding machines using virgin resin, regrind, or manual disassembly. These alternatives have their place, but understanding exactly where they fall short -- and where purpose-built compounds outperform them -- helps you make a cost-informed decision rather than defaulting to habit.
The following table compares every major cleaning approach side by side, covering the factors that matter most on the production floor:
| Method | Cleaning Effectiveness | Typical Cost per Changeover | Time Required | Equipment Wear Impact | Best Use Case |
|---|---|---|---|---|---|
| Chemical purging compound | High -- reactive agents penetrate dead spots, dissolve baked-on carbon, and reach hot runner channels | Moderate to high (specialty formulation cost offset by lower material volume needed) | 10-30 min including soak time | Low -- non-abrasive; safe for most barrel and screw surfaces | Heavy carbon buildup, hot runner cleaning, degraded engineering resins |
| Mechanical purging compound | High -- physically scrubs screw flights, barrel walls, and check ring through shear and displacement | Moderate (efficient per-shot usage reduces total volume) | 5-15 min for routine changeovers | Minimal -- high-viscosity scrubbing without abrasive fillers in most formulations | Routine color changes, material transitions, shutdown prep |
| Hybrid / foaming compound | Very high -- combines mechanical displacement with chemical reactivity and gas expansion for dual-action cleaning | Higher (premium formulation) | 10-20 min | Low -- designed for broad machine compatibility | Severe contamination, complex screw geometries, persistent dead spots |
| Liquid purging compound | Moderate in barrel; high in narrow hot runner channels where viscous compounds cannot flow | Moderate | 10-20 min | Very low -- no mechanical scrubbing force | Hot runner manifold cleaning, valve-gate systems, thin-channel geometries |
| Virgin resin purging | Low -- lacks cleaning chemistry or elevated viscosity; channels through the center of the barrel without scrubbing surfaces | Low unit cost but high total cost due to large resin volume consumed | 20-60+ min; often requires many barrel loads | None | Minor color shifts between similar shades when contamination is minimal |
| Regrind purging | Very low -- inconsistent particle size and contamination already present in regrind; no cleaning action | Very low material cost; high hidden cost in scrap and extended time | 30-60+ min with no guarantee of cleanliness | Potential for increased wear from inconsistent particle geometry | Not recommended as a primary purging method |
| Manual barrel pull and clean | Very high -- direct physical access to screw, barrel bore, and check ring for hands-on cleaning | Very high (labor, downtime, risk of damage during disassembly) | 2-8+ hours depending on machine size | Risk of scratching barrel bore or damaging screw flights during removal and reassembly | Last resort for extreme carbon fouling, screw inspection, or when purging compounds cannot resolve contamination |
A few patterns stand out. Virgin resin and regrind are the cheapest materials per pound, yet they cost more per changeover because you burn through far more material and time. Processors who purge injection molding machines with production resin often consume five to ten times the material volume compared to a purpose-built compound -- and still end up with residual contamination hiding behind the check ring. Manual barrel pulls deliver the deepest clean, but at a labor and downtime cost that makes them impractical for anything other than emergency situations or scheduled maintenance. Commercial purging compounds occupy the middle ground: higher material cost per pound, but dramatically lower total cost per changeover when you factor in time savings, reduced scrap, and the ability to keep the machine running without disassembly.
This comparison also applies beyond injection presses. Facilities purging extruders face the same trade-offs -- continuous-run extrusion lines accumulate contamination over longer periods, making concentrated purging compound formulations and mechanical purges especially valuable for color transitions and carbon removal without a full line shutdown.
Matching the Compound to Your Resin Family
Selecting a purging compound based only on its cleaning mechanism or physical form is like choosing a cutting tool without checking what metal you are machining. The compound must be chemically compatible with your production resin and capable of operating within your processing temperature window. Ignore either factor and the purge will underperform -- or worse, degrade inside the barrel and create new contamination.
Here is how compatibility breaks down across common resin families:
- PE and PP (polyolefins) -- Process at relatively low temperatures (350-500°F). PE- or PP-based purging compounds are a natural match. Most general-purpose mechanical and chemical formulations handle polyolefin changeovers effectively. These are the simplest transitions to purge.
- ABS and styrenics -- Mid-range processing temperatures (400-500°F). Compatible with polyolefin-based compounds in many cases, but transitions from ABS to crystalline resins (like PP) benefit from a compound rated for both temperature ranges to bridge the gap.
- Nylon (PA) -- Processes at higher temperatures (450-550°F) and is hygroscopic, meaning moisture sensitivity complicates changeovers. Purging compounds for nylon should tolerate the elevated thermal range and ideally be dried before use, just like the production resin.
- Polycarbonate (PC) -- High processing temperatures (500-620°F) and a strong tendency to carbonize when stagnant. PC is notorious for generating black specks, so a high-temperature purging compound with strong chemical or hybrid cleaning action is often the best choice. PE-based purges will not survive long enough at PC processing temperatures to accomplish anything useful.
- POM (acetal) -- Requires special care because POM releases formaldehyde gas when it degrades. Purging compounds used with POM must be thermally stable at POM processing temperatures (around 380-430°F) and should be fully displaced before introducing a resin that processes significantly hotter, to avoid decomposition.
- High-temperature engineering resins (PEI, PEEK, PPS) -- Processing temperatures can exceed 700°F. Only specialty engineering-resin-based purging compounds survive in this range. Standard PE or PP compounds will instantly degrade and carbonize, turning a purge cycle into a contamination event. Shops running these materials need to stock dedicated high-temperature formulations -- there is no workaround.
A practical rule of thumb: always select a purging compound rated at or above your highest processing temperature, and verify that the compound's base chemistry is compatible with both the outgoing and incoming resins. When transitioning between resin families that have very different melt temperatures -- say, moving from polycarbonate at 580°F to polypropylene at 420°F -- you may need a bridging sequence. This means purging with a compound rated for the higher temperature first, then stepping down to the lower-temperature production resin. Skipping the bridge invites thermal degradation of the incoming material against residual heat, or incomplete removal of the outgoing resin that has not yet been fully displaced.
Matching compound to resin is a technical decision, not a purchasing shortcut. The cheapest purge compound in the storeroom is the most expensive one if it cannot handle your barrel temperature or your resin chemistry. Much like choosing the right accommodation for a specific location -- you would not book an econo lodge acworth east if your job site is three states away -- you should not default to a general-purpose compound when your application demands a specialty match.
With the right compound type and resin compatibility established, the real question becomes execution: how do you actually run the purge? The procedures differ significantly depending on whether you are changing colors, switching resin families, or preparing for a shutdown -- and getting the sequence wrong can waste everything you have gained from selecting the right compound in the first place.
Step-by-Step Purging Procedures for Every Scenario
Selecting the right purge compound means nothing if the procedure behind it is sloppy. The way you execute the purge -- the sequence, timing, temperature settings, and shot count -- determines whether contamination actually leaves the barrel or just gets rearranged inside it. Three scenarios account for the vast majority of purging events on the production floor: color changes, material changes, and shutdown-to-startup transitions. Each demands a distinct approach.
Color Change Purging Protocol
Color changeovers are the most frequent reason operators reach for a purging compound, and the direction of the transition matters more than most people realize. Moving from a dark color to a light one is significantly harder than going the other way. Dark pigments -- especially blacks and deep blues -- embed themselves in the thin polymer film that coats screw flights, the check ring, and barrel-wall dead spots. Displacing that residual pigment requires more purge compound and additional cycles compared to a light-to-dark change.
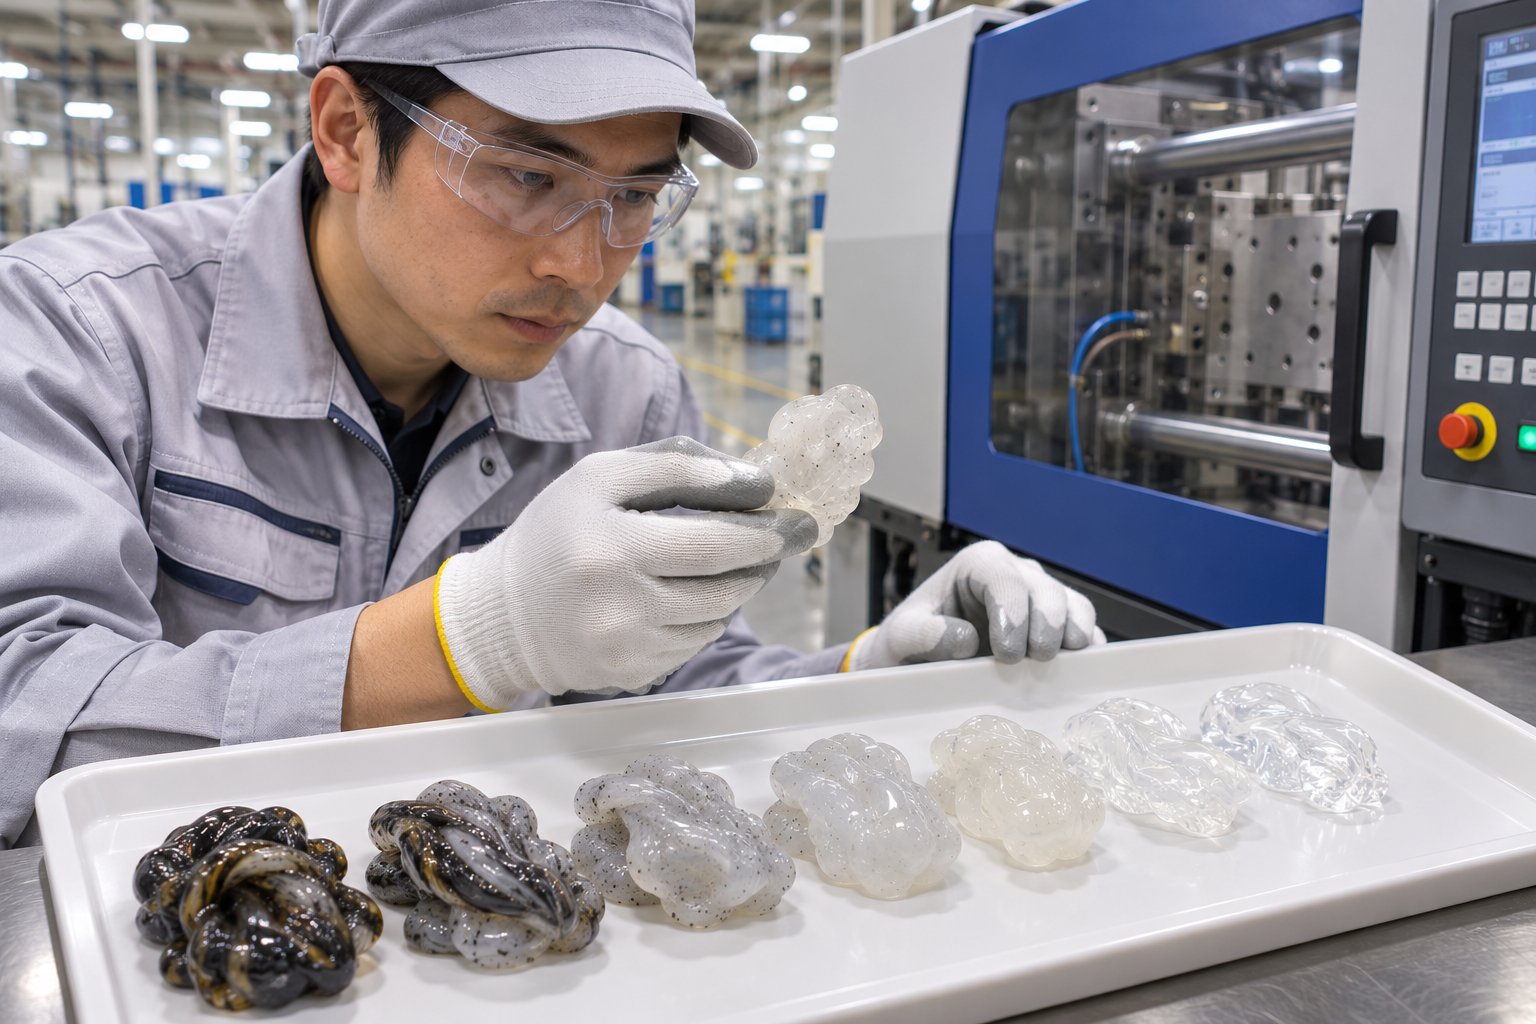
Here is the practical approach. First, empty the hopper of the current production resin and allow the screw to run until the barrel is as empty as possible. Next, introduce the purge compound at the temperature recommended by the compound manufacturer -- not the temperature of the outgoing resin. Cycle the screw at a moderate speed and fire purge shots through the nozzle, watching each shot closely. You will see the outgoing color bleeding through initially, then fading as the compound displaces pigment. Continue until the discharged material runs visually clean. For dark-to-light transitions, expect to use roughly 1.5 to 2 times the compound volume you would need for a light-to-dark change. Rushing this step almost always results in color streaking in the first production parts.
Once the purge exits clean, introduce the next production resin and cycle a few shots to displace any residual compound before resuming production. Inspect the first several molded parts carefully for specks or faint color traces that indicate hidden carryover.
Material Change Purging Protocol
Switching resin families is more complex than a color change because you are dealing with different processing temperatures, different melt behaviors, and potential chemical incompatibility between the outgoing and incoming polymers. Transitioning from ABS to nylon, for example, means moving from a processing window around 430-480 degrees F up to 480-550 degrees F. Running nylon into a barrel still holding degraded ABS residue risks carbonization and contamination that can persist for hours.
The key principle is this: your purge compound must be rated for the higher of the two processing temperatures involved. If you are stepping up from a low-temperature resin to a high-temperature one, purge at the incoming material's temperature so the compound can fully clean surfaces that will be exposed to that higher heat. If you are stepping down -- say, from polycarbonate at 580 degrees F to polypropylene at 420 degrees F -- purge at the outgoing resin's elevated temperature first, then transition to the lower range. Purging agents injection molding professionals rely on must bridge that thermal gap, or the outgoing resin simply bakes harder onto the screw instead of being removed.
Some transitions between chemically incompatible resins -- such as POM to PC -- demand a bridging sequence. You purge out the first resin completely, then introduce a thermally neutral compound to create a buffer before loading the next material. Skipping this bridge risks decomposition, gas generation, or even barrel-pressure spikes from incompatible polymers meeting at elevated temperatures.
Shutdown and Startup Purging Procedures
Shutdown and startup purges serve a completely different purpose than changeover purges. When a machine sits idle with molten resin in the barrel, that resin continues to degrade. Even overnight, heat from residual barrel temperatures can carbonize stagnant polymer into the kind of stubborn deposit that takes aggressive cleaning to remove later. Purging before shutdown prevents this problem from forming in the first place. Purging at startup clears whatever minor degradation did occur during the idle period so the first production parts come out clean.
Follow these steps for a controlled shutdown purge:
- Stop the production cycle and empty the hopper of all production resin.
- Run the screw until the barrel is as empty of production material as possible.
- Set the barrel temperature to the purge compound's recommended processing range.
- Feed the purge compound into the hopper -- most formulations require approximately 10 to 15 percent of screw capacity per cycle, though exact volume depends on barrel size and contamination level.
- Cycle purge shots through the nozzle until the discharged material runs clean and free of color or specks.
- Leave the screw in the forward position to minimize the barrel volume where residual material could sit and degrade.
- Reduce barrel heats gradually according to your machine's shutdown protocol, or turn heaters off per the compound manufacturer's guidance.
For startup, the sequence reverses with a focus on clearing any degradation that formed during the idle period:
- Bring barrel temperatures up to the purge compound's recommended operating range and allow adequate soak time for the barrel to reach uniform temperature throughout all zones.
- Feed purge compound into the hopper.
- Cycle the screw at low to moderate speed, firing shots through the nozzle to push out any degraded material that formed during downtime.
- Continue purging until discharged shots are completely clean -- no black specks, no discoloration, no streaking.
- Introduce the production resin and cycle several shots to displace residual purge compound from the flow path.
- Inspect the first molded parts against reference samples for part weight, appearance, and dimensional consistency before releasing the run to full production.
Precise measurement during these procedures matters just as much as the sequence itself. Guessing at compound quantities -- whether you are eyeballing pellet volume or wondering how many ounces is 473 ml of liquid purge concentrate -- leads to either wasteful over-purging or ineffective under-purging. Weigh your compound doses based on barrel capacity, and document what works so the next operator on the shift has a proven baseline rather than a guess.
Plants that standardize these three protocols across all machines and all shifts see measurable reductions in changeover scrap and startup reject rates. But there is a scenario these barrel-focused procedures do not fully address: contamination hiding inside the hot runner system, where there is no screw to generate cleaning force and where narrow manifold channels create their own set of purging challenges entirely.
Purging Hot Runner Systems Without Damaging Manifolds
The barrel and screw assembly gets most of the attention when operators think about purging. That makes sense -- it is the largest flow path and the one you can most directly control through screw speed and back pressure. But anyone who has chased persistent black specks or lingering color traces after a thorough barrel purge knows the frustrating truth: the hot runner system harbors contamination that barrel cleaning alone will never touch. And the physics of cleaning a hot runner are fundamentally different from cleaning a barrel.
Why Hot Runner Systems Are Harder to Purge
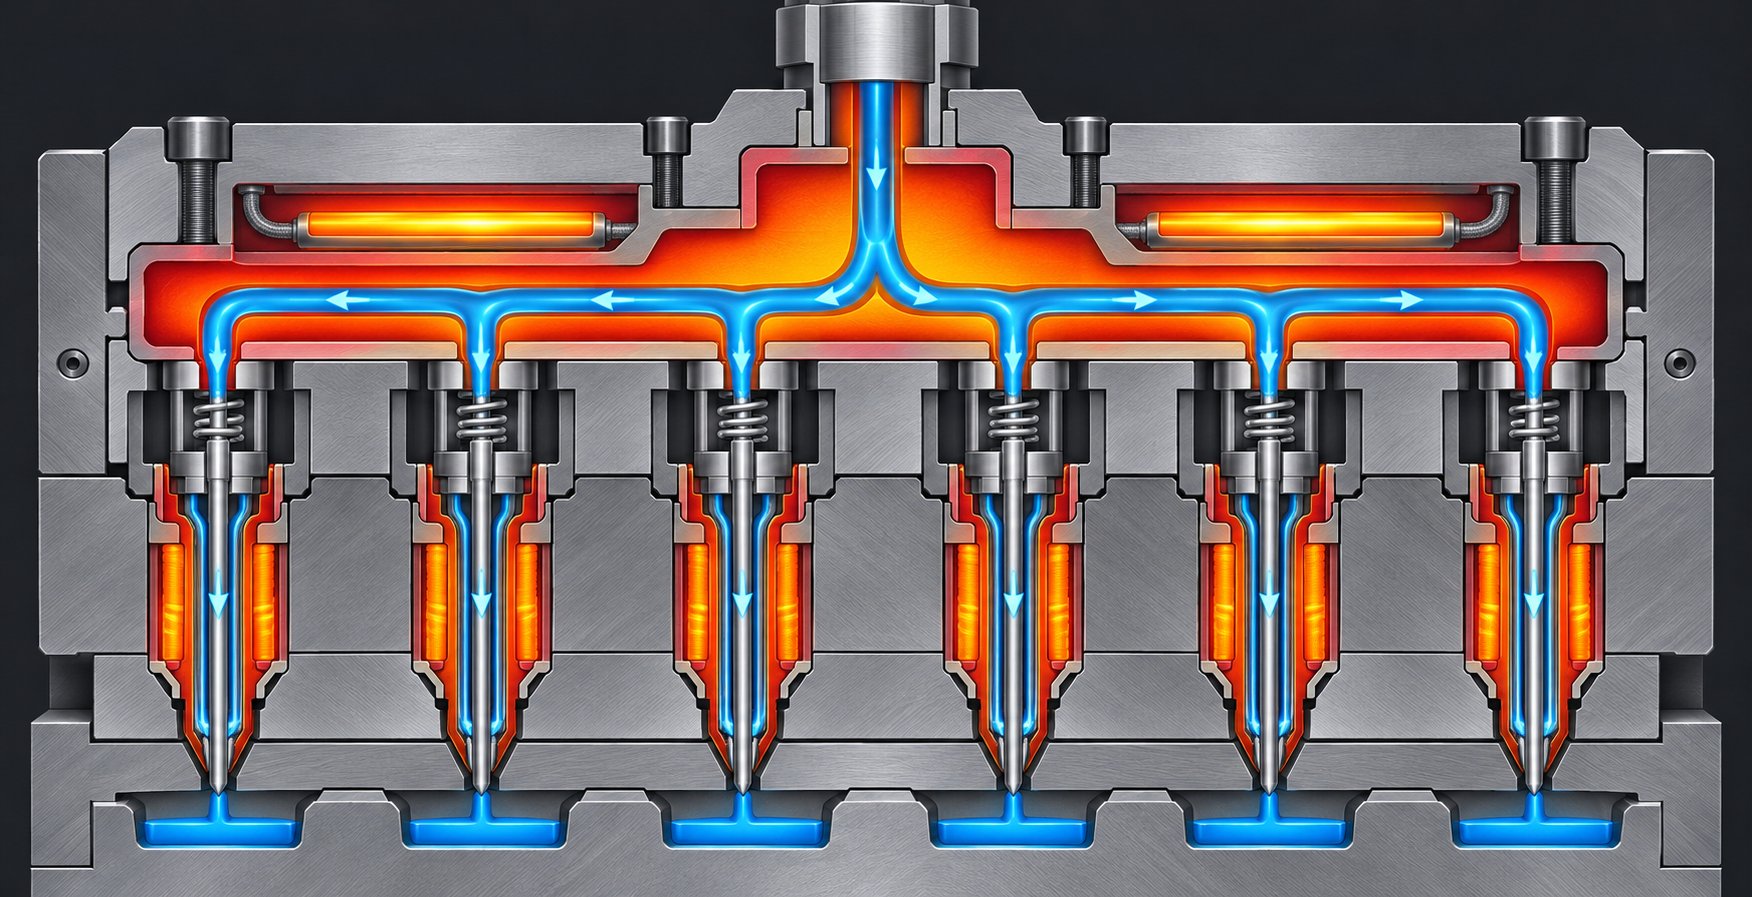
A barrel has a screw rotating inside it, generating shear and mechanical force against every surface. A hot runner manifold has none of that. It is a sealed network of narrow heated channels, valve gates, and drop assemblies where polymer flows under injection pressure alone -- no screw, no rotation, no mechanical scrubbing. This distinction changes everything about how contamination behaves and how you remove it.
Hot runner manifolds contain intricate internal geometry with corners, transitions, and flow-channel intersections that inevitably create low-flow zones and dead spots where material lingers instead of flowing through. In those stagnant areas, resin sits at processing temperature far longer than intended. Over time it degrades, carbonizes, and becomes a persistent source of black specks and color bleed. Unlike a barrel where the screw physically pushes material through, the hot runner depends entirely on injection pressure to move polymer past these dead spots -- and injection pressure alone is often not enough to dislodge baked-on deposits clinging to channel walls.
Extended residence time makes the problem worse. Material can sit in portions of a hot runner significantly longer than it would in a barrel's flow path. The longer polymer stays at temperature, the more it degrades. And because the inside of a hot runner is sealed and inaccessible, you cannot visually inspect or physically reach the contamination without a full teardown -- a process that can take hours and carries its own risk of damaging components during disassembly.
This is precisely why chemical purging plays an outsized role in hot runner cleaning. Without screw-generated shear, the chemical action of a purging agent -- foaming, expanding, and softening deposits through reactive chemistry -- becomes the primary mechanism for reaching and loosening contaminants in manifold dead spots that mechanical force simply cannot access.
Hot Runner Purging Techniques and Compound Selection
Cleaning a hot runner effectively requires specific techniques adapted to the system's sealed, narrow-channel geometry. You cannot simply run your standard barrel purge through the manifold and expect the same results. Here are the techniques that actually work.
Sequential valve gate actuation is one of the most effective strategies. Instead of opening all gates simultaneously during purging, close off all gates except one. Then fire high-velocity short shots through that single open gate, concentrating the full injection pressure and purge volume through a single flow path. This generates far more turbulence and flow velocity through each individual channel than you would achieve by splitting flow across all drops simultaneously. Work through each gate one at a time, focusing extra attention on any gates that show color streaking or contamination in their output.
Temperature boosting within safe operating limits is another valuable technique. Raising manifold temperatures slightly reduces the viscosity of both the purging compound and the degraded residue clinging to channel walls. Lower viscosity means the purge material flows more easily into tight clearances and dead spots. However, the operative phrase is "within safe limits" -- exceeding the resin's or the compound's thermal stability range creates new degradation instead of solving the existing problem.
Compound selection for hot runners demands different priorities than barrel purging. You need formulations that can flow through narrow restrictions without bridging or stalling -- something that high-viscosity mechanical compounds are poorly suited for. Low-viscosity chemical compounds or liquid purging formulations reach channels that dense, pellet-based purges cannot penetrate. Glass-filled mechanical compounds, in particular, should generally be avoided in hot runner systems, as abrasive particles can damage polished gate surfaces and become trapped in narrow flow paths.
Before running any purge through a hot runner, evaluate these key system parameters:
- Compound viscosity -- Must be low enough to flow through the smallest restriction in the manifold without stalling or creating excessive pressure.
- Flow-channel diameter -- Determines the maximum particle size and viscosity grade the system can handle; check the minimum gate clearance before selecting a compound.
- Drop count -- The number of drops in the system affects total purge volume and influences whether sequential or simultaneous gate actuation is more practical.
- Manifold volume -- Calculate the actual internal volume of the manifold and drops to determine the correct quantity of purge compound; guessing leads to either wasted material or an incomplete clean.
- Thermal profile -- Each zone in the manifold may run at a different temperature; the purging compound must activate and flow effectively across the entire thermal range present in the system.
Calculating manifold volume deserves special emphasis because it is the step operators most often skip. Many technicians default to a rough estimate based on barrel size or shot count, but manifold volume is independent of barrel capacity. Manifold suppliers typically publish internal volume specifications -- use them. Multiply the manifold volume by the number of purge cycles recommended for your contamination level, and you have a precise compound quantity. This approach eliminates both the waste of over-purging and the frustration of under-purging, regardless of whether the machine sits in a facility near an econo lodge lafayette near university campus or a remote industrial park.
Hot runner purging, done correctly, is dramatically less disruptive than a full manifold teardown. It keeps the mold in the press, avoids the risk of component damage during disassembly, and -- when combined with regular preventive purging cycles -- stops contamination from accumulating to the point where it becomes a persistent production problem. But even the best compound and the best technique fall short if operators make common procedural errors during the purge itself -- mistakes that waste material, leave contamination behind, or in the worst cases, damage the very equipment they are trying to clean.
Common Purging Mistakes That Cost Time and Material
You have the right compound, you know the mechanism, and you have followed the procedure step by step. Yet the barrel still is not clean, compound usage is climbing, or -- worse -- something just got damaged. In most cases, the problem is not the product. It is what happens between the operator and the machine during the purge itself. These mistakes are common, costly, and almost entirely preventable once you know what to watch for.
Operator Mistakes That Waste Purging Compound
The fastest way to blow through your purge budget is to use the compound incorrectly before it ever has a chance to do its job.
Purging at the wrong temperature ranks as the single most frequent error. Every purge purging compound formulation has a recommended processing temperature range. Run too cold and a chemical compound's reactive agents never fully activate -- the foaming or wetting chemistry stays dormant, and you are essentially pushing expensive inert pellets through the barrel. Run too hot and the compound itself begins to thermally degrade, leaving new residue behind instead of removing old contamination. Always set barrel zones to the compound manufacturer's specified range, not the outgoing resin's temperature or the incoming resin's temperature, unless those happen to overlap.
Skipping the barrel empty-out is another expensive habit. Introducing purge compound into a barrel still packed with production resin dilutes the compound immediately. Instead of concentrated cleaning action against barrel and screw surfaces, the purge mixes into the remaining melt and gets pushed out as a weak, contaminated blend that accomplishes very little. Run the barrel as empty as possible -- cycle until shots begin to short -- before loading the compound.
Using too much or too little compound per shot also wastes material or time. Overloading the barrel does not make the purge work faster; it just increases material cost with diminishing returns. Under-dosing means the compound cannot fill the entire flow channel, so contamination in screw-flight corners and behind the check ring never gets contacted. Weigh your doses based on barrel capacity rather than guessing by the handful.
Ignoring soak time for chemical formulations cuts their effectiveness dramatically. Chemical compounds need dwell time at temperature to allow reactive agents to penetrate and soften baked-on deposits. Firing shots in rapid succession pushes the compound through before the chemistry can work. A brief pause -- typically 30 seconds to a few minutes, depending on the formulation -- lets the active agents do what they were designed to do.
Mistakes That Leave Contamination Behind
Sometimes the purge looks successful. The last few shots exiting the nozzle appear clean, so the operator loads production resin and starts molding. Twenty shots later, black specks or color traces reappear. The barrel exit was clean, but the system was not.
This happens because contamination hides in places the operator cannot see from the discharge end. The check ring traps degraded material in the gap between its sliding surfaces. The screw root -- the deepest channel in the flight geometry -- retains a thin film of residue that a quick purge never contacts with enough force. The compression zone, where screw-flight depth decreases and shear should be highest, accumulates deposits in flight corners if screw speed is too low during the purge cycle.
Rushing through mold purging cycles is the root cause of most incomplete cleans. Operators under pressure to get the press back into production cut the purge short as soon as the nozzle output looks acceptable. But visual appearance at the nozzle reflects only the metering zone and front-end condition -- it tells you almost nothing about the state of the compression zone, transition section, or check ring further upstream.
Failing to adjust screw speed compounds the problem. Higher screw RPM generates more shear against screw-flight surfaces, which is exactly what dislodges stubborn residue. Running at production speed -- or worse, at the reduced speeds typical of auto-purge modes -- leaves contamination seated in low-shear regions that only aggressive screw action can reach. Alternating between high and low RPM during the purge cycle helps disrupt material trapped behind the check valve by creating pressure fluctuations that push compound into otherwise stagnant pockets.
Before declaring a purge complete and starting production, run through this verification checklist:
- Visual inspection of purge shots -- Examine discharged slugs on a clean, light-colored surface. Look for uniform color with zero specks, streaks, or swirling patterns.
- Check for specks or discoloration -- Even faint tinting or occasional dark particles indicate residual contamination upstream. Continue purging until multiple consecutive shots are completely clean.
- Run test parts -- Mold several test shots with the production resin and inspect them under good lighting. Parts reveal contamination that purge slugs sometimes mask, especially color traces from the hot runner or nozzle tip.
- Inspect the nozzle tip -- Remove and visually examine the nozzle tip if contamination persists. Carbon deposits frequently accumulate on the tip's interior surfaces and break loose intermittently during production, causing sporadic defects that appear random but have a consistent source.
Treating these verification steps as non-negotiable -- rather than optional when time is tight -- is the difference between a genuinely clean machine and one that will produce scrap within the first hour of the next run.
Preventing Equipment Damage During Purging
Purging compounds are designed to clean aggressively, which means using them carelessly can cross the line from cleaning into damaging. Three equipment-damage scenarios come up repeatedly on production floors.
Exceeding barrel pressure limits is the most dangerous. High-viscosity mechanical compounds generate substantial backpressure, especially at elevated screw speeds. If the nozzle is blocked, the mold is closed without adequate venting, or the operator cranks backpressure beyond the machine's rated capacity, pressure spikes can damage heaters, deform nozzle tips, or in extreme cases compromise barrel integrity. Always purge with an open nozzle or into a purge guard, and monitor pressure readings throughout the cycle.
Running abrasive mechanical compounds through hot runner systems is a mistake that has caused expensive manifold repairs. Glass-filled or mineral-loaded mechanical purges that work perfectly inside a robust barrel-and-screw assembly can score polished gate surfaces, lodge particles in narrow manifold channels, and create permanent flow restrictions inside the hot runner. Reserve abrasive formulations for barrel purging only, and switch to low-viscosity chemical or liquid compounds for any cleaning that involves the manifold.
Leaving purging compound in the barrel during extended shutdowns creates a problem that often does not surface until the next startup. Some compounds -- particularly chemical formulations with reactive agents -- continue to off-gas or degrade at residual barrel temperatures. Over hours or days, this can produce hardened deposits that are more difficult to remove than the original contamination. After completing a shutdown purge, either displace the compound with a stable production resin or ensure barrel heaters are fully off so no further thermal degradation occurs. This applies whether the machine sits idle overnight or over a long weekend -- the chemistry does not stop reacting just because the shift ended.
These equipment-protection practices are as much a part of proper purging as compound selection and procedure. A single pressure spike or an abrasive compound routed through the wrong flow path can cost more in repair bills than months of purging compound purchases. Yet even when operators avoid every procedural mistake and protect their equipment flawlessly, persistent contamination sometimes refuses to clear -- and when that happens, the issue often lives not in the purge process but in the physical condition of the plasticizing components themselves.
How Screw and Barrel Condition Affects Purging Performance
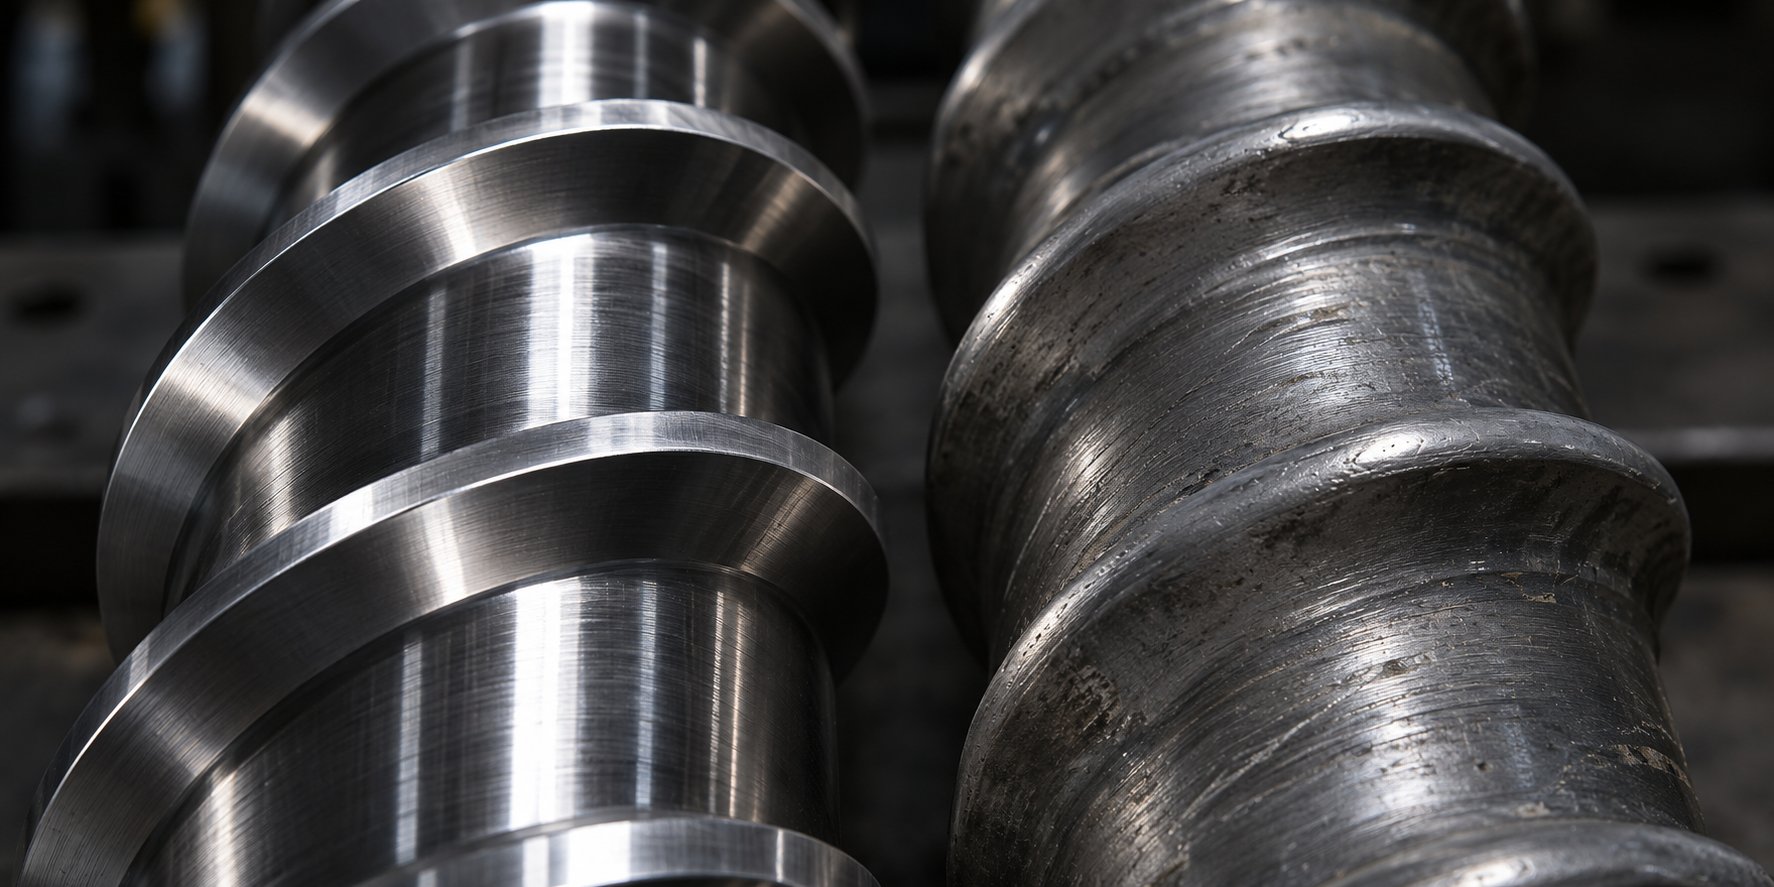
A worn screw does not announce itself with flashing lights or alarm codes. It announces itself through symptoms that look exactly like purging failures -- persistent black specks, color traces that will not clear, and contamination that returns mid-run no matter how carefully the operator follows procedure. This is the scenario that frustrates experienced technicians more than anything else on the production floor: the compound is correct, the temperature is right, the sequence is textbook, and the barrel still will not come clean. In many of these cases, the problem is not the purge. The problem is the hardware the purge is trying to clean.
The physical condition of the screw, barrel bore, and check ring assembly directly determines how effectively any injection molding purging compound can do its job. Worn, scored, or corroded plasticizing components create the very dead spots and stagnation zones that purging compounds are designed to clean -- except when those defects become severe enough, even purpose-built compounds cannot overcome the geometry working against them.
How Screw and Barrel Wear Undermines Purging Results
Imagine trying to scrub a smooth countertop versus a deeply scratched one. The smooth surface wipes clean in a single pass. The scratched surface traps residue in every groove, and no amount of scrubbing removes material lodged in pits too narrow for your cleaning cloth to reach. The same physics apply inside your barrel.
Worn screw flights reduce compression and shear. A general purpose injection molding screw generates cleaning force through the shear stress it creates between the flight tips and the barrel wall. As flights wear down, the clearance between the screw and barrel increases. That growing gap means the purging compound -- even a high-viscosity mechanical formulation -- cannot build the same shear stress against barrel surfaces. Material slips past the worn flights instead of being pushed forward by them. The compound channels through the path of least resistance rather than filling every flight corner and scrubbing every surface. Industry experience consistently shows that worn screw and barrel components make it difficult to compensate for shortcomings through process adjustments alone -- and that includes adjustments to purging routines.
Excessive clearance lets material bypass the compound entirely. In a properly fitted screw-barrel assembly, the tight clearance between flight lands and barrel bore forces material to travel forward through the screw channels in an orderly, high-shear flow. When wear opens that clearance beyond acceptable tolerances, polymer -- and purging compound -- leaks backward over the flights. The result is a purge that recirculates rather than displacing contamination forward through the nozzle. Operators notice this as a purge that seems to take forever, consuming shot after shot of compound without the discharged material ever running fully clean. The compound is not failing. The geometry is failing the compound.
Pitting and corrosion trap carbonized resin. Corrosive resins like PVC release hydrochloric acid during processing, which attacks barrel and screw surfaces over time. Abrasive fillers -- glass fiber, mineral fillers, carbon fiber -- score the barrel bore and erode screw-flight surfaces. Both mechanisms create microscopic pits, grooves, and rough patches on metal that was originally polished smooth. Degraded polymer lodges in these surface defects and resists removal even by chemical purging compounds. The reactive agents in a chemical purge can soften a carbonized film on a smooth steel surface, but they struggle to reach material embedded in a corroded pit below the surface plane. Every processing cycle deposits new contamination into these traps, creating a self-reinforcing cycle of fouling that progressively worsens over time.
The check ring -- or non-return valve -- deserves special attention here. This component experiences constant mechanical cycling and sits in a high-temperature zone where resin stagnation is already a concern. A worn check ring develops excessive clearance between its sliding surfaces, creating pockets where degraded polymer accumulates. During purging, compound flows past these pockets rather than through them, leaving embedded contamination undisturbed. The result is intermittent black specks that break loose unpredictably during production, sometimes hours after what appeared to be a successful purge.
These wear patterns do not develop overnight. They accumulate gradually across thousands of production hours. Facilities running abrasive glass-filled nylons or corrosive PVC compounds experience accelerated wear, while plants processing unfilled polyolefins may run much longer before clearance becomes an issue. The key insight is that purging performance is not static -- it degrades in lockstep with the condition of the plasticizing components, even if compound selection and operator technique remain constant.
When Screw Replacement Improves Purging Efficiency
Here is the diagnostic question every maintenance team should ask when purging results decline: has anything changed in our procedure, our compound, or our contamination sources? If the answer is no -- if the same operator is using the same compound at the same temperature on the same resin and getting progressively worse results -- the plasticizing hardware is the most likely variable.
Persistent purging failures that resist every procedural correction are a strong signal that the screw, barrel, or check ring has crossed the threshold from "worn but functional" to "actively undermining cleaning performance." Increasing compound usage to compensate is a common reaction, but it treats the symptom rather than the cause. You are spending more on purging compounds for extrusion and injection applications while the root problem -- degraded hardware geometry -- continues to worsen with every production hour.
A structured inspection reveals what the purge shots cannot. Pulling the screw and measuring flight-tip clearance against the barrel bore with calibrated gauges provides hard data. Industry guidelines suggest that screw-to-barrel clearance should typically not exceed 0.002 inches per side per inch of screw diameter for most applications; anything beyond that threshold begins to impact both processing and purging performance. Visual inspection reveals scoring, pitting, corrosion patterns, and carbon buildup lodged in surface defects that no amount of in-barrel purging will ever reach.
This is where the scope of the problem shifts from a purging question to a plasticizing-system question. Replacing a worn screw and barrel restores the tight tolerances that give purging compounds the shear, compression, and surface contact they need to function as designed. Facilities that have made this connection -- treating screw condition and purge effectiveness as linked rather than separate maintenance concerns -- consistently report that a new or refurbished screw immediately improves purge efficiency, often cutting compound usage and changeover time significantly with no other procedural changes.
For injection molders evaluating whether hardware condition is contributing to purging inefficiency, NANHAIYA's custom injection molding screw barrels offer a tailored approach. Their technical review examines screw geometry, wear patterns, melting behavior, mixing performance, and material-retention concerns to match the replacement screw and barrel to the specific application -- accounting for the resin portfolio, processing temperatures, and shot requirements of the machine in question. This kind of application-matched evaluation matters because a generic replacement screw may restore clearance tolerances without addressing the root cause of stagnation or retention issues unique to your process. Much like selecting the right purging compound for your resin family, selecting the right screw geometry for your application ensures the plasticizing system and the purging program work together rather than against each other.
Maintenance teams often defer screw inspection because pulling a screw means downtime -- and the perceived cost feels harder to justify than another drum of purge compound. But consider the math. If worn hardware forces you to double your compound consumption per changeover, increase your cycle count before shots run clean, and still leaves you chasing intermittent specks during production, the cumulative cost of deferred replacement quickly exceeds the cost of a planned screw pull and inspection. Processors working across multiple facilities -- whether the plant is in an industrial corridor or a smaller operation near an econo lodge hobbs nm -- face this same calculus. The numbers favor inspection over indefinite compensation.
If purging compound performance degrades over time despite consistent procedure, inspect the plasticizing components -- screw flights, barrel bore, and check ring -- before increasing compound usage. Worn hardware creates the contamination traps that purging compounds cannot overcome.
Recognizing this connection between hardware condition and purging outcomes reframes how you think about cleaning costs. Purging compound is not just a consumable expense -- it is a diagnostic tool. When a proven compound stops delivering the results it once did, it is telling you something about the state of the system it is trying to clean. Acting on that signal -- inspecting, measuring, and replacing worn components when the data supports it -- keeps both your purging program and your production line operating at their best. And it sets the stage for a broader conversation about how purging costs, industry requirements, and sustainability goals all intersect when you zoom out from a single machine to an entire operation.
Cost Justification and Industry-Specific Purging Applications
Compound selection, operator technique, and hardware condition all influence whether a purge succeeds or fails at the machine level. But zoom out to the plant-management perspective and a different question dominates the conversation: is the money we spend on purging compounds actually paying for itself? The answer depends on how you measure cost -- and most plants measure it wrong.
Calculating the True Cost of Purging vs Not Purging
The most common mistake in evaluating purging compound cost is comparing price per pound. A drum of commercial purge compound costs more per pound than a bag of virgin polyethylene -- that is obvious. What is not obvious is how much the "cheaper" option actually costs when you account for everything that happens during and after a changeover.
A realistic cost-per-purge calculation should include five categories:
- Downtime cost -- Every minute the machine is not producing saleable parts has a dollar value. A changeover that takes 90 minutes with virgin resin versus 30 minutes with a purpose-built compound represents a full hour of lost production capacity. For a press running high-value parts, that hour can dwarf the price difference between the two materials.
- Scrap cost -- Count every pound of off-spec material, rejected parts, and contaminated resin generated before good production resumes. Plants using virgin resin as a purge often run extra material until the machine clears, consuming five to ten times the volume a commercial compound would require.
- Labor cost -- How many operators or technicians are tied up during the changeover? Extended manual cleaning and repeated inspection cycles multiply labor hours quickly.
- Quality cost -- Black specks, streaking, or color carryover that slip past initial inspection create downstream rejections, customer complaints, and potential chargebacks. These costs rarely appear on the purge budget line, but they trace directly back to incomplete cleaning.
- Maintenance cost -- Frequent screw pulls, manual barrel cleaning, and hot runner teardowns driven by chronic contamination represent significant unplanned maintenance expenses that effective purging programs reduce or eliminate.
When all five categories are totaled, the lowest-cost purging material per pound is rarely the lowest-cost option per changeover. Industry analysis consistently shows that a higher-performance compound delivering faster changeovers and lower scrap reduces total cost even when its purchase price is substantially higher. The calculation is not complicated -- track your current changeover time, scrap pounds, labor hours, and rejection rates, then compare those numbers against a trial run with a recommended purging compound. The gap between the two totals is your real savings opportunity, whether the annual purge budget sits at usd 473 or runs into five figures.
How Purging Needs Differ Across Industries
Not every molding operation faces the same contamination challenges. A medical device manufacturer running clear polycarbonate housings operates under entirely different constraints than a packaging plant cycling through dozens of polyethylene colorants per week. Purging compound selection must reflect these differences -- what works on a consumer-goods line may be completely inadequate for aerospace or food-contact applications.
The following table maps out how industry requirements shape purging strategy:
| Industry | Typical Resins | Contamination Tolerance | Recommended Compound Type | Key Consideration |
|---|---|---|---|---|
| Automotive | PA (nylon), PC, ABS, PP, POM, glass-filled grades | Low -- visible defects rejected; structural parts require zero contamination | Hybrid or chemical; high-temperature grades for engineering resins | Frequent material transitions between commodity and engineering resins demand compounds that bridge wide temperature ranges |
| Medical devices | PC, PEEK, PP, PE, silicone, biocompatible grades | Very low -- regulatory compliance (FDA, ISO 13485) requires documented cleanliness | Food-grade or FDA-compliant chemical compounds; non-abrasive formulations | Compounds must meet food-contact or biocompatibility standards; documentation and traceability are mandatory |
| Packaging | PE, PP, PET, PS | Moderate to low -- consumer-facing parts require clean color; food-contact applications require regulatory compliance | Mechanical or hybrid; food-grade where required | High-frequency color changes drive compound volume; fast changeover speed is critical to throughput |
| Aerospace | PEEK, PEI (Ultem), PPS, high-temperature nylons | Very low -- zero tolerance for contamination in structural and flight-critical components | Specialty high-temperature chemical or hybrid compounds | Processing temperatures above 700°F eliminate standard compounds; only specialty grades survive without degrading |
| Consumer electronics | PC, ABS, PC/ABS blends, PMMA, LCP | Low -- cosmetic surfaces and transparent parts expose any contamination immediately | Chemical compounds with strong carbon-removal capability; Ultra Purge grades designed for PC and PMMA transitions | Clear and high-gloss parts amplify even minor specks or color traces; purging material injection moulding protocols must be rigorous |
Several patterns emerge from this comparison. Industries with tight contamination tolerances -- medical, aerospace, electronics -- cannot afford to gamble on general-purpose compounds or virgin-resin flushing. They need specialized purging compound selection matched to both their resin portfolios and their regulatory environments. Packaging operations, by contrast, prioritize speed and frequency over absolute cleaning depth, because they may execute dozens of color changes per shift across multiple lines. Automotive sits in the middle, dealing with wide resin diversity and moderate-to-strict quality requirements that demand versatile, thermally robust compounds.
Regardless of industry, the common thread is that advanced purging compounds undergo rigorous formulation to match specific processing conditions. Universal one-size-fits-all compounds exist, but as industry specialists consistently note, they are compromised solutions that underperform in applications outside their narrow sweet spot. Facilities serving multiple end markets -- an injection molder in the Southeast supplying both automotive and consumer goods, whether based near an econo lodge greenville ms or a major metro hub -- benefit most from stocking two or three targeted compound grades rather than relying on a single universal product.
Sustainability and Waste Reduction Through Effective Purging
Cost savings and environmental impact are not competing priorities -- they are the same priority measured differently. Every pound of scrap avoided during a changeover is a pound of resin that did not become landfill waste. Every shortened purge cycle reduces the energy consumed by barrel heaters and hydraulic systems running unproductively. Every successful purge that keeps regrind contaminant-free and suitable for reuse reduces reliance on virgin resin and keeps material circulating in a more sustainable production loop.
The sustainability case for optimized purging extends beyond individual changeovers. Plants that implement structured purging programs -- using the right compound at the right frequency with trained operators -- report cumulative reductions in total resin waste across their annual production cycles. Fewer rejected parts mean less material sent to scrap bins. Cleaner machines mean fewer emergency screw pulls and the energy-intensive manual cleaning sessions that follow. And properly purged equipment produces regrind that meets quality standards for reincorporation into production, closing the material loop rather than creating a waste stream.
For manufacturers reporting against sustainability metrics -- whether internal corporate goals or external frameworks -- purging program data provides concrete, measurable evidence of waste reduction. Tracking compound usage, changeover scrap rates, and regrind reuse percentages over time generates the kind of documentation that supports sustainability reporting with real numbers rather than estimates. A well-run purging program is not just a production efficiency tool. It is a sustainability initiative with a built-in return on investment.
These economic and environmental benefits, however, only materialize when purging is treated as an ongoing discipline rather than a one-time fix. The compound, the procedure, the operator training, and the equipment condition all need to work together inside a structured preventive program -- the kind of framework that turns individual best practices into lasting, plant-wide results.
Building a Preventive Purging Program That Delivers Lasting Results
Individual best practices -- choosing the right compound, following the correct procedure, avoiding common mistakes -- solve individual problems. A preventive purging program solves them permanently. The difference is the same gap that separates reactive maintenance from planned maintenance: one chases failures after they happen, the other prevents them from happening at all.
Building a Preventive Purging Schedule
A structured purging schedule removes guesswork from the production floor. Instead of letting contamination accumulate until black specks force an unplanned stop, you define purging triggers based on your actual production patterns. Four triggers should anchor every schedule:
- After every color change -- Even minor shade shifts leave pigment traces that compound over successive runs.
- After every material change -- Resin transitions carry thermal and chemical compatibility risks that only a proper purge addresses.
- At every planned shutdown -- Sealing the barrel with a stable compound or displacing residual resin prevents carbonization during idle periods.
- At regular calendar intervals for continuous-run operations -- Machines running the same resin and color for extended periods still accumulate degradation. Intermittent purging every two to three days is a practical starting point, with evaluation determining whether longer intervals are sustainable.
Implementing this framework does not require overhauling your operation overnight. Start with a prioritized checklist and build from there:
- Audit current changeover scrap rates, downtime per transition, and rejection frequency to establish a baseline -- you cannot measure improvement without knowing where you stand today.
- Select purging compound types based on your resin portfolio, processing temperature range, and machine configuration. Facilities running polyolefins need different formulations than shops processing engineering resins or running purging compounds for extrusion blow molding noblesville in operations alongside injection presses.
- Train every operator on correct purging procedure and common mistakes -- compound selection means nothing if execution varies from shift to shift. Cover temperature settings, soak times, dose quantities, screw-speed adjustments, and verification steps.
- Establish hot runner purging protocols where applicable, including manifold volume calculations, sequential gate actuation techniques, and appropriate compound viscosity selection.
- Inspect plasticizing components -- screw flights, barrel bore, and check ring -- for wear that may undermine purging effectiveness. Schedule these inspections at defined intervals rather than waiting for symptoms to force a reactive pull.
This sequence is deliberate. Measuring your baseline first ensures every subsequent step is guided by data rather than assumptions. Training comes before protocol refinement because even the best-designed program fails when the people executing it do not understand why each step matters.
Maintaining the Full Plasticizing System for Long-Term Results
A preventive purging program is only as strong as the system it operates within. The right chemical purge compounds deliver consistent results when the screw geometry provides adequate shear, the barrel bore maintains proper clearance, the check ring seats cleanly, and the nozzle tip is free of carbon deposits. Degrade any one of those hardware elements and the program's effectiveness degrades with it -- no matter how rigorously operators follow procedure.
This is why lasting results require a systems perspective. Compound selection, operator technique, processing parameters, and hardware condition are not independent variables. They interact. A worn screw forces higher compound consumption. An untrained operator wastes premium compound through procedural errors. A mismatched formulation fails regardless of perfect technique. Treating any single element in isolation -- whether that means upgrading only the compound while ignoring screw wear, or replacing the screw without training operators on purging protocol -- leaves gaps that contamination will exploit.
When purging alone cannot resolve persistent contamination despite correct compound selection and trained execution, the hardware itself warrants evaluation. NANHAIYA's custom injection molding screw barrels provide one path forward for maintenance teams facing this situation. Their technical review examines screw geometry, wear patterns, melting and mixing behavior, and material-retention concerns to determine whether plasticizing components need replacement or upgrading to restore the cleaning efficiency that the purging program depends on. This evaluation complements -- rather than replaces -- a well-run purging program by ensuring the hardware foundation supports compound performance over the long term.
Whether your facility runs a single press or manages dozens of machines across multiple sites, the framework is the same. Audit, select, train, protocol, inspect -- then repeat. Plants that treat purging as a continuous discipline rather than an occasional reaction to visible contamination consistently outperform those that do not, in scrap reduction, changeover speed, and overall equipment uptime.
Effective purging is a system discipline that combines the right compound, correct procedure, trained operators, and well-maintained plasticizing hardware. No single element compensates for weaknesses in the others.
That single principle ties together everything covered in this article -- from the chemistry happening inside the barrel to the wear patterns on screw flights, from hot runner manifold cleaning to the cost calculations that justify compound investment. Apply it consistently and purging stops being a frustrating chore that operators rush through. It becomes a competitive advantage built into your production process.
Frequently Asked Questions About Injection Molding Purging Compounds
1. How often should you purge an injection molding machine?
Purge after every color change, every material transition, and at every planned shutdown. For continuous-run operations using the same resin and color, intermittent purging every two to three days helps prevent carbon buildup and degradation in dead-flow areas. The exact frequency depends on your resin type, contamination tolerance, and production schedule. Tracking scrap rates and changeover times helps you fine-tune the interval for each machine.
2. What is the difference between chemical and mechanical purging compounds?
Chemical purging compounds use reactive agents -- foaming additives or surfactants -- that activate at processing temperature to soften and lift baked-on carbon and degraded polymer from metal surfaces. They excel in hot runner systems and areas with heavy carbon buildup. Mechanical purging compounds rely on high-viscosity formulations that generate physical shear and scrubbing force as the screw rotates, displacing residue through friction and pressure. Hybrid compounds combine both actions for severe contamination or complex screw geometries.
3. Can you use virgin resin instead of a purging compound?
While virgin resin can flush some loose material from the barrel, it lacks the cleaning chemistry or elevated viscosity needed to dislodge carbonized deposits, stubborn colorant, or degraded polymer clinging to screw flights and dead spots. Processors using virgin resin typically consume five to ten times more material per changeover and still end up with residual contamination behind the check ring. Purpose-built purging compounds deliver faster, more thorough cleaning at a lower total cost per changeover.
4. Why do black specks keep appearing after purging?
Persistent black specks after an apparently successful purge usually point to one of two root causes. First, contamination may be hiding in areas the purge did not fully reach -- behind the check ring, in screw-flight corners, or inside hot runner manifold dead spots. Adjusting screw speed, extending soak time, or switching to a chemical compound can help. Second, worn screw flights, barrel-bore pitting, or a degraded check ring may be trapping carbonized resin in surface defects that no purging compound can overcome. In that case, inspecting and potentially replacing plasticizing components like the screw and barrel is the corrective step.
5. How do you purge a hot runner system without damaging it?
Hot runner purging requires low-viscosity chemical or liquid purging compounds that can flow through narrow manifold channels without bridging or stalling. Avoid glass-filled or abrasive mechanical compounds, which can score polished gate surfaces. Use sequential valve gate actuation -- opening one gate at a time -- to concentrate flow and pressure through each individual channel. Calculate the manifold's internal volume to determine the correct compound quantity, and consider a slight temperature boost within safe limits to improve compound flow into dead spots.
Written by
Nanhaiya Technical Team
Zhoushan Nanhaiya Plastic Machinery Co., Ltd.
The Nanhaiya technical team supports screw and barrel manufacturing projects through application review, technical communication, custom manufacturing coordination, and production and quality control.
Discuss Your Application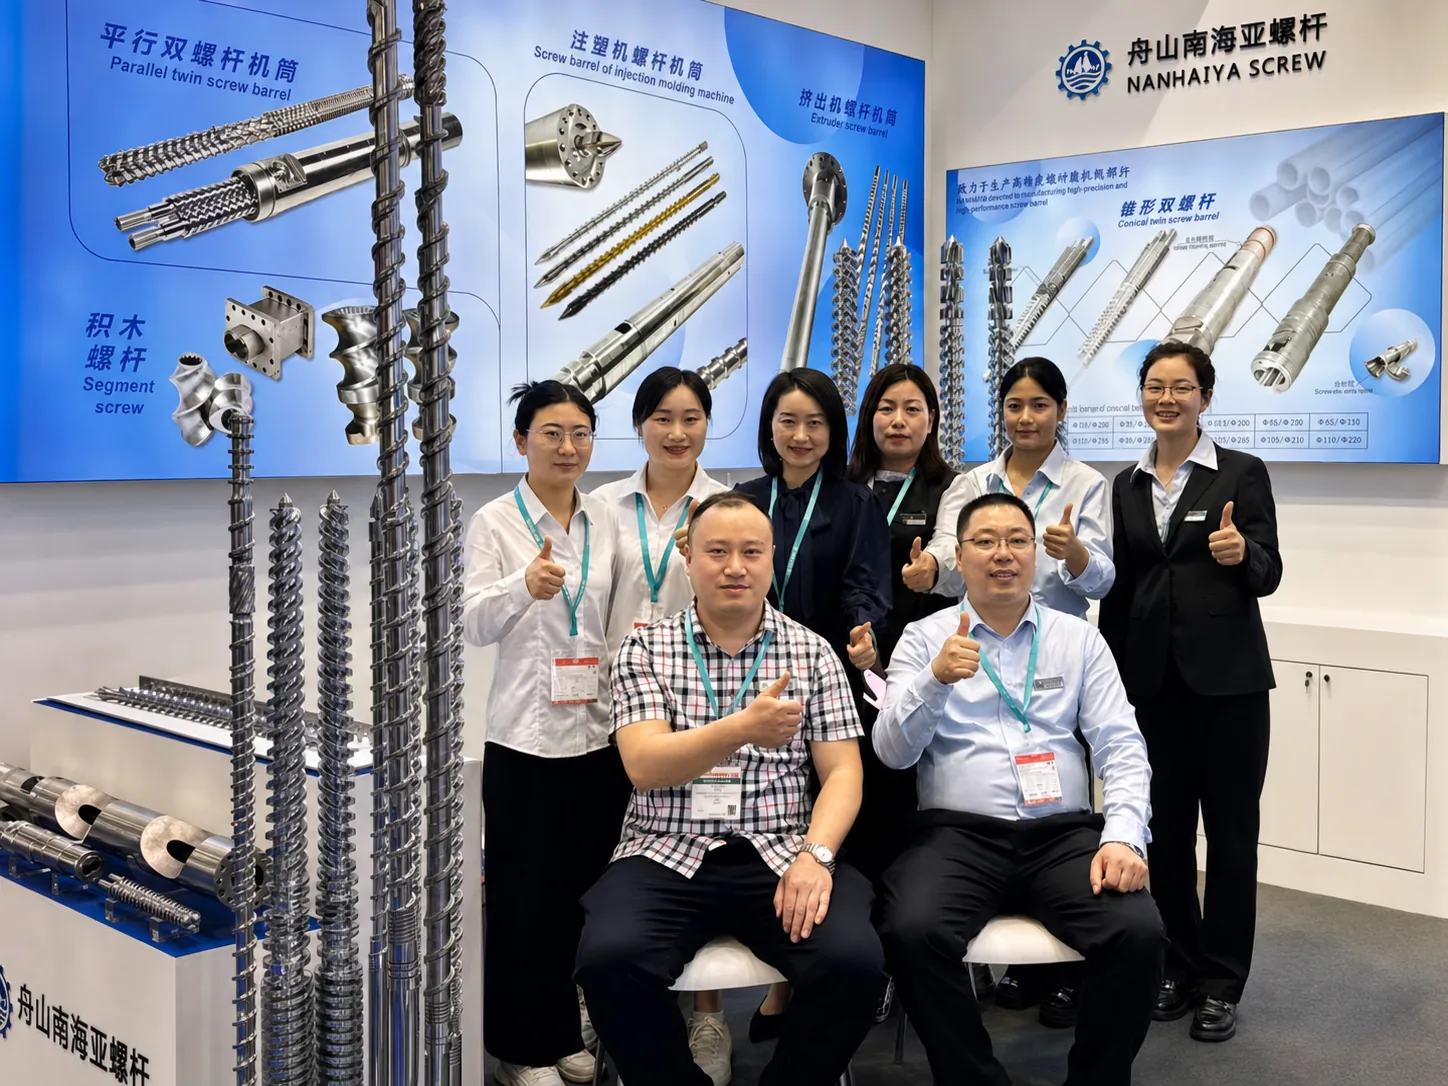
Related Articles
More insights on screw barrel technology and plastics processing.
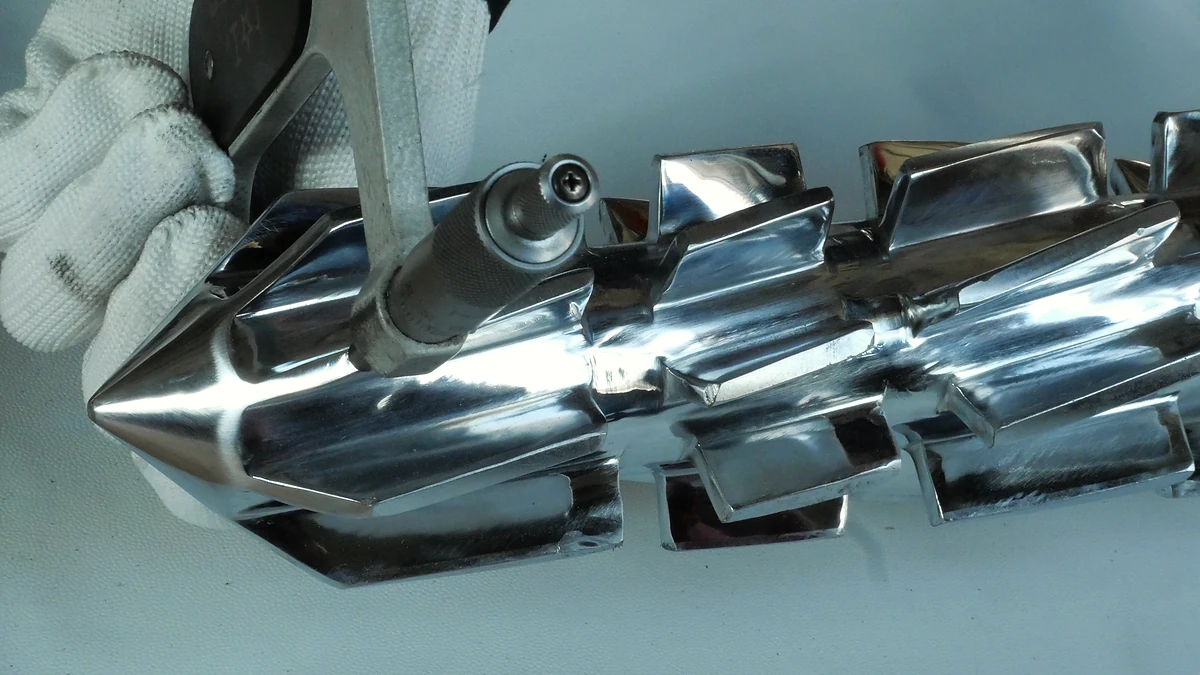
Purging Compound Decoded: Barrel Chemistry To Bottom-Line Savings
Nov 5, 2026
Learn how purging compounds clean barrels, screws, and hot runners. Compare chemical vs mechanical types, step-by-step procedures, selection tips, and cost savings.
Read Article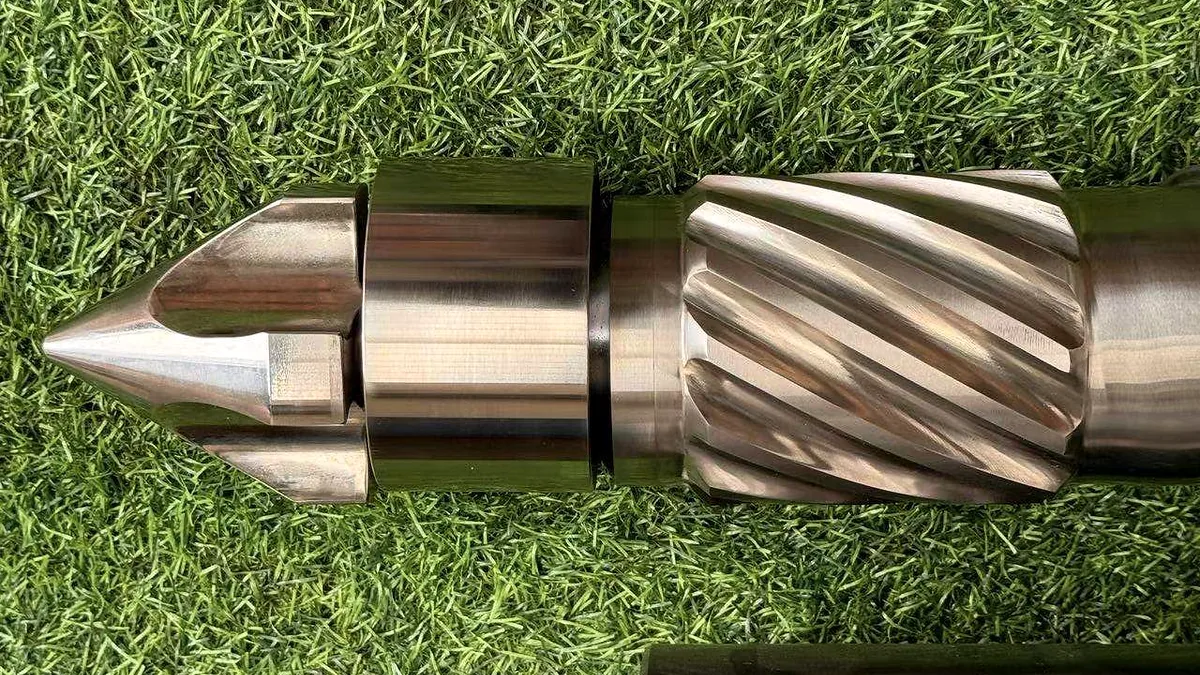
Stop Wasting Resin: How Mechanical Purging Compound Actually Works
Nov 5, 2026
Learn how mechanical purging compounds use shear force, high viscosity, and abrasive fillers to clean barrels. Covers dosage, procedures, resin matching, and maintenance tips.
Read Article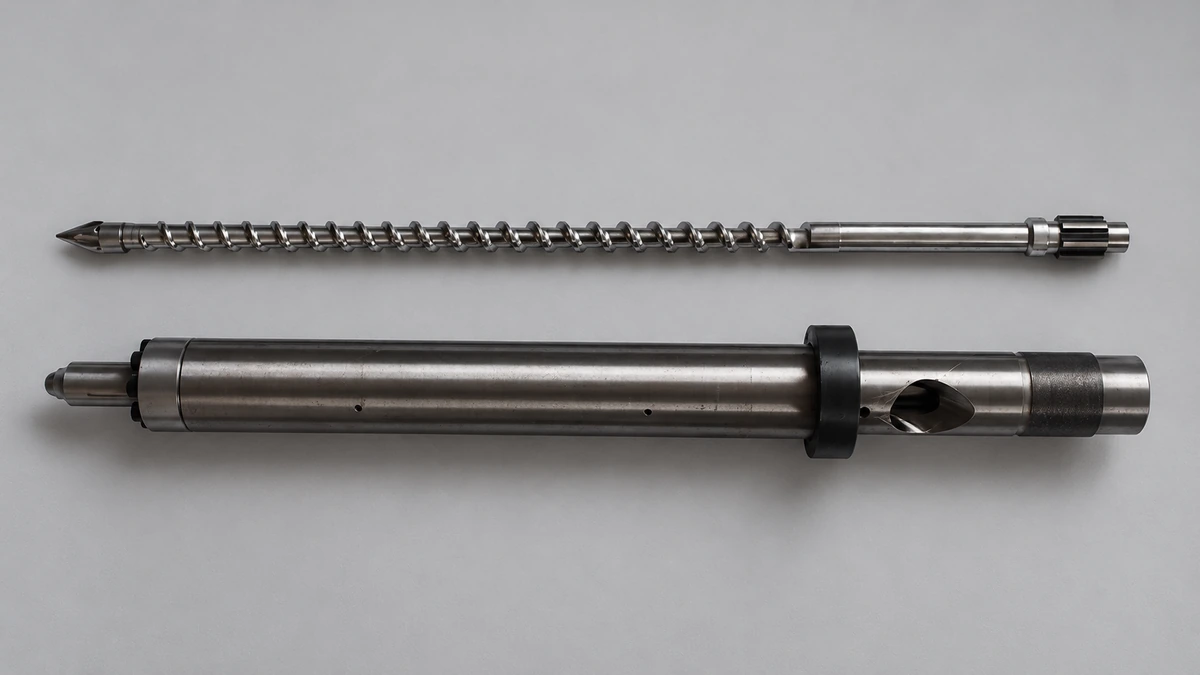
Why Your Injection Molding Back Pressure Is Costing You Parts
Nov 5, 2026
Learn how injection molding back pressure affects melt quality, cycle time, and part defects. Get resin-specific settings, troubleshooting tables, and a scientific optimization procedure.
Read ArticleLooking for something else?
Search by material, symptom or product and jump straight to the relevant page.
These are navigation suggestions based on keyword matching — not a quotation, not a delivery commitment, and not a substitute for engineering review. Final specification is confirmed by our engineers against your drawings and processed material.
Need help with screw barrel selection?
Share your machine model, processed material and application. Our team can help with pricing and technical support.