

What Is a Purging Compound and Why Does It Matter
Imagine finishing a dark-blue production run and switching straight to white. You feed in the new resin, but the first hundred parts come out streaked with blue ghosts. Scrap piles up, the clock keeps ticking, and your changeover window is blown. This is the exact scenario a purging compound is engineered to prevent.
What Is a Purging Compound
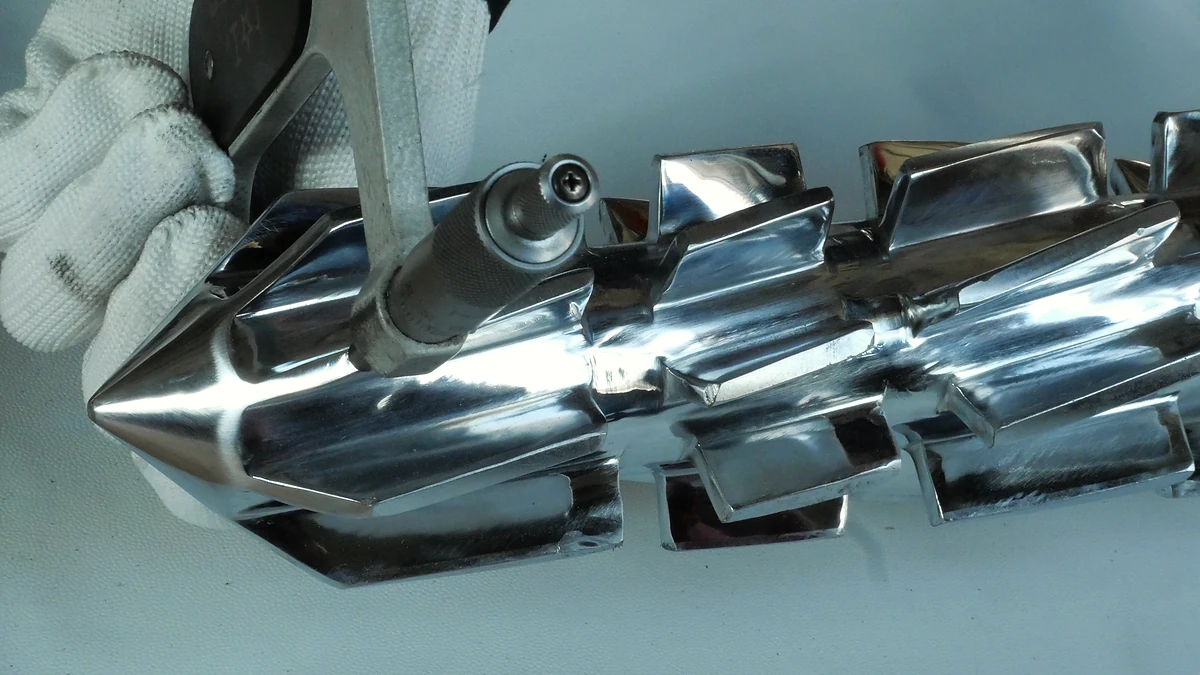
A purging compound is a specially formulated thermoplastic material designed to clean residual resin, colorant, carbon deposits, and degraded polymer from the barrel, screw, and melt-flow path of plastics processing equipment. Unlike production resin — which is optimized for making parts — purge compounds are optimized for cleaning machines. They use targeted chemical activity, elevated viscosity, or both to dislodge contamination that virgin resin simply pushes around.
You'll find these materials at work in injection molding, single-screw and twin-screw extrusion, blow molding, and blown-film lines. Facilities running operations as varied as purging compounds for extrusion blow molding in Noblesville, IN, to high-cavity medical mold shops all rely on them for the same reason: consistent, defect-free transitions between colors, materials, and production cycles.
Some processors still try to flush machines with virgin resin or regrind. While that approach may clear loose surface material, it cannot generate the mechanical shear or chemical action required to reach tight-tolerance areas — think check-ring pockets, nozzle tips, or passages as narrow as a 1 in NPT fitting. The result is contamination that lingers and reappears as black specks, color streaking, or degraded-material inclusions in the next run.
Why Contamination Accumulates in Processing Equipment
Every time molten plastic travels through a plasticizing unit, a thin boundary layer adheres to metal surfaces along screw flights, barrel walls, check rings, and dead spots where flow velocity drops. Over repeated heat-and-shear cycles, these layers oxidize, cross-link, and eventually carbonize into stubborn deposits. Color pigments embed themselves in low-shear zones, and resin degradation accelerates wherever temperature uniformity falters — much like residue building up in any facility that sees heavy, repeated use, from a lebanon tn econo lodge laundry system to an industrial extruder barrel.
Purging compounds exist because simple resin flushing cannot generate the mechanical force or chemical action needed to dislodge adherent residue from the complex internal geometry of a plasticizing unit.
This residue is more than a nuisance. It is a persistent contamination source that compromises part quality, extends changeover times, and increases scrap rates. Understanding how these specially engineered materials attack that buildup — through chemical reactions, mechanical scrubbing, or a combination of both — is the key to choosing and using them effectively.
How Purging Compounds Actually Work Inside the Barrel
Knowing what a purging compound does is only half the story. The real advantage comes from understanding how it does it — because the cleaning mechanism determines whether that stubborn carbon layer gets removed in five shots or fifty. At the most fundamental level, every purging material attacks contamination through one of two pathways: chemical action, mechanical displacement, or a deliberate blend of both. Each pathway interacts with barrel-wall residue, screw-flight deposits, and dead-zone buildup in a different way, and matching the right mechanism to the right contamination is what separates an efficient purge from wasted time and resin.
Chemical Cleaning Mechanisms
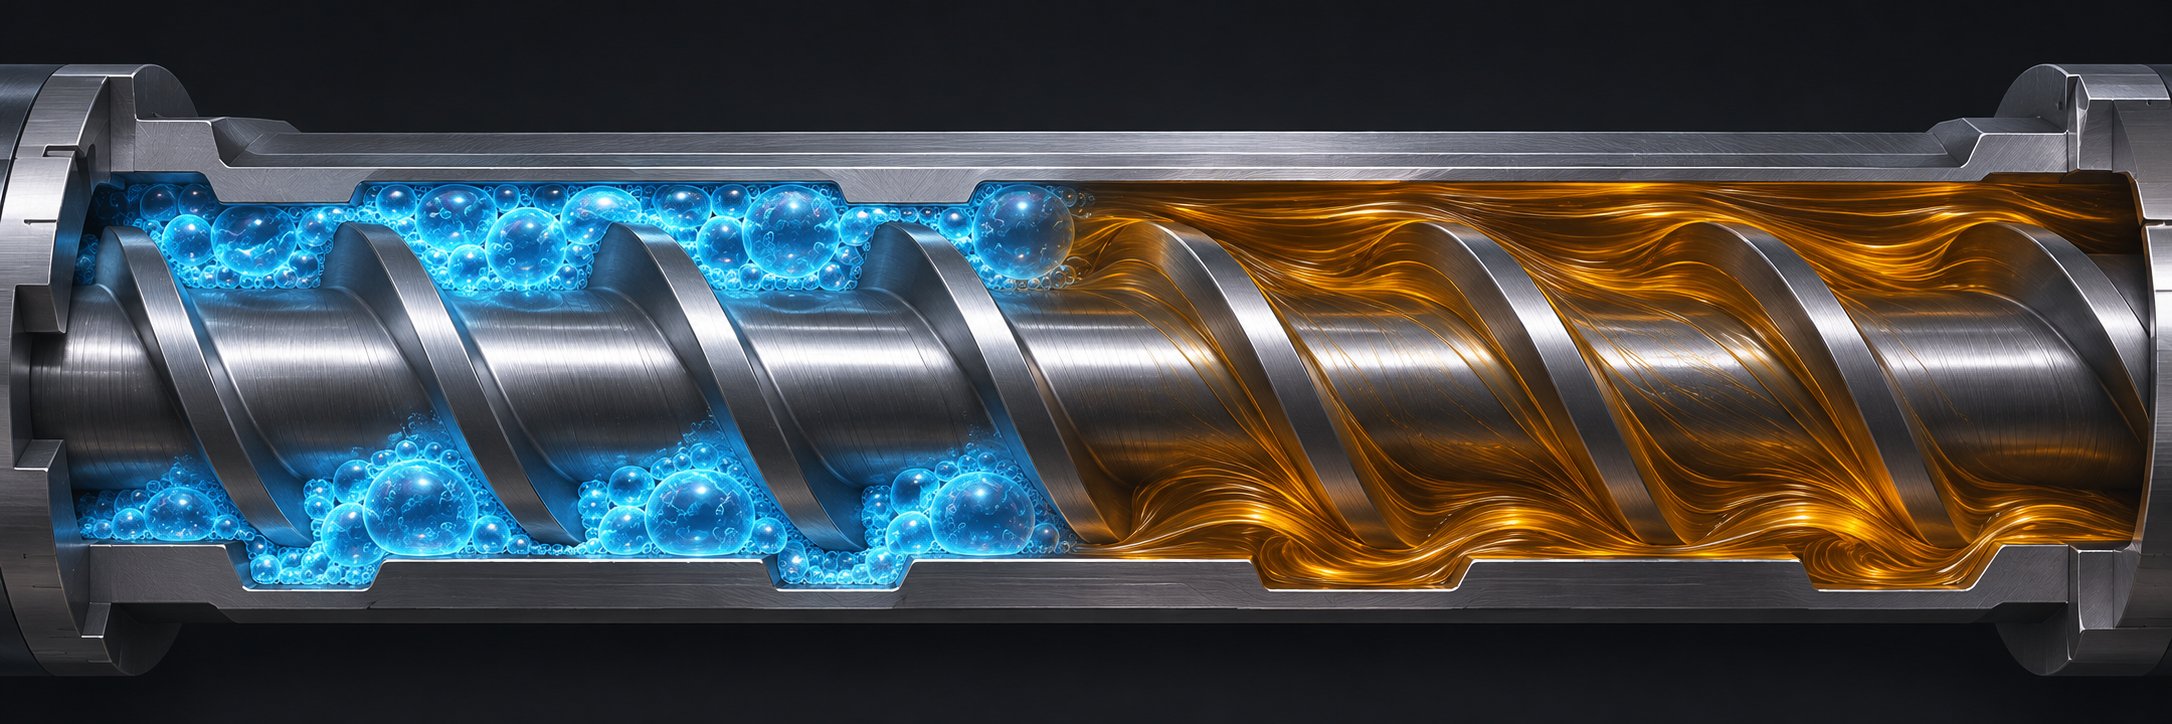
Chemical purging compounds rely on active ingredients that react at processing temperature to break the bond between degraded polymer and metal surfaces. Picture a carbonized film baked onto the inside of a barrel wall. A purely mechanical flush might slide right over it. A chemical formulation, however, deploys several molecular-level strategies simultaneously.
First, surfactants reduce the surface tension between the residue layer and the steel substrate. When surface tension drops, the adhesion force that locks contamination in place weakens — similar to how dish soap lifts grease from a pan instead of just pushing it around. Second, detergent-action molecules emulsify degraded polymer, breaking large deposits into smaller fragments that the melt stream can carry out through the nozzle or die. Third, many chemical purging agents incorporate foaming agents that expand under heat and pressure. This expansion is critical: the foam reaches dead zones, thin-gap areas behind check rings, and manifold corners where bulk melt flow is minimal.
The result is a cleaning action that loosens carbonized deposits without relying on abrasion. That makes chemical formulations especially useful for equipment with polished flow surfaces or tight-tolerance components — situations where scratching or scoring would be unacceptable. In hot runner molds and complex injection mold purging compound applications, this non-abrasive chemistry is often the only viable option for reaching every contamination zone.
Mechanical Scrubbing Mechanisms
Mechanical purging compounds take the opposite approach. Instead of reacting chemically, they clean through shear, pressure, and physical displacement — essentially scrubbing the barrel's interior the way a stiff brush scrubs a pipe wall.
The foundation of a mechanical formulation is a high-viscosity carrier resin. When you feed this dense, viscous material into the barrel and rotate the screw, the viscosity differential between the purging material and the residual resin generates intense shear force at the metal surface. That shear is the primary cleaning driver. The higher the viscosity gap, the greater the scrubbing energy at the boundary layer where contamination clings.
Some mechanical purging compounds go further by incorporating abrasive or semi-abrasive fillers — mineral particles or engineered additives that increase the physical scrubbing action as the screw turns. These fillers physically displace and break apart deposits that viscosity alone cannot remove. The trade-off is clear: abrasive fillers deliver aggressive cleaning power, but they also carry a risk of accelerated wear on screw flights, barrel bores, and check-ring surfaces if used excessively or in equipment with tight clearances.
Mechanical purge compounds shine in processes with active screw rotation and high shear, making them a popular choice for routine purge injection molding changeovers where speed and simplicity matter most. Because they clean through movement rather than chemistry, they leave minimal reactive residue behind — an advantage when the next production resin is sensitive to chemical contamination.
Hybrid and Liquid Approaches
Not every contamination challenge fits neatly into a chemical-only or mechanical-only solution. Hybrid purging compounds combine both pathways in a single formulation — pairing a high-viscosity carrier with chemically active cleaning agents. The carrier delivers shear-driven scrubbing, while the chemical components attack baked-on residue and penetrate low-flow zones. For processors dealing with mixed contamination — say, pigment streaking and carbonized degradation in the same barrel — hybrid formulations often deliver the most complete clean in the fewest cycles.
Liquid purging concentrates offer yet another option. These are concentrated chemical purging agents designed to be blended with a carrier resin on-site, typically at a specific ratio. The processor feeds the carrier resin through the hopper and meters the liquid concentrate into the feed throat. This approach provides flexibility: you can adjust concentration based on contamination severity and tailor the carrier resin to match your processing temperature window. However, it requires more operator attention to mixing ratios and consistency than a ready-to-use pelletized product.
Here is a concise summary of the three core cleaning pathways:
- Chemical action — Active ingredients such as surfactants, detergents, and foaming agents react at temperature to break molecular bonds between residue and metal, reaching dead zones through expansion rather than flow.
- Mechanical displacement — High-viscosity carriers and optional abrasive fillers generate shear force through screw rotation, physically scrubbing and flushing contamination from barrel walls and screw flights.
- Hybrid combination — A single formulation merges chemical reactivity with mechanical viscosity, addressing both surface-bonded deposits and bulk residue in a unified purging cycle.
Each pathway has clear strengths and practical limitations — which raises an important follow-up question: how do you compare them side by side and decide which type fits your specific equipment, resin, and contamination profile?
Types of Purging Compounds Compared
That side-by-side comparison is exactly what most processors need — and exactly what most guides fail to deliver. When you're standing on the plant floor deciding between five different types of purging compounds, a wall of marketing text doesn't help. A clear, honest breakdown of trade-offs does. The table below maps every major category against the factors that actually drive your decision: how it cleans, where it works best, what temperature window it covers, and what it will cost you relative to the alternatives.
Chemical vs Mechanical vs Hybrid vs Liquid Concentrate
Each category of purging compound occupies a distinct niche. Some overlap exists — particularly between hybrid formulations and their parent technologies — but the core differences in cleaning mechanism, best-fit applications, and cost structure are significant enough to influence which one belongs in your program. Among the most common injection molding purging methods, selecting the correct compound type eliminates guesswork and slashes wasted material during changeovers.
| Type | Cleaning Mechanism | Best Use Cases | Typical Temperature Range | Advantages | Disadvantages | Relative Cost |
|---|---|---|---|---|---|---|
| Chemical Purging Compound | Surfactants, detergents, and foaming agents react at temperature to break bonds between residue and metal surfaces | Hot runner systems, blown film, long extrusion lines, deep carbon remediation | Varies by formulation; often limited to specific activation windows (typically 350 – 600 °F) | Reaches dead zones and low-flow areas through expansion; non-abrasive; effective on baked-on deposits | May leave reactive residue requiring additional flushing; possible odor or off-gassing; narrower temperature range | Moderate to High |
| Mechanical Purging Compound | High-viscosity carrier resin generates shear force during screw rotation; optional abrasive fillers add physical scrubbing | Injection molding color changes, routine barrel cleaning, standard single-screw extrusion | Broad; some formulations span approximately 175 – 750 °F | Fast displacement; low residue left behind; simple to use; wide temperature compatibility | Limited reach in dead zones and complex manifold geometries; abrasive grades may accelerate wear on polished surfaces | Low to Moderate |
| Hybrid Purging Compound | Combines chemical reactivity with high-viscosity mechanical scrubbing in a single formulation | Mixed contamination (pigment + carbon), multi-process plants needing one versatile product | Moderate to wide, depending on chemical and carrier components | Addresses both surface-bonded and bulk contamination; reduces need for multiple product SKUs | Higher cost than single-mode products; may still require post-purge flushing in sensitive applications | Moderate to High |
| Liquid Purging Concentrate | Concentrated chemical agents blended on-site with a carrier resin at a specified ratio | Large-barrel machines, extrusion lines where carrier resin can be matched to production polymer | Depends on carrier resin selected; concentrate activation range must overlap carrier melt window | Flexible concentration adjustment; carrier can be matched to production resin for seamless transitions | Requires accurate metering and operator training; inconsistent mixing leads to inconsistent cleaning | Low to Moderate (per-pound basis) |
| Concentrated Purging Compound (Pelletized) | Pre-blended pellets containing concentrated active agents mixed with carrier resin at a letdown ratio before use | High-volume operations seeking cost control; plants standardizing on one base resin across machines | Set by the carrier resin; active agents must be compatible with that window | Lower per-purge cost on large equipment; consistent formulation within each lot; reduced freight and storage | Requires blending step; incorrect letdown ratio weakens performance; less convenient than ready-to-use grades | Low |
You'll notice that no single row dominates every column. That's the reality of purging agents in injection molding, extrusion, and blow molding alike — each type excels in specific conditions and falls short in others. The practical challenge is matching the right row to your actual production scenario.
Choosing Between Concentrate and Ready-to-Use Formats
Beyond the cleaning mechanism itself, format matters more than many processors realize. A concentrated purging compound — whether liquid or pelletized — is designed to be mixed with a carrier resin at a prescribed ratio before it enters the barrel. Think of it like a cleaning additive: you supply the bulk material, and the concentrate supplies the active cleaning chemistry or enhanced viscosity. Purge packets, for instance, offer pre-measured doses of concentrate that simplify the blending step on the shop floor.
This format shines on large machines with big barrel volumes, where feeding an expensive ready-to-use grade at full rate would burn through material quickly. By letting you use a less costly carrier for the bulk of the purge volume, concentrates bring per-purge costs down — sometimes substantially. They also give you the flexibility to select a carrier resin that closely matches your production polymer's melt temperature and viscosity, smoothing the transition in and out of the purge cycle.
Ready-to-use grades, on the other hand, arrive as fully formulated pellets. You dump them in the hopper and run. There is no mixing ratio to manage, no blending step to train operators on, and no risk of ratio errors diluting performance. For smaller machines, tight changeover windows, or plants where operator consistency varies, the simplicity of a ready-to-use product often outweighs the cost premium per pound.
So when does each format win? Concentrates favor high-volume, large-barrel operations where the team has the discipline to maintain accurate blend ratios. Ready-to-use grades favor speed, simplicity, and environments where purging must be foolproof — such as lights-out or semi-automated production cells.
No single type of purging compound is universally superior. The best choice depends on the contamination type, processing temperature, equipment configuration, and the operational discipline of the team running the purge.
With the types and formats mapped out, the next practical question shifts from what to buy to when to use it. Different production scenarios — from simple shade-to-shade color swaps to deep carbon remediation after weeks of neglect — demand dramatically different purging strategies, compound selections, and cycle counts.
When and Why to Purge in Different Production Scenarios
A dark-to-light color swap and a weeks-overdue carbon cleanout both require a purging compound — but they are not the same job. Treating every purge as a one-size-fits-all event is one of the most common and costly mistakes on the plant floor. Each production scenario introduces distinct contamination challenges, and the strategy that clears a simple shade change in a few shots may barely scratch the surface of a severe carbon problem. Understanding these differences before you open the hopper saves time, material, and a lot of frustration.
Color Change Purging
Color transitions are the most frequent reason processors reach for a purging compound, and they range from trivially easy to surprisingly stubborn. Switching between two similar light shades? A moderate-viscosity mechanical purge and a handful of cycles usually gets you there. Jumping from jet black to natural white? That is an entirely different battle.
The difficulty comes down to pigment behavior inside the barrel. Dark pigments — especially carbon blacks and deep blues — embed themselves in low-shear zones along screw-flight roots, check-ring pockets, and nozzle bores. Even after the extrudate looks clean, trace pigment can lurk in these dead spots and release as streaks or ghost tinting ten, twenty, or fifty shots later. Processors who have dealt with this "returning color" phenomenon know it can turn a planned fifteen-minute changeover into an hour of wasted resin and scrap parts.
Aggressive purging is the answer for dark-to-light transitions. That means selecting a purge material with a viscosity high enough to generate real scrubbing shear, raising back pressure to pack the material into dead zones, and running short-shot cycles rather than long, slow injections. In extrusion, the equivalent tactic involves increasing screw RPM and maintaining steady throughput to keep shear energy high. Liquid purging compounds can offer an additional edge here when blended with a carrier matched to the production resin's melt window, because the chemical surfactants help release pigment that shear alone cannot dislodge. The key takeaway: never judge a color-change purge solely by what the first few clean shots look like — run enough cycles to confirm the ghost color truly will not return.
Material and Resin Change Purging
Color is visible, which makes it easy to track. Resin cross-contamination, on the other hand, hides inside the part — and the consequences can be far worse than a cosmetic streak.
Consider transitioning from polyoxymethylene (POM) to polycarbonate (PC). POM decomposes at elevated temperatures and produces formaldehyde gas, which can cause splay, voids, and hazardous fumes if residual POM contacts PC processing temperatures. Or imagine switching from nylon to ABS: residual nylon at ABS processing temps can degrade and generate black specks, while incompatible melt viscosities create uneven displacement that leaves pockets of the old resin clinging to screw flights.
Thermal compatibility during the purge is critical. The purging compound must bridge the processing windows of the outgoing and incoming resins safely. If the old resin degrades at the new resin's processing temperature, you need to purge at an intermediate temperature — high enough to keep the purge material effective, low enough to avoid thermally destroying the residual polymer before it exits the barrel. Many compound manufacturers publish specific transition guides for common resin pairings, and following these recommendations prevents the kind of barrel-fouling event that turns a routine changeover into an emergency teardown.
For processors running purging extruders with long L/D ratios, resin changes demand extended purge cycles because the residence time — and therefore the volume of residual material — is significantly greater than in a short injection unit. Twin-screw extruders add another layer of complexity: intermeshing elements create additional retention zones that single-screw geometries do not have.
Shutdown and Startup Purging
Here is a scenario every plant has experienced: the machine sits idle over a long weekend, resin slowly degrades inside the barrel, and Monday's first parts are peppered with black specks. Those specks are carbonized polymer — the direct result of heat exposure during downtime — and they can persist for dozens or even hundreds of cycles after startup.
Pre-shutdown purging prevents this problem at the source. Before powering down, you displace the production resin with a purging compound that seals the barrel against degradation. Some processors use a heat-stable grade that can sit inside the barrel at reduced temperature without breaking down, effectively "capping" the system. When the machine restarts, a brief post-startup purge clears the protective compound and any minimal degradation that occurred, delivering a clean barrel ready for production resin.
Skipping shutdown purging — a temptation when Friday's end-of-shift whistle blows — is a false economy. The resulting carbon contamination on startup wastes far more resin and time than a five-minute purge cycle would have consumed. In regulated industries, startup black specks can trigger lot rejections that dwarf the cost of the purge material many times over.
Carbon and Black Speck Remediation
Carbon buildup is the most persistent contamination challenge in plastics processing, and it rarely appears overnight. It accumulates gradually — thin layers of degraded polymer bake onto barrel walls, screw roots, and check-ring surfaces over weeks or months of production. Eventually, fragments break free and enter the melt stream as black specks. As one industry resource puts it, black specks are a symptom; the real problem is material that has been sitting inside the machine far longer than anyone realizes.
Remediation typically requires chemical-type or hybrid purging compounds with soaking capability. The process involves feeding the compound into the barrel, raising temperature slightly to activate the chemistry, and then letting the material dwell — or "soak" — for a specified period so the active agents can penetrate and loosen carbonized layers. After soaking, the screw is rotated to flush the loosened deposits out. Multiple cycles may be needed, and it is not unusual for the first purge to bring out alarming amounts of dark material that the operator did not know was present.
Mechanical compounds alone can struggle with heavy carbon because the deposits are chemically bonded to the metal substrate; shear force may slide over a well-adhered carbon film without breaking it free. That said, a hybrid approach — chemical soak followed by a high-viscosity mechanical push-out — often delivers the most thorough remediation in the fewest total cycles. For processors who have neglected barrel maintenance for extended periods, even aggressive purging may not fully resolve the issue, and a manual screw pull may become necessary.
To put these four scenarios in perspective, here they are ranked by typical purging difficulty, from simplest to most demanding:
- Routine color change between similar shades — Usually the easiest scenario. A moderate-viscosity mechanical purge clears the old pigment in a small number of cycles, especially when shade contrast is low and no deep dead zones are involved.
- Dark-to-light or high-contrast color change — Noticeably harder. Aggressive shear settings, higher purge volumes, and sometimes a chemical or hybrid formulation are needed to eliminate ghost tinting from embedded pigment.
- Material or resin family change — More complex because thermal compatibility, melt-viscosity mismatch, and potential chemical incompatibility between the old and new resins must all be managed simultaneously during the purge.
- Heavy carbon and black speck remediation after extended neglect — The most difficult scenario by a wide margin. Multiple purge-and-soak cycles, chemical or hybrid compounds, elevated temperatures, and significant time investment are typical. In severe cases, no purging compound alone can compensate, and manual disassembly becomes the only path to a truly clean barrel.
Recognizing which scenario you are facing before you begin changes everything — from compound selection and cycle count to temperature settings and expected scrap. Yet even with the right scenario diagnosis, picking the specific product that matches your processing temperature, resin family, and equipment type is a separate decision that demands its own structured framework.
How to Select the Right Purge Compound for Your Application
Diagnosing your purging scenario is the first half of the equation. The second half — and the one that trips up even experienced processors — is translating that diagnosis into a specific product selection that actually fits your barrel, your resin, and your production reality. A purge compound that works brilliantly for ABS at 450 °F may char and smoke in a PEEK application at 720 °F. One that clears carbon from a short injection barrel may barely make a dent in a long-L/D extrusion line. The variables are real, and ignoring them turns a promising product into an expensive disappointment.
Think of it this way: you wouldn't book a stay — whether at an econo lodge escondido ca or a five-star resort — without confirming it fits your travel dates and budget. The same logic applies here. Every purging compound has a performance window, and your job is to match that window to the conditions inside your machine.
Matching Purging Compounds to Processing Temperature
Temperature is the single most important filter in purge compound selection. Every formulation has a rated working range — a floor below which it won't melt or activate properly, and a ceiling above which it degrades, smokes, or carbonizes inside the barrel. Operating outside that window doesn't just reduce cleaning effectiveness; it can create new contamination from the purge material itself.
For commodity resins like PE, PP, and ABS, standard-temperature purging compounds cover the typical processing band of roughly 350 °F to 550 °F. Most general-purpose mechanical and chemical purging formulations fall comfortably within this range, giving processors plenty of product options.
Engineering resins demand more specialized solutions. High-temperature grades of purging material — some rated up to 788 °F (420 °C) — exist specifically for resins like PEEK, PEI (Ultem), PPS, and LCP. A glass-filled high-temperature purging compound with a service range of 518 °F to 788 °F can tackle these ultra-high-heat polymers while producing low smoke and odor — a real concern when purging at extreme temperatures in enclosed plant environments. Unfilled high-heat grades, meanwhile, are available for hot runner cleaning and shutdowns in the 570 °F to 735 °F range, where the absence of glass filler protects polished gate surfaces from abrasion.
The practical takeaway? Always cross-reference the purge compound's rated temperature band against your actual barrel zone setpoints — not just the resin's published processing range, but the temperatures you are running on that specific machine. A mismatch of even 30 °F to 40 °F outside the compound's window can mean the difference between a clean barrel and a smoky, half-effective purge.
Resin Compatibility and Melt Flow Considerations
Temperature gets the headline, but melt viscosity is the silent deal-breaker. A purge compound's viscosity at processing temperature must be compatible with the production resin it is displacing — and "compatible" does not mean "identical."
Here is the core principle: the purging material should be slightly higher in viscosity than the resin being removed. That viscosity differential is what generates the shear force needed for effective scrubbing. When the purge is too thin relative to the production resin, it slips through the barrel like water through a dirty pipe — moving fast but cleaning nothing. When it's too thick, it can stall the screw, spike injection pressure, or over-pressurize the system — risking equipment damage and safety hazards.
Different resin families create different matching challenges:
Polyolefins (PE, PP) process at relatively low viscosities and moderate temperatures. Most general-purpose mechanical purge compounds handle these transitions easily because the viscosity gap is manageable and the thermal window is forgiving.
Styrenics and ABS sit in a mid-range viscosity bracket. Standard purging formulations typically pair well, though highly pigmented ABS runs may benefit from chemical purging agents that attack embedded colorant in dead zones.
Engineering resins (PC, nylon, POM, PBT) introduce wider viscosity variation and thermal sensitivity. Nylon, for example, is moisture-sensitive and can degrade quickly if purged at excessive temperature. POM, as discussed earlier, can decompose and produce formaldehyde gas at elevated temperatures — making the choice of a thermally compatible purge critical for both cleaning effectiveness and operator safety.
High-performance polymers (PEEK, PEI, PPS, LCP) demand specialized high-temperature purge grades. Standard compounds simply cannot survive the 600 °F-plus melt temperatures these resins require, and attempting to use them produces degradation, smoke, and additional barrel contamination rather than cleaning.
Facilities that serve diverse markets — processors handling everything from commodity packaging runs to specialty jobs as specific as purging compounds for extrusion in Noblesville, IN — often stock two or three purge grades to cover the viscosity and temperature spectrum across their machine fleet.
Process Type and Equipment Factors
Your machine type shapes purging behavior just as much as your resin does. A purge compound that clears an injection molding barrel in five shots may need thirty minutes of continuous operation to clean an extrusion line of equal barrel diameter — and the reasons are purely geometric.
Injection molding machines use reciprocating screws with relatively short L/D ratios, discrete shot cycles, and controllable back-pressure settings. This gives operators fine-grained control over shear, pressure, and residence time during purging. Check rings, nozzle tips, and hot runner manifolds add dead-zone complexity, but the ability to run short, high-pressure shots makes mechanical and hybrid compounds particularly effective.
Single-screw extrusion lines feature continuous screw rotation, longer barrels, and no reciprocating action. Purging relies on sustained throughput and extended residence time rather than the repeated high-shear shots available in injection molding. Die heads, screen packs, and adapter assemblies create additional retention zones that the purge material must transit. Chemical purging formulations with foaming action can be advantageous here, because the expansion helps reach stagnant zones that continuous laminar flow tends to bypass.
Twin-screw extrusion adds intermeshing elements, kneading blocks, and complex screw configurations that multiply the number of potential dead spots. The high-shear environment of a co-rotating twin screw can enhance mechanical purge effectiveness, but the intricate geometry also means that contamination hides in more places. Processors often find that a hybrid approach — chemical soak followed by a high-viscosity mechanical displacement — provides the most thorough cleaning of twin-screw systems.
Blow molding introduces large accumulator heads, parisons, and die geometries that differ significantly from injection or extrusion. Purging must account for the accumulator volume and the relatively low shear environment in head and die areas, where mechanical compounds may lack the flow penetration to displace heavy contamination.
Here are the key selection criteria to evaluate before choosing any purging product:
- Processing temperature range — Confirm the compound's rated window covers your actual barrel setpoints, including any temperature adjustments for startup or shutdown purges.
- Resin type and melt viscosity — Match the purge compound's viscosity to create an effective shear differential without risking stalling or over-pressurization.
- Contamination severity — Routine color changes may need only a fast mechanical displacement; deep carbon remediation calls for chemical or hybrid formulations with soak capability.
- Equipment type and geometry — Injection molding, single-screw extrusion, twin-screw extrusion, and blow molding each demand different purge strategies due to L/D ratio, flow-path complexity, and available shear energy.
- Regulatory requirements — Food-grade purging compounds must meet FDA compliance for food-contact packaging applications. Aerospace purging compounds used in AS9100-certified environments may require documented material traceability and validated cleaning protocols. Medical device molders operating under ISO 13485 face similar validation demands. In these regulated sectors, compound selection is not purely a performance decision — it is a compliance decision.
Much like choosing the right accommodation for a specific trip — the way a traveler might compare an econo lodge socorro to other options based on location, amenities, and budget — selecting a purge compound means weighing multiple variables against your unique operating constraints. No universal "best" product exists, but a disciplined selection framework narrows the field to the one or two formulations that genuinely fit your process.
With the right compound identified and on hand, the next challenge becomes equally critical: running the purge correctly. Even the ideal product underperforms when processing parameters — screw speed, back pressure, temperature profile, and cycle sequencing — are set incorrectly. A structured, step-by-step procedure bridges the gap between choosing the right material and actually getting a clean barrel.
Step-by-Step Purging Procedure and Best Practices
A perfectly selected purging agent is only as good as the procedure behind it. You can stock the ideal compound for your resin, temperature, and contamination type — and still get disappointing results if the screw speed is too low, the back pressure is wrong, or the operator lets the material sit static at temperature. Procedure is where theory meets the barrel wall, and getting it right is the difference between a five-minute changeover and a thirty-minute headache.
The steps below are generalizable across most purging compound brands. However, always defer to the compound manufacturer's technical data sheet for exact barrel temperatures, shot counts, soak times, and letdown ratios specific to the grade you are using. The purpose here is to explain why each step matters so your team executes with understanding, not just habit.
Injection Molding Purging Procedure
Injection molding gives you the most control over a purge cycle because you can manipulate discrete shots, back pressure, and screw speed independently. Here is the logical sequence:
1. Empty the hopper and run down the barrel. Continue cycling until shots begin to short. The goal is to evacuate as much production resin as possible before introducing the purging compound. A barrel still packed with old material dilutes the purge and wastes cleaning energy on displacement rather than scrubbing.
2. Adjust barrel temperatures. Set zones per the compound manufacturer's recommendations. Some formulations activate best at the production resin's normal processing temperature; others require a slight increase to trigger chemical action. Running outside the recommended window — even by a modest margin — can render the purge ineffective or cause it to degrade inside the barrel.
3. Feed the purging compound into the hopper. Load the amount specified on the data sheet. For mold purging applications with hot runner systems, you may need additional volume to fill manifold channels and gate drops beyond the barrel itself.
4. Perform purge shots at elevated back pressure and screw speed. This is the step where most cleaning actually happens. High back pressure keeps the screw in the forward position and forces the purge material into low-flow zones — behind check rings, along flight roots, and inside compression sections. High screw RPM generates the shear energy that scrubs contamination from metal surfaces. As industry processing experts note, the combination of high rotational speed and high injection speed manages the scrubbing action that mechanical purge purging compound formulations depend on. On machines where back-pressure limits prevent holding the screw at the zero position, increase injection speed and perform short manual shots to compensate — this focuses cleaning force on the check valve and nozzle area.
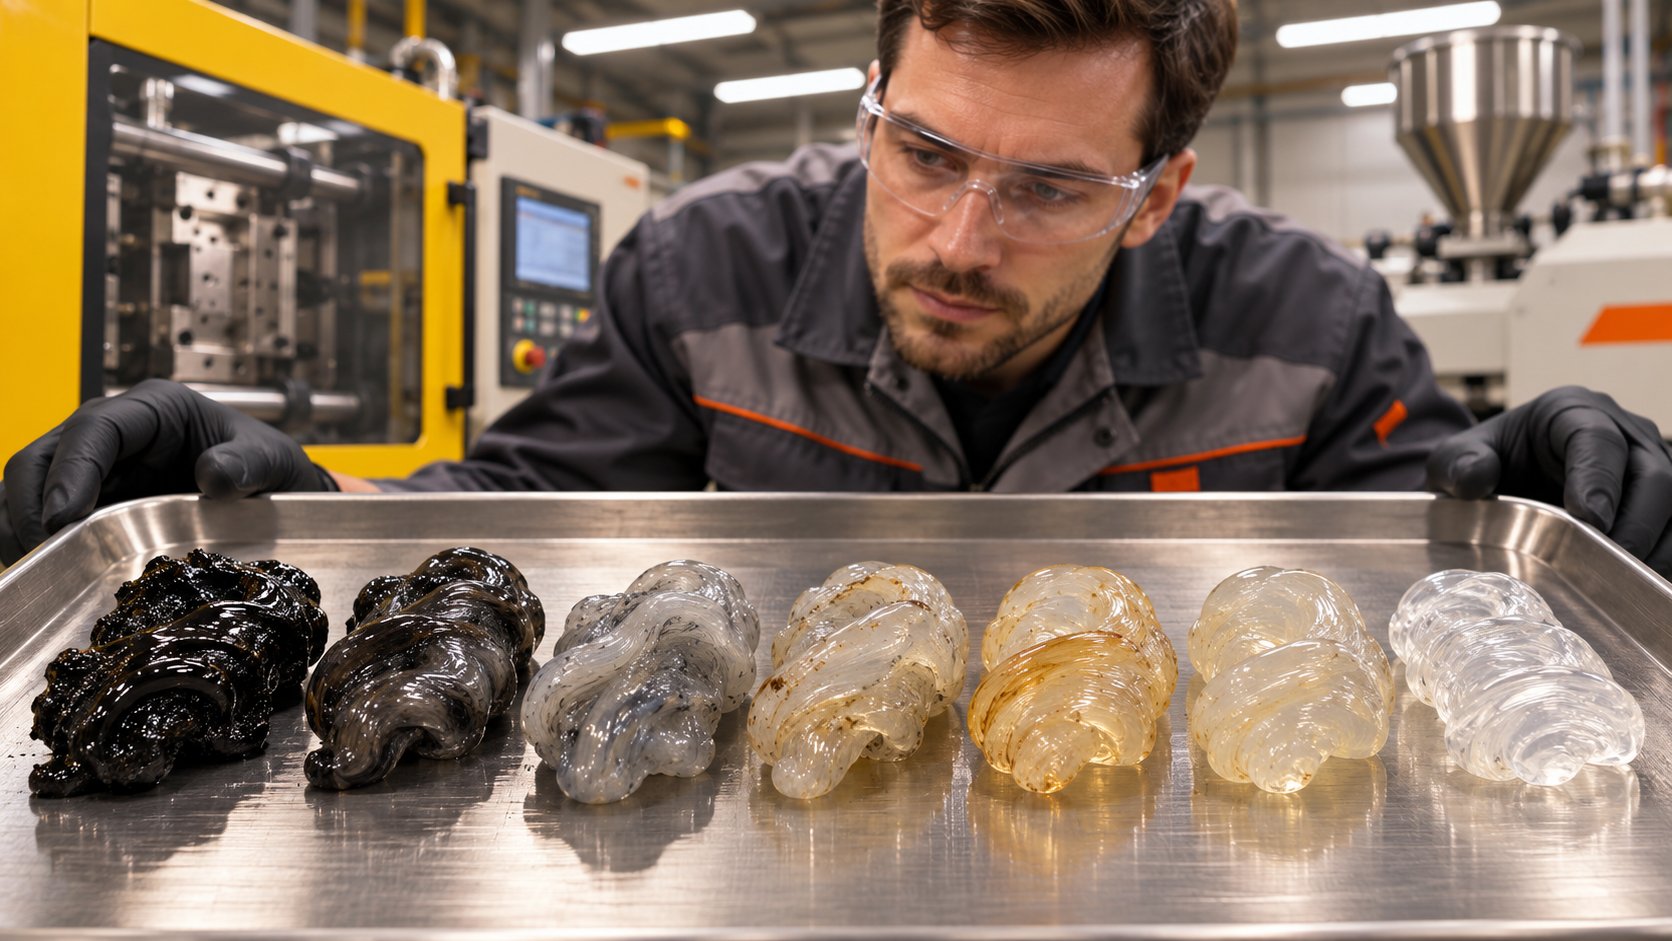
5. Observe the extrudate. Inspect each purge slug on a clean metal tray. You are looking for uniform color, zero streaking, and no black specks. Continue cycling until consecutive slugs come out consistently clean. Stopping too early because the first clean-looking shot appears is one of the most common operator errors — residual contamination often hides in dead spots and releases intermittently.
6. Transition to the next production resin. Once the extrudate is clear, feed the incoming resin and run it through until all traces of the purging compound have been displaced. Verify part quality on the first several shots before resuming full production.
Extrusion and Blow Molding Purging Procedure
Extrusion and blow molding share a fundamental difference from injection molding: the screw runs continuously, and there are no discrete shot cycles to leverage. This changes the purging dynamic in several important ways.
First, residence time replaces shot count as the primary cleaning metric. Instead of counting individual purge shots, you are measuring sustained throughput time — how long the purging agent flows continuously through the barrel, die head, and any downstream tooling. Longer barrels with higher L/D ratios require proportionally more purge time because the material must transit a greater volume of metal surface.
Second, die-head geometry adds retention zones that injection molds do not have. Accumulator heads in blow molding, screen packs in extrusion, and adapter assemblies all trap contamination that the purge must reach and flush. When practical, removing screen packs before purging improves throughput and prevents clogging. For blow molding specifically, running the purge through the full parison-formation cycle helps clean accumulator walls and die-lip surfaces that a simple barrel flush would miss.
Third, maintain high screw RPM throughout the purge to keep shear energy elevated. Unlike injection molding — where intermittent high-speed shots create bursts of cleaning action — extrusion relies on consistent, sustained shear. Reducing screw speed during an extrusion purge is like lowering the water pressure mid-rinse: you lose the very force that makes the process work. Consistent throughput also prevents the purge material from dwelling too long in any one zone, which could lead to degradation of the purging compound itself.
Monitor the extrudate exiting the die for color clarity, specks, and consistency — the same visual checks used in injection molding, just applied to a continuous strand or parison rather than discrete slugs.
Best Practices That Apply Across All Processes
Regardless of whether you are running an injection press, a single-screw line, or a blow molder, certain principles hold true every time you purge. Violating any one of them can undermine even the best compound and the most careful procedure. Think of these as the non-negotiables — the equivalent of checking that the doors are locked before you leave, whether you are closing up a production facility or checking out of an econo lodge lafayette near university after a business trip.
- Never let purging compound sit static at temperature. A motionless purge inside a hot barrel degrades just like production resin does. If the screw stops turning, the compound begins losing its cleaning properties and can itself become a contamination source. Keep the screw rotating or cycling at all times during the purge.
- Always purge at the production processing temperature unless the compound manufacturer instructs otherwise. The purging material is formulated to work within a specific thermal window. Dropping temperature to "save energy" during a purge reduces melt viscosity, lowers shear force, and can prevent chemical activation — defeating the purpose entirely.
- Monitor extrudate continuously for contamination clearance. Visual inspection of purge slugs or extrudate strands is the primary feedback loop. Do not rely on shot count or elapsed time alone — contamination levels vary from purge to purge depending on how long the previous run lasted, what resin was processed, and how much carbon has accumulated. Your eyes and a clean inspection surface are the most reliable tools.
- Document purge material usage for cost tracking. Record the compound grade, quantity consumed, machine number, resin transition, and purge duration for every cycle. This data reveals which machines and resin changes consume the most material, enabling targeted improvements. Without documentation, purging costs remain invisible — and invisible costs never get optimized.
- Use short, high-shear cycles rather than long, slow ones. Extended residence time during a purge does not improve cleaning; it insulates contamination. Rapid screw rotation combined with short injection strokes — or sustained high RPM in extrusion — delivers far more effective scrubbing per pound of compound consumed.
These fundamentals apply whether you are purging a 50-ton shuttle press or a massive accumulator blow molder. They are process-agnostic because they address the physics of how purging compounds interact with metal, melt, and contamination — physics that do not change based on zip code, whether your plant sits near an econo lodge brockport or in the middle of an industrial corridor halfway across the country.
Even with a flawless procedure, though, certain equipment configurations resist standard purging strategies. Hot runner molds — with their narrow flow channels, manifold dead spots, and valve-gate geometries — present a unique set of challenges that demand their own specialized approach.
Hot Runner Purging Challenges and Strategies
Hot runner molds are a marvel of efficiency — eliminating cold runners, reducing waste, and enabling precise gate-controlled filling. Yet that same efficiency creates a purging nightmare. The sealed, intricate flow paths that make hot runners so productive also make them exceptionally difficult to clean. If you have ever chased black specks or ghost color through a multi-drop manifold for hours, you already know: standard barrel-purging logic does not apply here.
Why Hot Runners Present Unique Purging Challenges
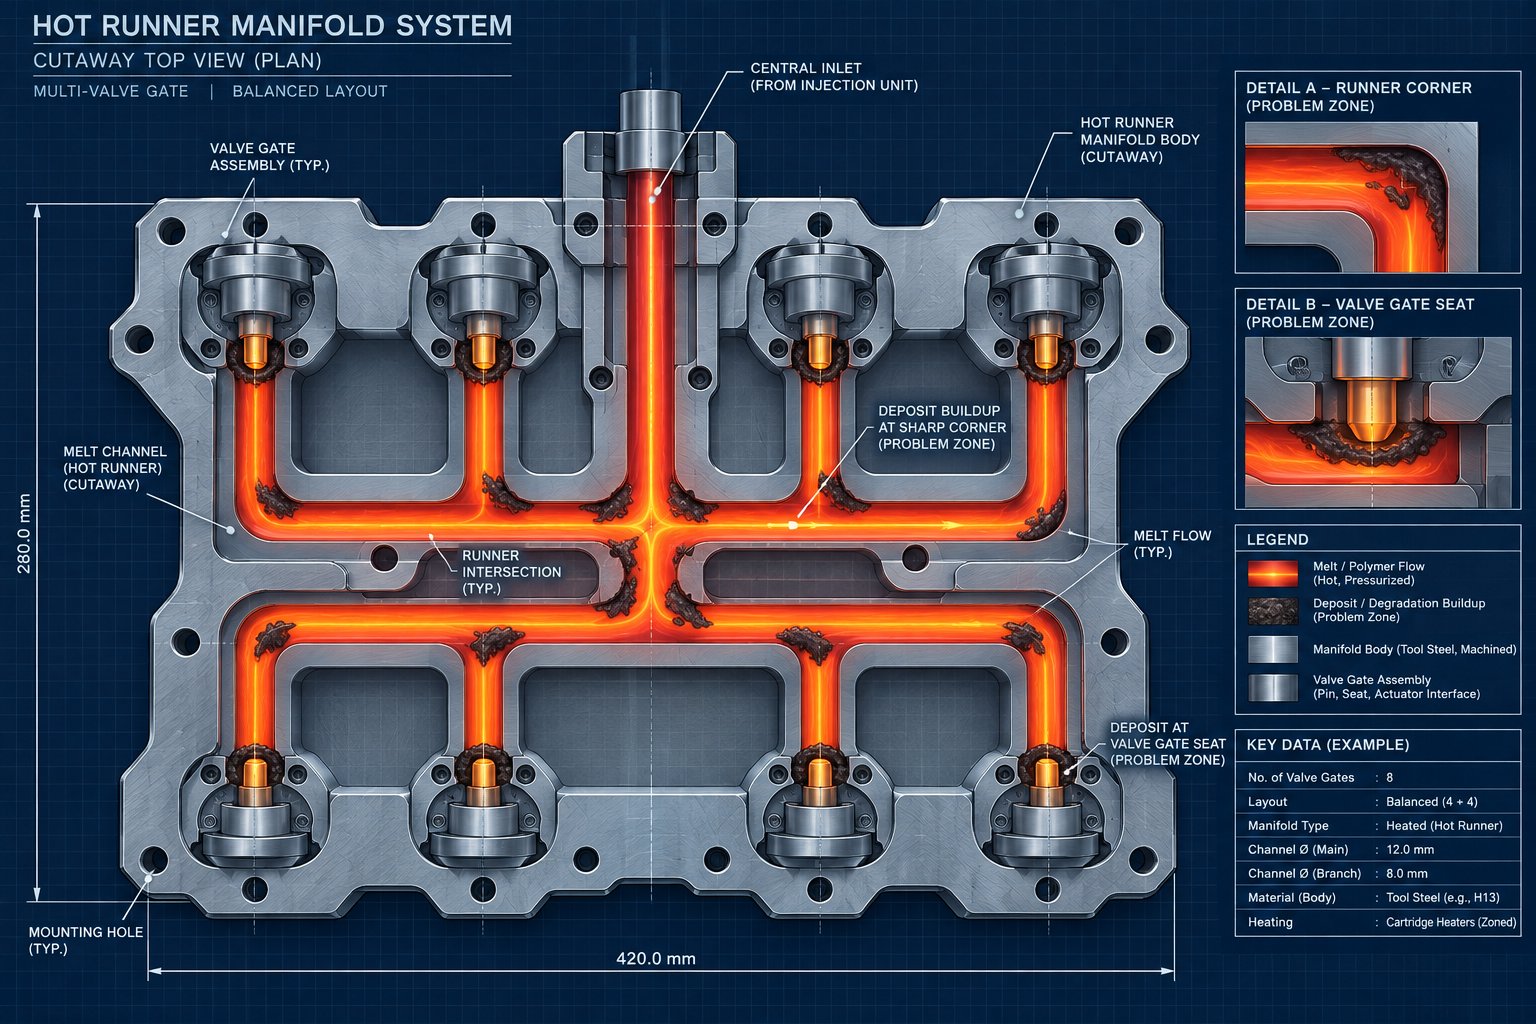
The trouble starts with geometry. A hot runner manifold routes molten polymer through a network of narrow channels, tight corners, and branching drops before it reaches each gate. Every transition point — every bend, every diameter change, every manifold split — creates a zone where flow velocity drops and resin lingers. These dead spots are where degradation begins. Material that hangs up in a manifold corner bakes at processing temperature cycle after cycle, eventually carbonizing into the stubborn black specks that contaminate parts seemingly at random.
Valve gate areas compound the problem. The tight clearance around valve pins creates thin annular gaps where pigmented or degraded resin wedges itself in place. Because flow through these gaps is minimal during normal molding, conventional displacement purging barely touches the residue. Color changes in valve-gated systems can drag on far longer than the barrel purge itself — the barrel is clean, but the manifold keeps bleeding old pigment.
Temperature variation across the system adds another layer of difficulty. Manifold heaters, drop heaters, and gate-tip heaters often run at different setpoints. These thermal gradients mean that some zones may be slightly too cool for effective purging while others are hot enough to accelerate degradation. The result is uneven cleaning — some drops clear quickly while others stubbornly retain contamination, much like how travel experiences vary wildly from one location to another, whether you are checking in near a busy airport hub or at an econo lodge nashville near percy priest lake for a quieter stopover.
Unlike an open barrel or a removable die, hot runner internals are largely sealed and invisible. You cannot see where contamination is hiding, and you cannot physically scrub it. That sealed architecture makes flow-based cleaning with a properly selected purging compound the most practical — and often the only — remediation path short of a full manifold teardown.
Hot Runner Purging Strategies and Compound Selection
Given these constraints, what actually works? The answer tilts heavily toward chemistry over brute-force displacement.
Chemical purging compounds with foaming action are often the preferred choice for hot runner cleaning. The foaming mechanism is critical: as the chemical agents activate at temperature, they expand into dead zones, thin-gap annuli around valve pins, and manifold corners that bulk melt flow cannot penetrate. This expansion-driven reach is something high-viscosity mechanical compounds simply cannot replicate in a sealed, multi-drop system. Industry purging experts recommend chemical grades specifically for hot runners because they can pull contamination from low-flow areas that would otherwise require disassembly to access.
Hot runner purging requires lower-viscosity, chemically active compounds because mechanical force alone cannot access all contamination zones in a multi-drop manifold system.
Abrasive or glass-filled mechanical compounds, by contrast, carry real risk in hot runner applications. Polished gate surfaces, precision valve pins, and tight-tolerance nozzle tips can be scratched or scored by abrasive fillers, leading to cosmetic defects on parts and potential seal failures in valve-gate assemblies. Most compound suppliers explicitly advise against running glass-filled grades through hot runners for this reason.
Effective injection mold purging in hot runner systems also demands zone-by-zone temperature management. Raising manifold heats slightly — while staying within the resin's safe processing window — reduces melt viscosity in the manifold channels and helps the purging compound flow into stubborn dead spots. If contamination concentrates in specific drops, closing off the clean gates and cycling high-velocity short shots through each affected drop individually focuses cleaning energy where it is needed most. This targeted approach avoids wasting compound on drops that are already clear.
A few additional tactical tips make a measurable difference:
- Know your minimum gate clearance — select a purge grade whose particle size and melt behavior can pass through the smallest restriction in the system without clogging.
- Use short, high-velocity shots with the mold open to promote turbulence inside the manifold, disrupting laminar flow patterns that allow contamination to cling undisturbed.
- Seal the hot runner at shutdown by displacing production resin with the purging compound before powering down. This prevents oxygen exposure and degradation in the manifold during downtime — a preventive step that dramatically reduces startup contamination.
- Never assume the barrel purge cleaned the hot runner. The barrel and the manifold are separate contamination zones with different geometries and flow characteristics. A clean barrel does not guarantee a clean manifold.
Hot runner purging is more nuanced than standard barrel cleaning, but the payoff is substantial: fewer teardowns, shorter color changes, and far less scrap from manifold-sourced contamination. The key is respecting the geometry, choosing chemistry over abrasion, and treating each drop as its own cleaning challenge.
Yet even with the right compound and the right hot runner strategy, persistent contamination sometimes refuses to clear. When proper purging still leaves defects in parts, the root cause may not be the purge at all — it may be the equipment itself.
Troubleshooting Persistent Contamination After Purging
You ran the purge. You followed the data sheet. The extrudate looked clean — and then, twenty shots into the next production run, black specks reappeared. Or a ghost color crept back into parts that should have been crystal clear. This is one of the most frustrating situations on the plant floor, and it happens more often than anyone likes to admit. When proper purging still leaves contamination behind, the instinct is to blame the compound. Sometimes that instinct is right. But often, the real culprit is hiding somewhere else entirely — in the procedure, the process parameters, or the physical condition of the equipment itself.
A structured troubleshooting approach prevents the costly cycle of "purge harder, hope for the best" that wastes material and time without solving the underlying problem. The framework below walks through the most common failure points, from compound selection errors all the way to hardware issues that no purging compound on the market can fix.
Common Reasons Purging Fails
Before suspecting the machine, start with the purge itself. The majority of purging failures trace back to one of four process-side errors — each fixable without pulling a single bolt.
Wrong compound type for the contamination. This is the most frequent root cause. A fast-displacement mechanical grade may breeze through a routine color change but barely touch a carbonized deposit that has been baking onto the barrel wall for weeks. Conversely, a chemical purging compound designed for deep carbon remediation is overkill — and unnecessarily expensive — for a simple shade-to-shade swap. Purging compound selection must match the contamination you are actually fighting, not the contamination you assume is there. As one industry overview of common purging mistakes notes, using an incompatible grade — such as a glass-filled mechanical compound in a sensitive hot runner system — can create new problems rather than solving existing ones.
Incorrect processing temperature during purging. Every purging formulation has a thermal activation window. Running even moderately outside that window — barrel zones set too cool for chemical activation, or too hot, causing the purge material itself to degrade — undermines cleaning performance at the molecular level. Operators sometimes drop temperatures to "save energy" during a changeover, not realizing they have just disabled the compound's primary cleaning mechanism. Always cross-check actual barrel zone readings against the compound manufacturer's recommended range before concluding the product "doesn't work."
Insufficient purge volume or cycle count. Contamination hides. It lodges in check-ring pockets, clings to screw-flight roots, and embeds in dead zones that the first few purge shots cannot reach. Stopping at the first clean-looking slug is one of the most common operator errors because residual contamination releases intermittently — the barrel looks clean, but pockets of degraded material are still present. Purging best-practice guidance suggests that typical purge volume should equal roughly 10 to 15 percent of the screw capacity, though heavily contaminated systems may require substantially more. If you are cutting volume to control cost, you may be creating a far more expensive scrap problem downstream.
Static soak time — unintentional or excessive. Chemical and hybrid purging compounds often benefit from a brief, controlled soak period to let reactive agents penetrate carbonized deposits. But "controlled" is the key word. Letting any purge material sit motionless in a hot barrel beyond the manufacturer's recommended dwell time does not improve cleaning — it degrades the compound, reducing its viscosity and chemical potency. A purge that has thermally degraded inside the barrel becomes part of the contamination rather than the solution. Keep the screw rotating or cycling unless the data sheet explicitly calls for a static hold, and never exceed the stated soak duration.
When the Problem Is the Equipment, Not the Purge
Here is the scenario that catches experienced processors off guard: you have verified the compound type, confirmed the temperature, used adequate volume, avoided static soak — and contamination still persists. You try a different brand, maybe even switch from a mechanical to a chemical formulation. Same result. At this point, the problem almost certainly is not the purge. It is the hardware.
Persistent contamination after proper purging is one of the strongest diagnostic signals that plasticizing components have degraded beyond the point where any purging compound can compensate. The internal geometry of the screw, barrel, and associated hardware is what creates the shear forces, compression ratios, and flow dynamics that purging compounds depend on. When that geometry is compromised, even the best formulation cannot do its job — like trying to scrub a surface with a brush that has lost half its bristles.
Several equipment-level failure modes produce exactly this pattern:
Worn screw flights. As flight lands wear down, the clearance between the screw and barrel bore increases. This reduces compression in the transition and metering zones, which directly lowers the shear force the purge material can generate against the barrel wall. Contamination that would normally be scrubbed free by a tight-clearance screw simply sits undisturbed when flight wear opens up that critical gap. Diagnostic analysis of black-speck defects confirms that worn screw flights are among the most common machine-related sources of persistent contamination — sometimes even shedding metallic particles that appear as specks in finished parts.
Scored or pitted barrel bore. A smooth barrel bore allows purge material to flow evenly and contact all surfaces. A barrel with scoring, pitting, or corrosion damage creates micro-pockets where degraded polymer lodges and resists displacement. These micro-dead-zones are invisible during normal operation but act as persistent contamination reservoirs that release material intermittently — explaining the maddening pattern of specks that appear, disappear, and reappear unpredictably.
Damaged check ring. A worn or cracked check ring allows backflow during injection, creating a stagnation zone where resin sits, degrades, and carbonizes. No purging compound can flush a zone that is continuously re-contaminated by backflow on every shot cycle. Check-ring wear is particularly insidious because it also degrades shot-to-shot consistency, often masking the contamination problem behind other quality issues.
Cracked or worn nozzle tip. A nozzle with internal cracks, erosion, or a poor seat creates dead zones right at the transition from barrel to mold — the last point where contamination can enter the part. Purge material may clear the barrel completely but leave behind degraded resin trapped in nozzle-tip geometry that has lost its designed flow path.
In every one of these cases, the corrective action is not a better purge — it is hardware restoration. When troubleshooting identifies worn plasticizing components as the root cause, replacing those components with properly specified hardware restores the barrel geometry and compression ratios that purging compounds depend on to function effectively. For injection molding operations, custom injection molding screw barrels from NANHAIYA, engineered to match machine specifications, resin characteristics, and shot requirements, offer one path to restoring that critical geometry. Their technical review process evaluates screw design, wear patterns, melting performance, and material-retention concerns to ensure the replacement hardware addresses the specific failure mode — not just the symptom. Pouring more purging compound into a barrel with degraded hardware is like spending USD 473 on cleaning supplies for a building with broken plumbing: you are treating the symptom while the root cause persists, and the expense never stops.
This distinction matters financially, too. A processor chasing contamination with repeated purge cycles — burning through expensive compound, scrapping parts, and extending downtime — can easily spend more in a few weeks of misdiagnosed purging than the cost of the component replacement that would have solved the problem permanently. Recognizing when to stop purging and start inspecting hardware is one of the most valuable diagnostic skills on the plant floor, whether your facility operates in a major industrial hub or a smaller manufacturing community like the areas around econo lodge hobbs nm.
Diagnostic Checklist
When contamination persists after what should have been an adequate purge, work through this sequence before escalating to more disruptive interventions. Each step either confirms or eliminates a potential cause, narrowing the field systematically rather than guessing:
- Verify the compound is rated for the processing temperature. Cross-reference actual barrel zone setpoints against the purging compound's published working range. A mismatch — even a modest one — can render chemical activation incomplete or cause the purge material to degrade, producing new contamination instead of removing existing deposits.
- Confirm sufficient purge volume was used. Compare the amount consumed against the compound manufacturer's recommended volume for your barrel size and contamination severity. If you cut volume to reduce cost, try a full-specification purge before changing anything else. Purging compounds for extrusion lines with long L/D ratios often require significantly more material than injection applications of similar barrel diameter.
- Check screw and barrel wear indicators. Measure screw-flight outside diameter and barrel bore inside diameter at multiple points. Compare readings against original specifications. If clearance has increased beyond the manufacturer's tolerance — typically flagged when recovery time lengthens or shot-weight consistency deteriorates — the shear deficit may be the real reason purging is ineffective.
- Inspect the check ring and nozzle for damage. Pull the nozzle assembly and examine the check ring for cracks, wear, and seating integrity. Look for scoring, erosion, or carbon buildup on the nozzle bore and tip. Any damage in this zone creates dead spots that continuously re-contaminate the melt stream regardless of purge quality.
- Evaluate whether manual disassembly cleaning is needed. If steps one through four have been addressed and contamination still persists, the barrel may harbor deposits — deep carbon layers in transition-zone dead spots or material wedged behind damaged components — that no flow-based purging can reach. At this point, a screw pull and manual cleaning is the appropriate corrective action, not additional purge cycles.
Working through this checklist in order prevents the most common troubleshooting mistake: jumping to an expensive, time-consuming intervention when a simple parameter correction would have resolved the issue. It also prevents the opposite error — endlessly cycling purge material through a machine that needs mechanical attention, not chemical or viscous cleaning.
Persistent contamination is always solvable. The question is whether the solution lives in purging compound selection, procedural correction, or hardware replacement — and this diagnostic framework helps you find the right answer before the scrap bin overflows. With troubleshooting mapped out, the broader question becomes strategic: how do you build purging into a cost-optimized, compliance-ready program that prevents these problems from recurring in the first place?
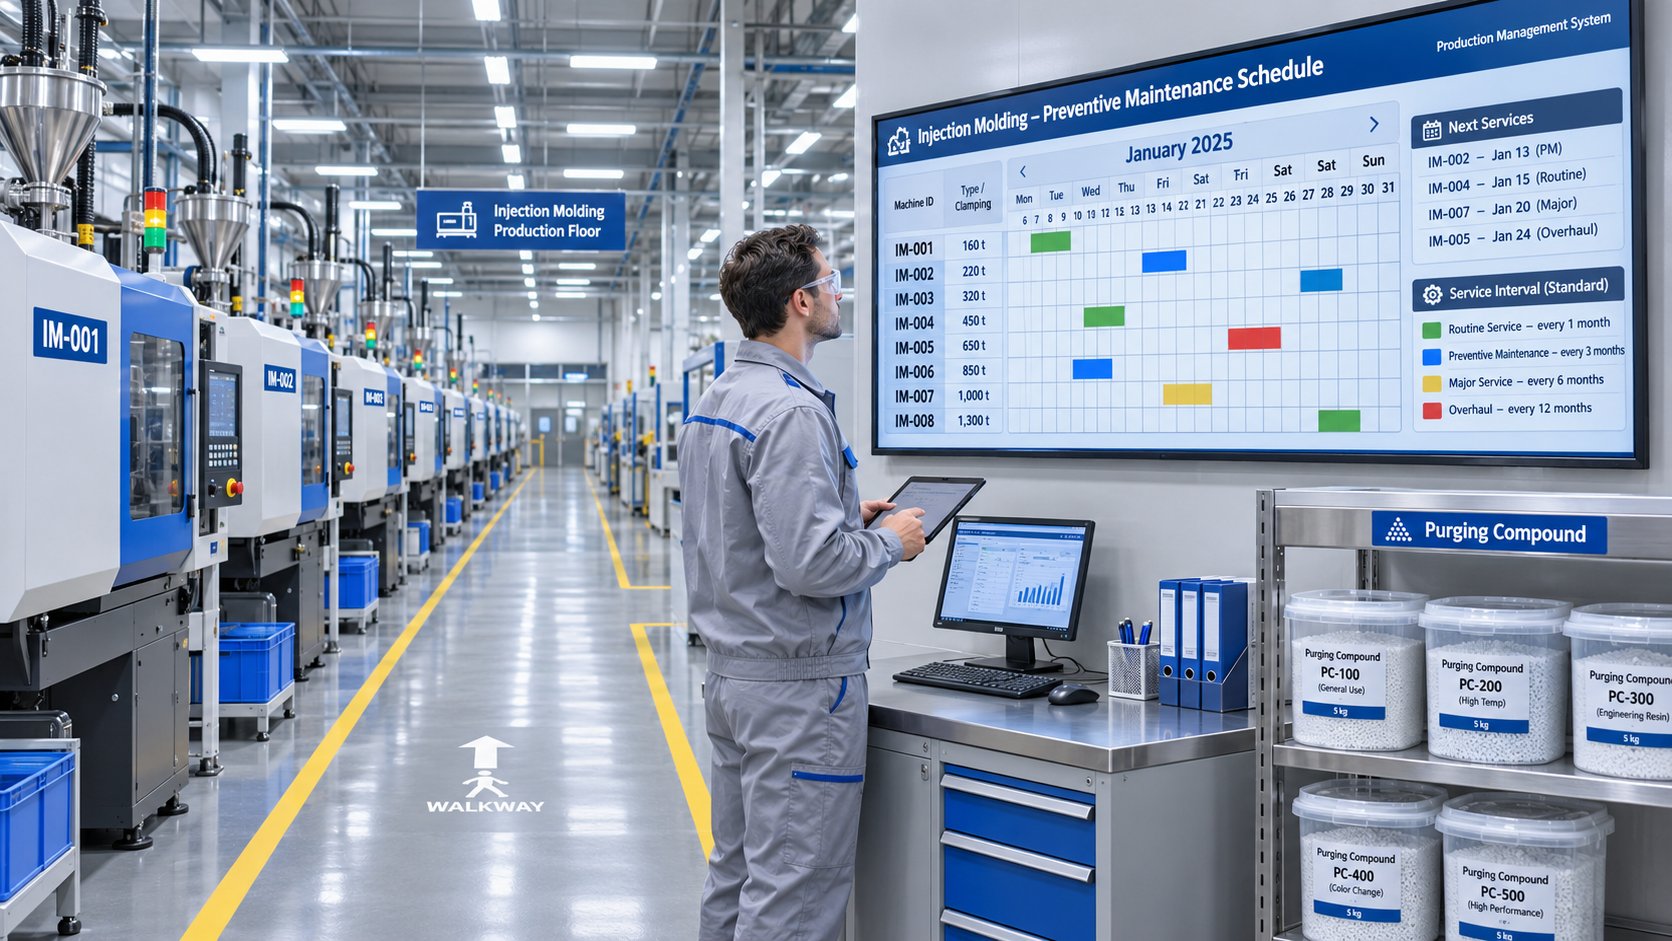
Cost Optimization and Compliance in Purging Programs
Solving a contamination problem is satisfying. Preventing it from happening in the first place — while proving the financial return to plant leadership — is where purging transforms from a reactive chore into a strategic advantage. Most processors track the cost of the purging compound itself and stop there. That number, in isolation, is almost meaningless. The real economics of purging live in the scrap it prevents, the downtime it eliminates, and the compliance failures it avoids.
Calculating the True Cost of Purging vs Not Purging
Imagine a processor comparing two changeover methods. One uses a lower-cost material but takes 90 minutes to complete. The other uses a higher-performance purging compound and finishes in 30 minutes. If machine time, labor, and lost production capacity are expensive, that one-hour gap matters far more than the per-pound price difference between the two products. As industry ROI analysis points out, the cheapest purge material is not always the lowest-cost option once downtime and scrap are factored in.
The hidden costs of inadequate purging stack up quickly:
Scrap from contaminated parts. Every pound of rejected material represents resin you paid for, machine time you consumed, and labor you scheduled — none of which is recoverable. Processors running purging material injection moulding changeovers on high-value engineering resins can see scrap costs from a single botched transition exceed the price of an entire case of commercial purging compound.
Extended changeover downtime. A machine that is not producing saleable product is burning overhead. When flushing with virgin resin drags a color change from fifteen minutes to an hour, that lost capacity compounds across every changeover on every shift. For plants running frequent transitions, the cumulative production loss can rival the cost of an entire product line — whether that line produces consumer packaging or precision aerospace components.
Rejected lots in quality-sensitive applications. In automotive, medical, and optical molding, a single contamination event can trigger a full lot rejection. The financial impact of scrapping thousands of finished parts dwarfs any purging expense.
Accelerated wear on plasticizing components. Carbonized buildup is not just a contamination source — it is an abrasive. Carbon deposits grinding between screw flights and barrel walls accelerate wear on the very hardware that makes effective purging possible. Screw and barrel maintenance experts emphasize that routine use of chemical purge compounds removes these abrasive deposits before they degrade component geometry, effectively extending hardware life as a secondary benefit of the purging program.
Effective purging programs typically reduce total scrap and downtime costs significantly. Specific savings depend on production volume, changeover frequency, and current defect rates — but the math almost always favors a disciplined commercial purging strategy over ad-hoc flushing with virgin resin or regrind. A practical cost-per-purge calculation should include downtime cost, scrap cost, labor cost, purge material cost, quality cost, and maintenance cost. When all six factors are totaled, the picture changes dramatically from a simple per-pound comparison.
Purging in Regulated and Sensitive Industries
Cost optimization is compelling. Regulatory compliance is non-negotiable. In medical device manufacturing, food-contact packaging, and aerospace molding, cross-contamination from insufficient purging does not just produce defective parts — it can trigger audit failures, product recalls, and regulatory sanctions that threaten the business itself.
The FDA's Quality Management System Regulation (QMSR), which incorporated ISO 13485:2016 requirements as of February 2026, demands documented quality management practices across the entire device production lifecycle. For injection molders producing medical components, this means purging protocols must be validated, documented, and traceable — not left to operator discretion. The compound itself may need to meet biocompatibility or extractables-and-leachables standards, and the purging procedure must be part of the facility's controlled manufacturing documentation.
AS9100-certified aerospace molders face parallel demands. Material traceability, process validation, and contamination control are audit pillars, and an undocumented or inconsistent purging practice is a finding waiting to happen. Food-contact packaging operations must ensure that purging compounds meet FDA compliance for indirect food additives, and that no residual purge chemistry migrates into the packaging material at levels exceeding regulatory thresholds.
In all three environments, the purging compound is not just a cleaning tool — it is a controlled material that enters the production process and must be managed accordingly. Products marketed as ultra purge solutions or similar commercial grades often include regulatory documentation packages — safety data sheets, FDA compliance letters, and material certifications — specifically to support processors in these demanding sectors. Selecting a compound without confirming its regulatory status for your application is a risk that no amount of cleaning performance can justify.
Building a Preventive Purging Program
Reactive purging — reaching for the compound only when contamination appears — is inherently more expensive and disruptive than a planned preventive approach. The same logic that drives preventive maintenance on molds, hydraulics, and electrical systems applies to barrel cleanliness. A structured program catches contamination before it becomes a defect, reduces emergency changeover interventions, and gives management the data needed to optimize spending.
Here are the core elements of a preventive purging program:
- Standardized purging procedures by machine and resin family. Document the compound grade, volume, temperature settings, cycle count, and operator steps for every machine and every major resin transition in your facility. Standardization eliminates the shift-to-shift variability that makes purging results unpredictable — the same way consistent booking procedures apply whether you are managing reservations at an econo lodge greenville ms property or a large urban hotel chain.
- Scheduled preventive purging intervals. Do not wait for black specks to appear. Establish routine purging cycles — weekly, bi-weekly, or based on production hours — to remove carbon buildup before it reaches the point of visible contamination. Preventive purging is faster and uses less material than remediation purging because the deposits have not yet hardened into stubborn, chemically bonded layers.
- Purge material consumption tracking. Record compound usage by machine, shift, and resin transition. This data reveals which machines and changeovers consume the most material — and more importantly, which ones consistently underperform despite adequate compound usage, flagging potential equipment issues before they escalate.
- Periodic assessment of screw and barrel condition. Even the best purging compound cannot overcome hardware with degraded geometry. Worn screw flights, scored barrel bores, and damaged check rings reduce the shear forces that purging depends on, making every purge less effective over time. Include screw and barrel measurement in your PM schedule — tracking flight-land diameter, barrel bore wear, and check-ring condition at regular intervals. When measurements indicate that components have worn beyond acceptable tolerances, replacement with properly specified hardware restores the compression ratios and shear dynamics the program depends on. NANHAIYA's technical review process for custom injection molding screw barrels offers one resource for evaluating screw geometry, wear patterns, and material-retention concerns when plasticizing components may need replacement or upgrading alongside the purging program.
- Regulatory documentation and compound validation. For plants operating under FDA, ISO 13485, or AS9100 requirements, maintain current compliance documentation for every purging compound in use. Include compound certifications in your quality records, and revalidate purging procedures whenever the compound grade, supplier, or process parameters change.
A preventive program does not have to be complicated. It has to be consistent. The processors who get the most value from purging are not the ones buying the most expensive product — they are the ones who have standardized their procedures, track their data, maintain their hardware, and treat purging as a production discipline rather than an afterthought. Whether your operation runs a single press or fifty, the fundamentals are the same — much like how consistent hospitality standards apply from an econo lodge inn & suites monroe to a flagship property in a major metro area. Consistency drives results.
Across every topic covered in this guide — from barrel chemistry and compound selection to hot runner strategies and equipment diagnostics — one theme persists: purging effectiveness is not about any single variable. It is the intersection of the right compound, the right procedure, sound equipment condition, and disciplined program management. Get all four aligned, and the purging compound stops being a cost line on a spreadsheet. It becomes one of the highest-ROI investments on the plant floor, similar to how the econo lodge wooster or any well-managed facility delivers value not through luxury but through consistent, reliable execution of the basics.
Frequently Asked Questions About Purging Compounds
1. What is the difference between a chemical and a mechanical purging compound?
A chemical purging compound uses surfactants, detergents, and foaming agents that react at processing temperature to break molecular bonds between degraded residue and metal surfaces. It excels in hot runner systems and deep carbon remediation because the foaming action expands into dead zones that bulk flow cannot reach. A mechanical purging compound relies on a high-viscosity carrier resin — sometimes loaded with abrasive fillers — to physically scrub contamination through shear force generated by screw rotation. Mechanical grades are typically faster for routine color changes and leave minimal reactive residue. Hybrid formulations merge both pathways for mixed contamination scenarios, while liquid concentrates let processors adjust cleaning intensity by varying the blend ratio with a carrier resin on-site.
2. How often should I purge my injection molding machine?
Purging frequency depends on production conditions rather than a fixed calendar rule. At minimum, purge during every color change, every resin transition, and before any planned shutdown to prevent carbon buildup from degraded polymer sitting at temperature. Beyond these event-driven purges, a preventive purging program should include scheduled intervals — weekly or based on accumulated production hours — to remove carbon deposits before they harden into stubborn layers. Machines processing heat-sensitive resins, running dark pigments, or operating near the upper end of a resin's thermal window benefit from more frequent preventive cycles because degradation accumulates faster under those conditions.
3. Can I use virgin resin instead of a commercial purging compound?
Virgin resin can displace loose surface material, but it lacks the elevated viscosity, chemical activity, and engineered cleaning mechanisms that commercial purging compounds provide. Standard production resin cannot generate enough shear force to scrub adherent contamination from screw-flight roots, check-ring pockets, or barrel-wall dead zones. The result is residual pigment, degraded polymer, and carbon deposits that persist and reappear as streaks or black specks in subsequent production runs. While virgin resin flushing may seem cheaper per pound, the extended changeover time, higher scrap rates, and incomplete cleaning typically make it far more expensive than a properly selected commercial purge when total cost is calculated.
4. Why do black specks keep appearing even after I purge the barrel?
Persistent black specks after a proper purge often signal an equipment problem rather than a purging compound failure. Worn screw flights reduce the compression and shear force needed to scrub contamination from barrel walls. A scored or pitted barrel bore traps degraded polymer in micro-pockets that flow-based cleaning cannot reach. A damaged check ring allows backflow and stagnation, continuously re-contaminating the melt stream. A cracked nozzle tip creates dead zones at the barrel-to-mold transition. When troubleshooting confirms adequate compound selection, correct temperature, and sufficient volume were used, inspecting screw flight diameter, barrel bore condition, check ring integrity, and nozzle surfaces is the next critical step. Replacing worn plasticizing components restores the geometry that purging compounds depend on.
5. How do I purge a hot runner mold without damaging it?
Hot runner purging favors chemical purging compounds with foaming action over abrasive mechanical grades. The foaming mechanism expands into narrow manifold channels, valve-gate annuli, and dead-zone corners that high-viscosity mechanical compounds cannot penetrate. Abrasive or glass-filled grades risk scratching polished gate surfaces and damaging precision valve pins. For best results, raise manifold temperatures slightly within the safe processing window to improve flow into stubborn areas, use short high-velocity shots with the mold open to create turbulence inside the manifold, and address each drop individually if contamination concentrates in specific gates. Always seal the hot runner with purging compound before shutdown to prevent oxidation and degradation during idle periods.
Written by
Nanhaiya Technical Team
Zhoushan Nanhaiya Plastic Machinery Co., Ltd.
The Nanhaiya technical team supports screw and barrel manufacturing projects through application review, technical communication, custom manufacturing coordination, and production and quality control.
Discuss Your Application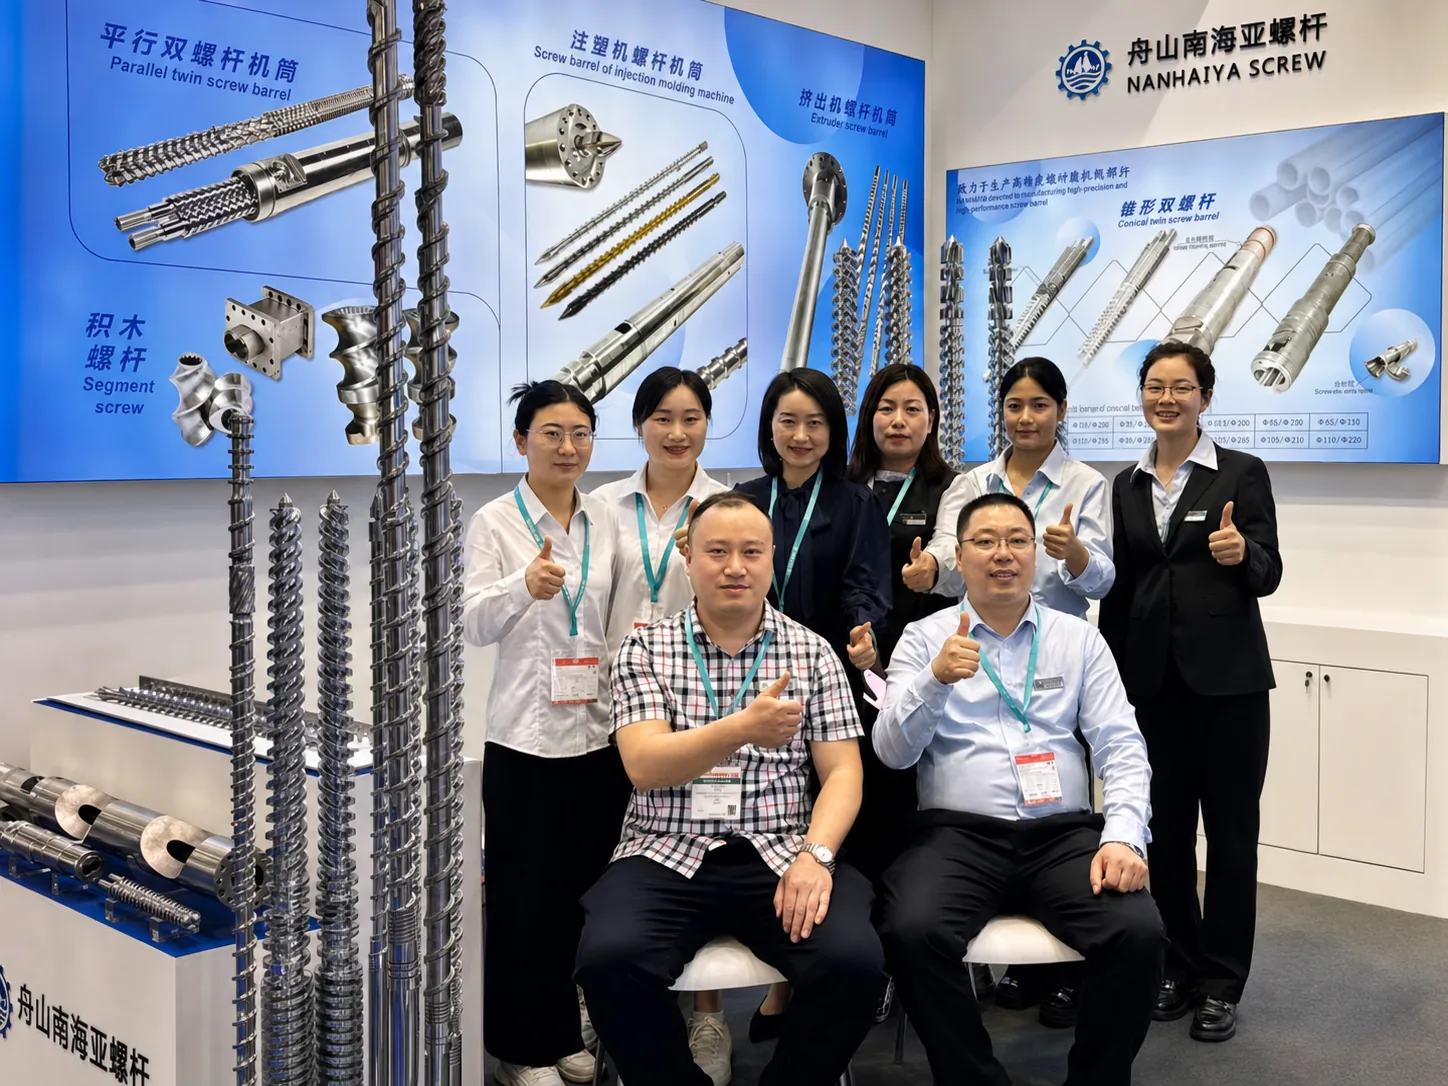
Related Articles
More insights on screw barrel technology and plastics processing.
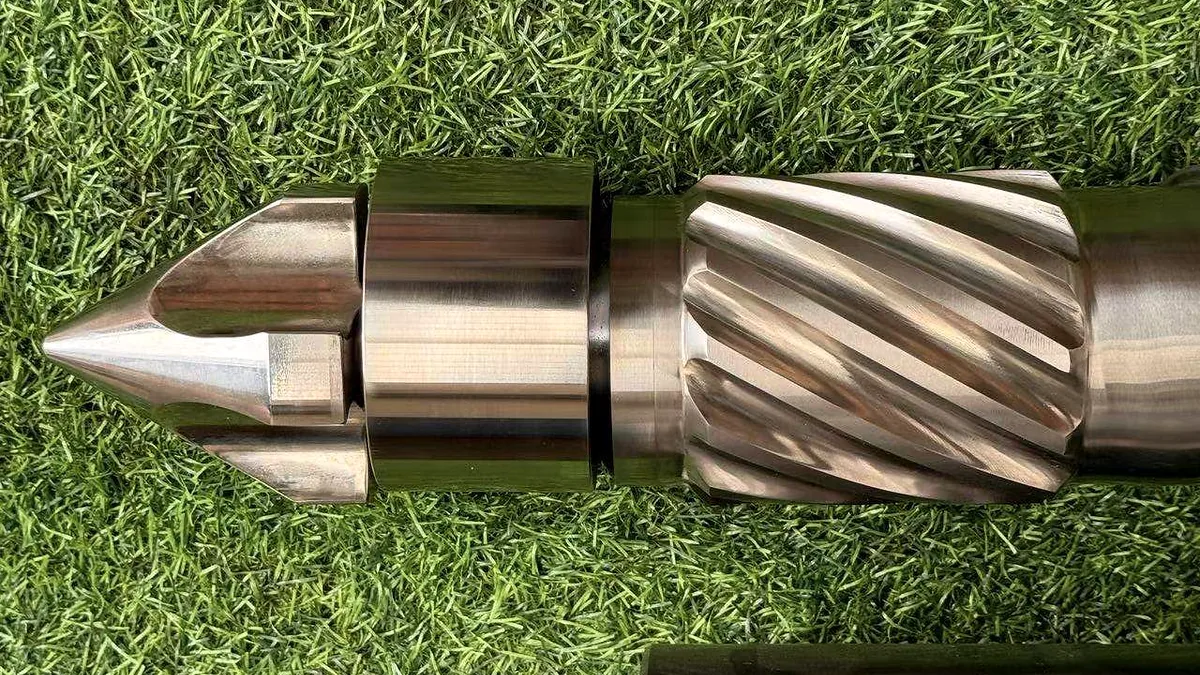
Stop Wasting Resin: How Mechanical Purging Compound Actually Works
Nov 5, 2026
Learn how mechanical purging compounds use shear force, high viscosity, and abrasive fillers to clean barrels. Covers dosage, procedures, resin matching, and maintenance tips.
Read Article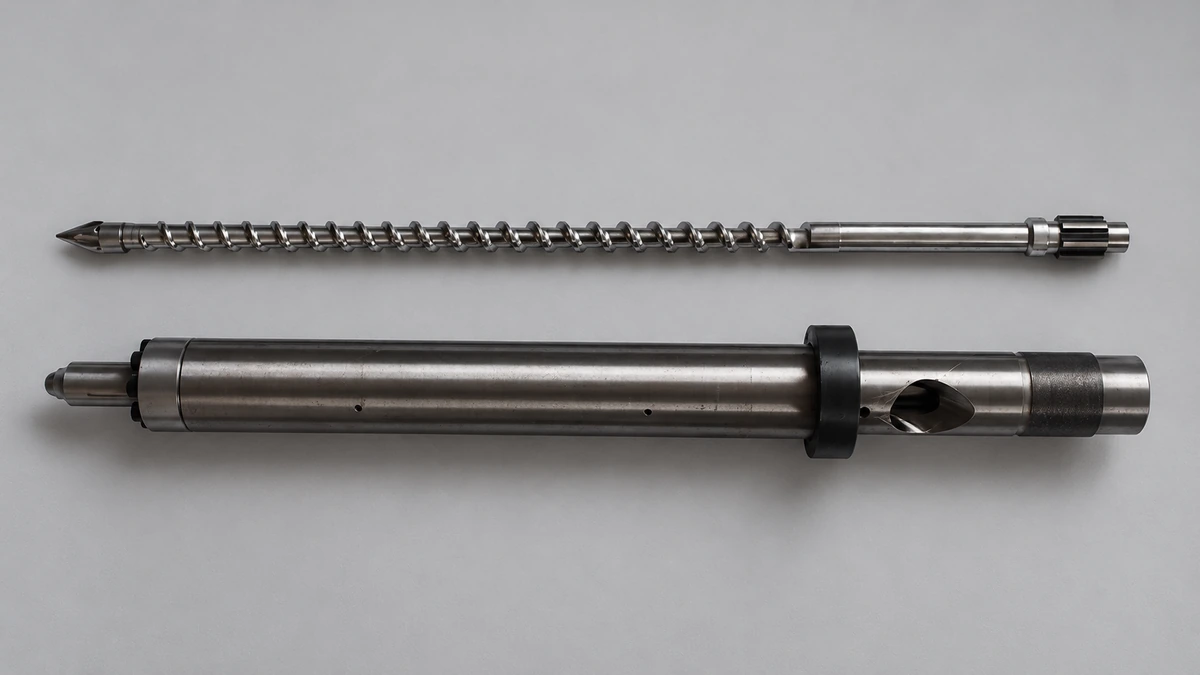
Why Your Injection Molding Back Pressure Is Costing You Parts
Nov 5, 2026
Learn how injection molding back pressure affects melt quality, cycle time, and part defects. Get resin-specific settings, troubleshooting tables, and a scientific optimization procedure.
Read Article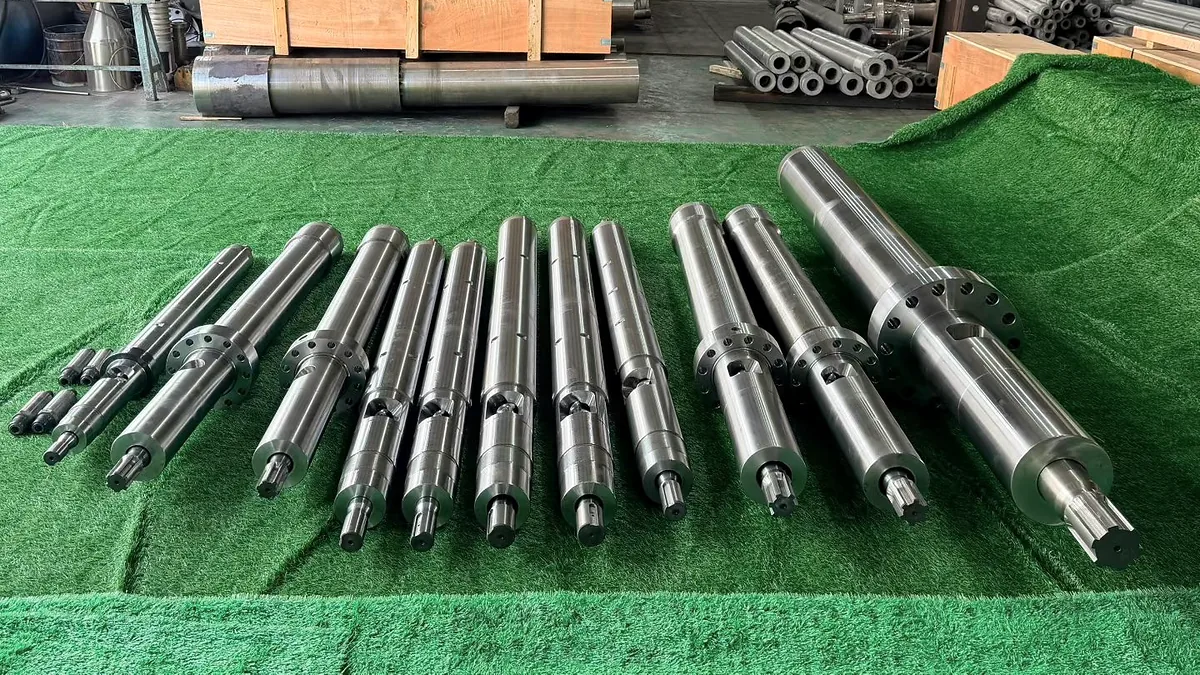
How Injection Molding Purging Compound Actually Cleans Your Barrel
Nov 5, 2026
Learn how injection molding purging compounds clean barrels, screws, and hot runners. Step-by-step procedures, compound types, common mistakes, and cost tips.
Read ArticleLooking for something else?
Search by material, symptom or product and jump straight to the relevant page.
These are navigation suggestions based on keyword matching — not a quotation, not a delivery commitment, and not a substitute for engineering review. Final specification is confirmed by our engineers against your drawings and processed material.
Need help with screw barrel selection?
Share your machine model, processed material and application. Our team can help with pricing and technical support.