

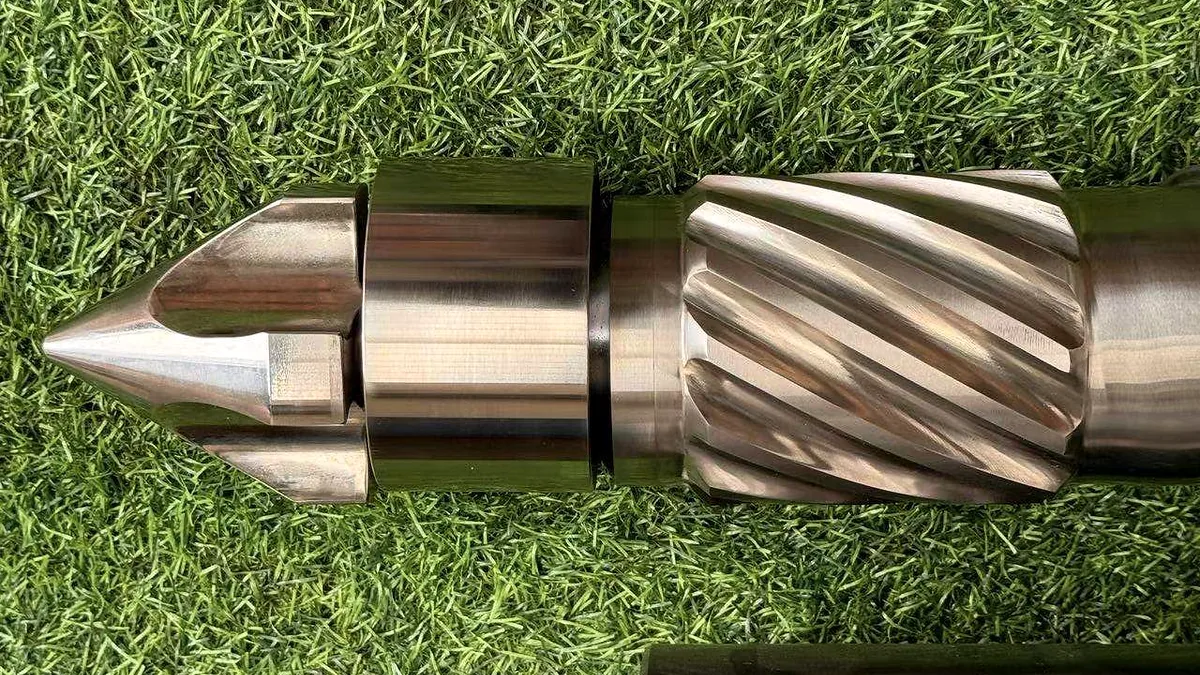
What Is a Mechanical Purging Compound and Why It Matters
A mechanical purging compound is a thermoplastic-based cleaning material that uses physical scrubbing and high-viscosity displacement — rather than chemical reactions — to remove residual resin, color pigments, and carbonized deposits from the screw, barrel, and melt-delivery components of plastics processing equipment. It softens into a dense, high-shear mass inside the machine, displacing contamination through pressure and abrasive contact with metal surfaces.
What Makes a Purging Compound Mechanical
The term "purging compound" is broad. It covers any commercial cleaning material designed to flush contamination from plasticizing equipment. So what separates a mechanical purging compound from the rest?
The distinction comes down to how the material actually cleans. A mechanical grade relies entirely on physical action — think of it as scrubbing the walls of your barrel and screw flights as it passes through. Its formulation typically includes three key elements:
- High-melt-viscosity carrier resin that generates elevated shear stress against internal metal surfaces
- Abrasive or scrubbing fillers (mineral or glass-fiber based) that dislodge stubborn deposits
- Shear-force generation driven by the compound's resistance to flow under backpressure
The word "mechanical" refers to this mode of action — not to the machine hardware itself. It means the purging material does its work through displacement and friction, not through heat-activated chemical reactions or gas expansion.
Alternatives do exist. Chemical purge compounds use reactive agents that break down contamination at processing temperatures, while hybrid types combine a mechanical carrier with a chemical foaming agent. Each approach has trade-offs, which we will compare in detail later in this article.
Why Plastics Processors Rely on Purging Compounds
Imagine running a dark blue masterbatch on an injection molding machine and then switching to natural white. Or transitioning from ABS to polycarbonate with a 50-degree temperature gap between the two resins. These scenarios — color changes, material transitions, scheduled shutdowns, and carbon-speck remediation — are everyday realities in injection molding, extrusion, and blow molding operations.
Every one of those transitions demands a clean machine. Residual polymer, trapped pigment, and degraded resin left inside the barrel will contaminate the next production run, driving up scrap rates and eating into cycle time. Choosing the wrong purging approach — or worse, relying on production resin alone to flush the system — wastes material, machine hours, and labor.
That is exactly why purpose-built purge compounds exist. They clean faster, more thoroughly, and more consistently than simply running extra resin through the barrel.
This article is a vendor-neutral, engineering-education-first resource. It covers the physics behind mechanical cleaning action, resin compatibility frameworks, step-by-step procedures for common scenarios, honest limitations, and guidance on building a preventive purging program that actually reduces costs over time.
Mechanical purging compounds clean by physical force — high viscosity, shear stress, and abrasive scrubbing — making them broadly compatible across resin families and easy to handle without special safety precautions.
Understanding what a purging material does at a surface level is one thing. Understanding exactly how shear forces, viscosity differentials, and abrasive fillers interact inside the barrel to strip contamination from metal — that is where the real engineering value lies.
How Mechanical Purging Compounds Physically Remove Contamination
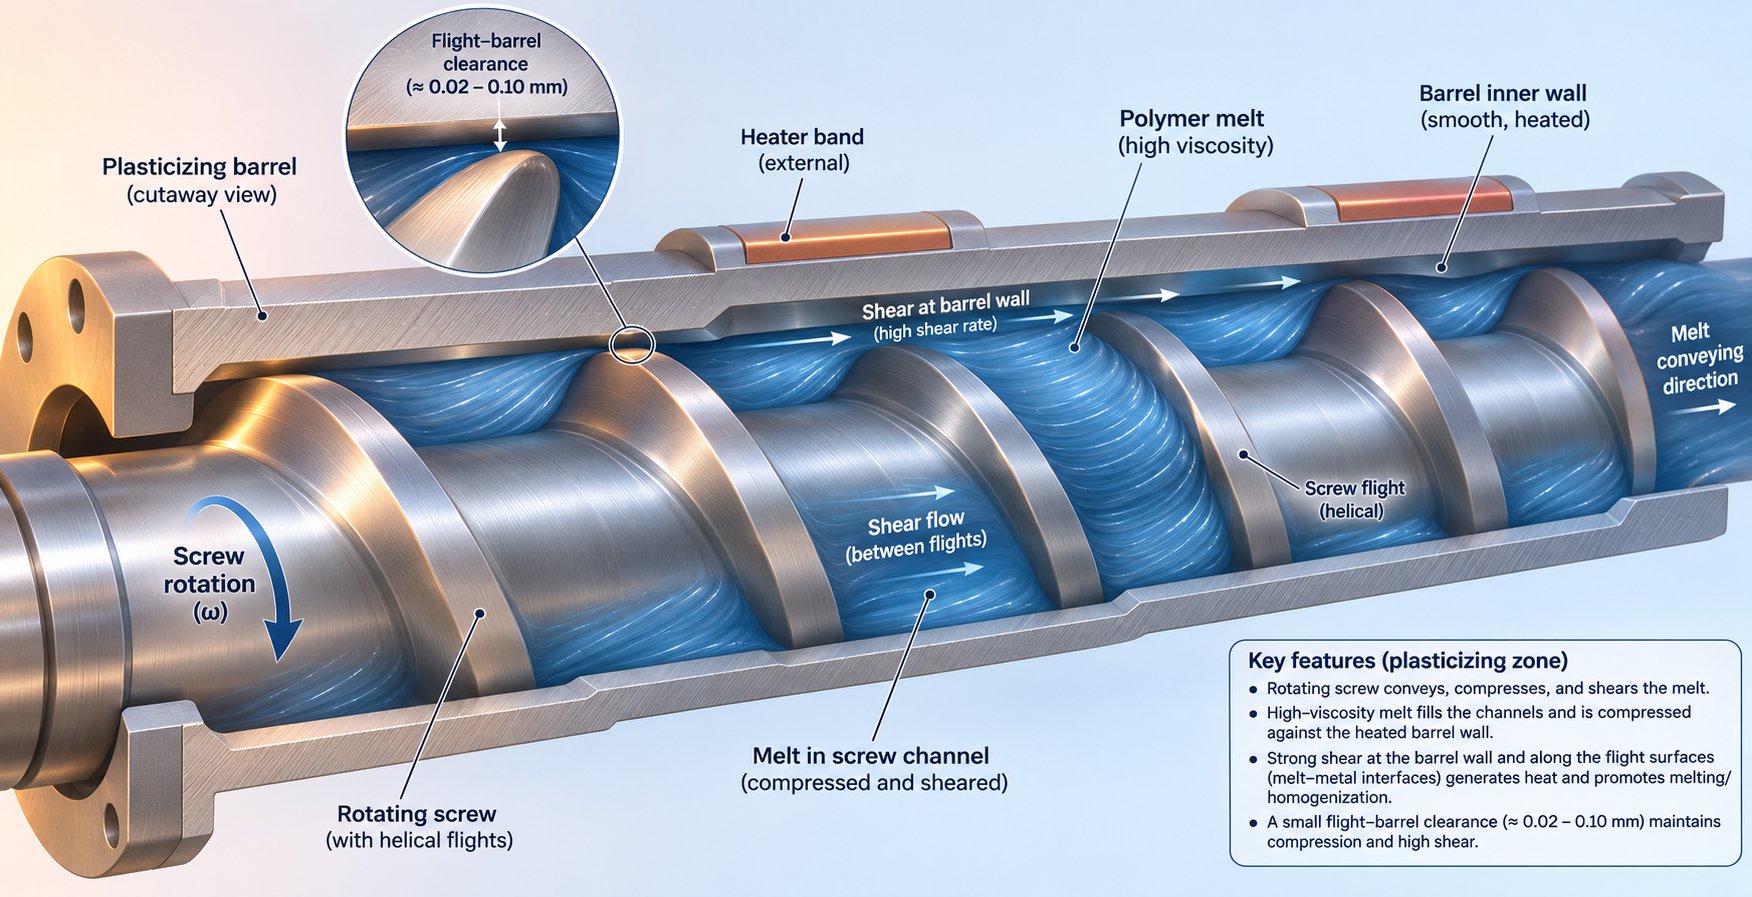
Picture honey moving through a straw versus water. The honey drags against every surface it touches, gripping the walls and sweeping debris along with it. A mechanical purging compound works on the same principle — except inside your barrel, that "grip" translates into precisely engineered shear stress capable of stripping pigment films, degraded polymer, and carbonized deposits off hardened steel.
Most processors know that purging compounds clean the machine. Far fewer understand why the physics actually work. That gap leads to poor parameter choices, wasted compound, and incomplete cleaning. Breaking down the mechanism at a granular level changes how you approach every purge cycle.
High-Viscosity Displacement and Shear-Force Dynamics
The base resin in a mechanical purging compound is formulated to have a significantly higher melt viscosity than the production resin it replaces. This is not accidental — it is the entire foundation of how the compound cleans.
When a thick, high-viscosity melt enters a barrel previously occupied by a thinner production resin, a viscosity differential develops at the interface between the two materials. That differential generates elevated shear stress along every metal surface the compound contacts: barrel walls, screw flights, the check-ring gap, compression-zone channels, and nozzle passages.
Why does viscosity matter so much? Shear stress is directly proportional to viscosity. A higher-viscosity melt resists flow, and that resistance forces the material to push harder against the surfaces it encounters. Production resin, by contrast, tends to flow smoothly through the center of the channel — it slides over residual contamination instead of dragging it away. The thicker purging compound cannot take that easy path. It presses into the boundary layer where pigments and degraded resin cling to metal.
Two machine parameters amplify this effect:
- Backpressure: Increasing backpressure compresses the purge melt, raising shear stress along barrel walls and forcing material into low-flow zones behind the check ring, inside transition-zone channels, and around nozzle-tip geometry. As plasticating specialists note, low backpressure allows contaminants to stay seated in pockets, while high backpressure packs the purge into areas where contamination hides.
- Screw speed: Moderate screw RPM maintains enough residence time for the compound to work against surfaces while still generating the rotational shear needed to scrub screw flights and the barrel bore. Too fast, and the compound blows through without adequate contact. Too slow, and shear drops below the threshold needed to dislodge stubborn deposits.
The interplay between viscosity, backpressure, and screw speed is what separates a productive purge from one that burns through compound without results. You are not just pushing material through the barrel — you are engineering a controlled scrubbing force inside a closed system.
The Role of Abrasive and Scrubbing Fillers
Viscous displacement handles a large share of the cleaning work, but some contaminants refuse to let go. Carbonized deposits, in particular, bond tenaciously to metal surfaces. Understanding why helps explain why physical scrubbing is the most effective counter.
Carbon buildup forms when polymer chains degrade under prolonged heat exposure. The thermal degradation cross-links those chains into a dense, charred matrix that mechanically interlocks with the microscopic roughness of barrel and screw surfaces. Imagine burned food fused onto a cast-iron skillet — it does not dissolve in water, and it does not wipe away with a paper towel. You need an abrasive pad.
Many mechanical formulations incorporate mineral or glass-fiber fillers that serve exactly this role. Common fillers include calcium carbonate, talcum, clay, and glass fibers, typically in carefully controlled concentrations. Patent literature on purging compound formulations references inorganic fillers such as calcium carbonate, silica, alumina, and nanoclay at loadings of 0.1 to 10 percent by weight, with particle sizes around 2 micrometers for optimal cleaning efficiency.
These micro-abrasives ride within the high-viscosity carrier resin. As the screw rotates and builds pressure, the fillers are pressed against barrel walls and dragged along screw-flight surfaces, physically dislodging carbonized films and pigment residues that viscous displacement alone cannot reach. The carrier resin then sweeps the loosened debris forward and out through the nozzle or die.
One important nuance: filler loading is a balancing act. Too little, and the scrubbing effect is negligible. Too much, and the compound itself becomes difficult to flush from the machine — a finding confirmed by efficiency testing where high inorganic-filler formulas showed reduced second-purge performance because filler particles distributed into the simulant resin and resisted removal. The best-performing formulations optimize filler concentration against carrier viscosity to maximize cleaning power without creating a secondary contamination problem.
How Mechanical Action Addresses Different Contaminant Types
One reason purging compounds built on physical force enjoy such broad applicability is their versatility against different contamination profiles. Unlike chemical types — which rely on specific reactions tuned to certain polymer chemistries — mechanical action attacks contamination based on how it is physically attached, not what it is chemically made of.
The table below maps the most common contaminant types to the specific mechanical action responsible for removing each:
| Contaminant Type | How It Adheres to Surfaces | Primary Mechanical Removal Action |
|---|---|---|
| Color pigments | Thin films deposited on barrel walls and screw flights during masterbatch processing | Viscous displacement — high-viscosity melt shears pigment films off the boundary layer and carries them out |
| Degraded polymer | Partially cross-linked resin stuck in low-shear zones and transition channels | Shear peeling — elevated shear stress generated by the viscosity differential peels softened degraded layers from metal |
| Additive residue (lubricants, UV stabilizers, slip agents) | Waxy or oily films coating internal surfaces, often invisible but affecting adhesion and clarity of subsequent runs | Viscous displacement with moderate abrasion — the carrier resin sweeps residue forward while fillers break up tenacious films |
| Carbonized buildup (black specks) | Cross-linked, charred polymer mechanically interlocked with surface roughness of barrel bore and screw roots | Combined action — abrasive fillers physically scrub the charred matrix while high backpressure and viscous flow flush loosened carbon fragments from dead spots |
This physical versatility explains why a single concentrated purging compound grade can handle color changes in polyolefins one hour and carbon-speck remediation in ABS the next — without requiring chemical compatibility matching between the purge and the production resin. The cleaning force comes from viscosity, shear, and abrasion, not from a reaction that needs the right molecular target.
It also explains why mechanical grades are often the default choice for purge injection molding applications across diverse resin families. Whether you are processing polyethylene, polypropylene, styrenics, or engineering thermoplastics, the underlying physics — displacement and scrubbing — remain effective as long as the compound's melt-temperature window overlaps with your process range.
Of course, understanding the mechanism is only half the equation. The real question processors face is how mechanical purging compounds stack up against chemical and hybrid alternatives in specific, real-world scenarios — and where each type genuinely outperforms the others.
Mechanical vs Chemical vs Hybrid Purging Compounds Compared
Knowing how mechanical cleaning physics work gives you a solid foundation — but every processor eventually hits the same crossroads: should I use a mechanical grade, a chemical grade, or a hybrid? The honest answer is that no single type wins in every situation. Each carries genuine strengths and real limitations, and picking the wrong one costs more than the compound itself — it costs downtime, scrap, and sometimes rework on parts that should have run clean the first time.
Here is a transparent, side-by-side look at all three types of purging compounds so you can match the right tool to the job sitting in front of you.
Mechanical Purging Compounds at a Glance
Mechanical grades are the workhorse of the plastics processing floor, and for good reason. Their cleaning power comes entirely from the physical principles covered earlier — viscous displacement, shear force, and abrasive scrubbing — which gives them several practical advantages.
Strengths
- Broad resin compatibility: Because cleaning relies on physics rather than a chemical reaction tuned to a specific polymer, a single mechanical grade can often handle polyolefins, styrenics, and many engineering resins within its temperature window.
- No chemical residue risk: There is no foaming agent or reactive additive left behind that could interact with sensitive downstream resins. What goes in comes back out as thermoplastic.
- Simpler handling and storage: No special material-safety precautions beyond standard thermoplastic practice. No shelf-life concerns tied to reactive chemistry degrading in the bag.
- Effective on heavy carbon and color contamination: The abrasive fillers and high shear stress excel at dislodging carbonized deposits and flushing stubborn pigment films — the two most common complaints on the production floor.
- No soak cycle required: You run them through the machine like resin. High screw speed and high backpressure increase their effectiveness, keeping the process straightforward.
- Generally lower cost per use: Mechanical formulations tend to be less expensive per kilogram than their chemical or hybrid counterparts.
Limitations
- May require more shots for thin-film residue: When contamination is a microscopic additive plate-out or waxy film rather than a bulk deposit, a mechanical grade may need extra barrel volumes to achieve full cleanliness compared to a chemistry-driven approach with superior wetting action.
- Less effective in complex hot-runner geometries: Higher viscosity and abrasive fillers can struggle to flow through narrow manifold channels, valve gates, and dead-spot areas where material stagnates. These tight zones simply do not generate enough displacement force for a purely physical cleaning mechanism.
Chemical Purging Compounds and Where They Excel
Chemical purging compounds take a fundamentally different approach. Instead of relying solely on shear and displacement, they contain heat-activated reactive agents that break down residue through chemical decomposition and gas expansion at processing temperature.
When heated inside the barrel, these agents decompose to produce gases — typically nitrogen or carbon dioxide — that create internal foaming and turbulence. That expanding gas reaches into negative-flow areas where a high-viscosity mechanical melt physically cannot go: deep inside hot-runner manifolds, behind check rings, through micro-channels, and around valve-gate assemblies.
Strengths
- Superior reach in complex flow paths: The foaming action pushes cleaning material into dead spots, stagnation zones, and intricate melt-delivery systems that mechanical action alone struggles to access.
- Effective against degradation and baked-on films: Chemical reactions can break polymer-to-metal bonds at a molecular level, loosening residue that abrasive scrubbing might only partially address in extreme cases.
- Often fewer shots in specific scenarios: For thin-film contamination or additive plate-out deep inside downstream equipment, a well-matched chemical grade can finish the job in fewer purge cycles.
Limitations
- Narrower processing-temperature windows: The reactive agents activate within a defined thermal range. Run too cool and the reaction is incomplete; run too hot and the chemistry can degrade unpredictably, potentially creating new contamination.
- Potential for chemical residue: Residual reactive by-products may affect sensitive resins like optical-grade polycarbonate or medical-grade materials, sometimes requiring a displacement flush after the chemical purge itself.
- Soak cycle required: Most chemical grades need a 5- to 30-minute soak period with the screw stopped to allow the heat-activated reaction to fully develop — adding time to each changeover.
- Material-safety handling considerations: Some formulations generate fumes during the reaction phase, requiring adequate ventilation and safety awareness that go beyond standard thermoplastic handling.
- Often higher cost per kilogram: The specialized reactive chemistry carries a price premium over purely mechanical formulations.
Hybrid Purging Compounds and Niche Applications
What if you could get the scrubbing power of a mechanical carrier and the deep-reaching foam of a chemical agent in one product? That is exactly the promise of hybrid purging compounds. These formulations pair a high-viscosity mechanical base resin — complete with abrasive fillers — with a chemical foaming or reactive component.
In practice, hybrids can sometimes be used mechanically for quick changeovers and then allowed to soak for deeper cleaning when contamination demands it. This versatility makes them attractive for facilities that process a wide range of resins and face both routine color changes and periodic heavy carbon remediation.
The trade-off? Complexity and cost. Hybrid selection criteria are more involved because you need to consider both the mechanical carrier's temperature range and the chemical agent's activation window. And the per-kilogram price typically sits above both purely mechanical and purely chemical grades. Facilities that run a narrow range of resins and face predictable contamination types may find that a dedicated mechanical or chemical grade outperforms a hybrid at lower total cost.
Side-by-Side Comparison Across Key Dimensions
The following table compares all three types of purging compounds across the dimensions that matter most when you are standing at the machine making a selection decision. Every cell reflects balanced, real-world assessments rather than favoring any single approach.
| Dimension | Mechanical | Chemical | Hybrid |
|---|---|---|---|
| Cleaning mechanism | Viscous displacement, shear force, abrasive scrubbing | Heat-activated chemical reaction, foaming, gas expansion | Mechanical scrubbing combined with chemical foaming action |
| Ideal contaminant types | Color pigments, heavy carbon, bulk degraded resin | Thin-film residue, additive plate-out, degradation in dead spots | Mixed contamination profiles requiring both scrubbing and deep reach |
| Resin compatibility breadth | Wide — works across most resin families within its temperature window | Narrower — reactive chemistry must be compatible with downstream resins | Moderate to wide — depends on both carrier and chemical agent compatibility |
| Temperature range flexibility | Broad — limited only by the carrier resin's melt stability | Constrained — reaction activates within a specific thermal window | Moderate — must satisfy both mechanical and chemical operating ranges |
| Hot-runner suitability | Limited — high viscosity and fillers may not reach tight channels and dead spots | Strong — foaming action expands into low-flow zones and manifold passages | Good — chemical component extends reach beyond what mechanical action alone achieves |
| Residue risk | Low — no reactive by-products; flushes out as thermoplastic | Moderate — reactive residues may require a secondary displacement purge | Low to moderate — depends on chemical loading and flush procedure |
| Handling complexity | Simple — run like standard resin; no soak cycle needed | Higher — soak time required; ventilation and safety awareness recommended | Moderate — optional soak cycle; some safety considerations apply |
| Relative cost per purge | Lowest | Higher | Highest |
Notice how no single column dominates every row. A mechanical purging compound wins on cost, simplicity, and resin compatibility breadth — but a chemical grade is the stronger choice when you need to reach deep into hot-runner manifolds or break down thin molecular films in stagnation zones. Hybrids offer flexibility at a premium, making them useful for plants with highly variable production schedules and diverse contamination challenges.
The right pick depends on your specific combination of resin family, equipment geometry, contamination type, and changeover frequency. And that leads to a question many processors overlook entirely: even within the mechanical category, does the compound you chose actually match the temperature range and melt behavior of the resins you are running?
Resin Compatibility and Temperature Suitability Framework
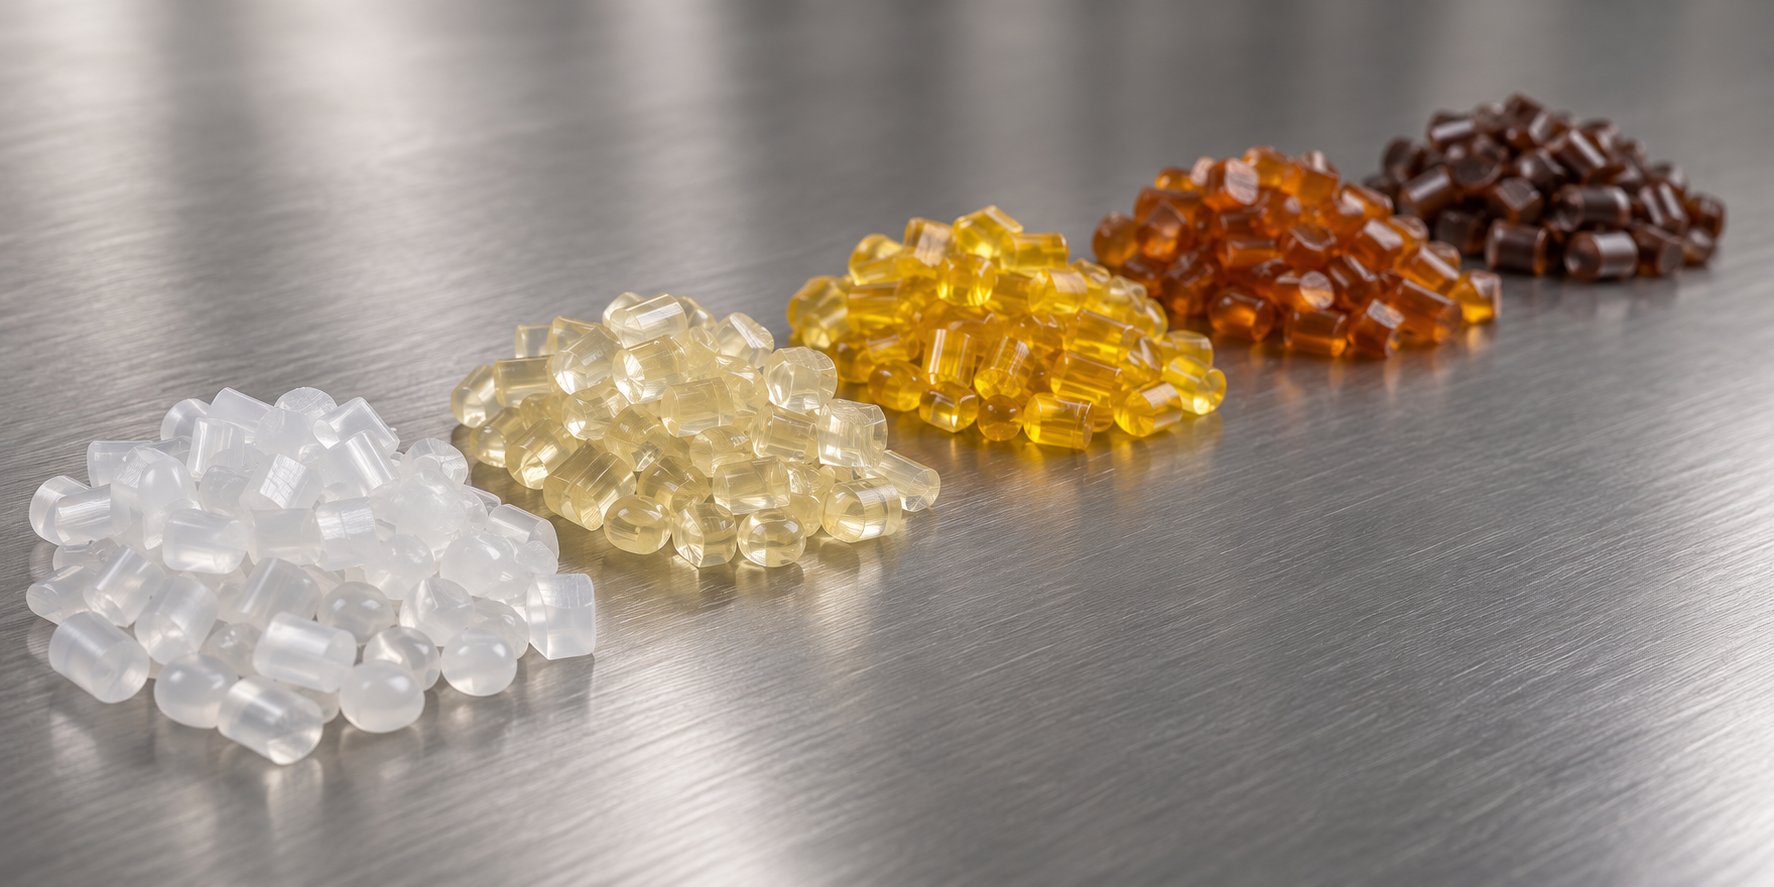
A mechanical purging compound that cleans polypropylene brilliantly at 420 °F may be completely useless inside a barrel running PEEK at 720 °F. The physics of shear and displacement do not change between resin families — but the thermal window and melt-viscosity profile of the purge absolutely must overlap with the production resin you are cleaning out. Get this match wrong, and you will either push an under-melted slug through the machine or watch the compound degrade into the very contamination you are trying to remove.
The core principle is straightforward: the purging material needs to reach full melt and develop its designed viscosity within the same temperature range your production resin processes in. A compound that is too cold for the barrel will not generate the shear stress it was formulated for. One that is too hot will lose viscosity, thin out, and slide past contamination instead of scrubbing it away.
Matching Mechanical Purging Compounds to Resin Families
Most mechanical grades fall into one of two broad categories — standard-temperature formulations and high-temperature formulations. Standard grades typically cover a processing range from roughly 340 °F to 680 °F, which handles the majority of commodity and mid-range engineering resins. High-temperature grades extend that ceiling considerably — with some glass-filled formulations rated from 518 °F up to 788 °F (270 °C to 420 °C) — specifically engineered for super-engineering polymers.
The table below maps the major resin families to their typical processing-temperature ranges, the grade tier you will likely need, and special considerations that affect purge behavior.
| Resin Family | Typical Processing Range | Purge Grade Tier | Special Considerations |
|---|---|---|---|
| Polyolefins (PE, PP) | 350 °F – 500 °F (175 °C – 260 °C) | Standard mechanical | Low melt viscosity in LDPE may reduce shear effectiveness — increase backpressure to compensate. Widely used in packaging purging compounds applications where fast color changes drive compound selection. |
| Styrenics (ABS, PS, SAN) | 380 °F – 500 °F (195 °C – 260 °C) | Standard mechanical | ABS tends to degrade at extended residence times, producing carbon specks. Purge promptly after production ends to prevent buildup. |
| Engineering resins (PC, POM, Nylon/PA) | 450 °F – 620 °F (230 °C – 325 °C) | Standard mechanical (upper range) or high-temperature mechanical for PC blends above 580 °F | POM releases formaldehyde gas during processing — ensure adequate ventilation during purging. Nylon is highly moisture-sensitive; absorbed water affects melt viscosity and can cause foaming that mimics a failed purge. Pre-dry nylon before purging or expect erratic extrudate appearance. |
| High-temperature polymers (PEI/Ultem, PEEK, PPS, LCP) | 600 °F – 780 °F (315 °C – 415 °C) | High-temperature mechanical (glass-filled) | Standard mechanical compounds lose integrity and viscosity above approximately 680 °F — they may burn or become water-like, eliminating cleaning power. Use only purpose-built high-temperature grades for these resins. Low-smoke formulations are preferred for operator safety. |
Processors running diverse resin portfolios — especially shops handling both high and low temperature changeovers throughout a shift — often stock two mechanical grades: a standard formulation for commodity and mid-range work, and a high-temperature grade reserved for engineering and super-engineering runs. Trying to stretch a single grade across the entire spectrum is where most compatibility failures originate.
Common Resin-to-Resin Changeover Challenges
Even with the right purge grade on hand, certain transitions are inherently more difficult than others. The challenge is not just about temperature overlap — it is about contamination adhesion, thermal degradation risk, and the physical properties of the outgoing resin.
Here are the transitions that give processors the most trouble and why:
- Dark to light color in the same resin family: Pigment clings to barrel walls and screw flights in thin, tenacious films. The outgoing dark pigment has the same melt behavior as the incoming light resin, so there is no viscosity differential to help flush it. You are relying entirely on the purging compound's shear and abrasion. Expect to use significantly more compound — and possibly a brief soak step — compared to a same-shade or light-to-dark transition.
- ABS to PC with a large temperature gap: ABS processes around 430 °F to 480 °F, while polycarbonate typically runs between 540 °F and 600 °F. Raising barrel temperatures for PC while ABS residue is still inside the system risks charring that residue into carbonized deposits. The purging compound must bridge both temperature ranges. A two-step approach works well here: purge out the ABS at its processing temperature, raise the barrel to the PC range, then purge again to clear any material that softened or degraded during the ramp.
- Nylon to POM (or POM to nylon): This transition is dangerous from a degradation standpoint. Residual POM that contacts nylon at nylon processing temperatures can decompose violently, releasing formaldehyde gas. Complete removal of the outgoing resin is mandatory — not optional. Multiple purge cycles with a compatible mechanical grade, verified by inspecting extrudate for any trace of the previous resin, are standard practice. Some facilities use an intermediate polyolefin resin as a buffer step before introducing the mechanical purge.
- Engineering resin to commodity resin (e.g., PC to PP): The outgoing high-temperature material may not flow at the lower barrel temperatures needed for the incoming commodity resin. Purging must happen at the higher temperature first, then temperatures are stepped down while continuing to flush — a process that also applies to purging compounds for extrusion operations where continuous screw rotation adds residence-time complexity.
A pattern emerges across all of these scenarios: the more extreme the mismatch in temperature, viscosity, or chemical sensitivity between the outgoing and incoming resin, the more likely you will need multiple purge cycles or a staged approach. Recognizing these trouble spots before you start the changeover — rather than discovering them mid-purge — saves compound, time, and a significant amount of frustration.
Selecting the right grade and understanding which transitions demand extra attention are critical first steps. The next lever you control is how you actually run the purge — backpressure settings, screw speed, dosage, and soak timing all determine whether that well-chosen compound delivers its full cleaning potential or falls short.
Process Parameters and Dosage for Effective Mechanical Purging
You could stock the ideal mechanical purging compound for every resin on your production schedule and still get mediocre results. The compound is only the raw material — the machine settings you dial in are what actually convert that material into cleaning force. Backpressure, screw speed, temperature profile, and dosage volume each play a distinct role, and getting any one of them wrong undermines the rest.
Think of it like a pressure washer. The cleaning solution matters, but water pressure, nozzle angle, and flow rate determine whether the grime actually comes off. The same logic applies inside your barrel.
Backpressure, Screw Speed, and Temperature Settings
Backpressure is arguably the single most influential parameter during a mechanical purge. Raising backpressure compresses the high-viscosity purge melt against barrel walls and screw channels, directly increasing the shear stress that does the cleaning work. It also forces compound into low-flow zones — behind the check ring, inside transition-zone channels, and around nozzle-tip geometry — where contamination tends to anchor. As processing specialists have noted, high backpressure allows you to run the screw at elevated rotation speeds without the screw retracting uncontrollably, enabling the purging agent to scrub all the threads of the screw and the walls of the barrel simultaneously.
But there is a ceiling. Excessive backpressure can stall the screw motor, damage check rings, or create unsafe pressure spikes — especially on older hydraulic machines with limited pressure relief. A practical range for most injection molding machines falls between 100 and 200 psi of hydraulic backpressure, though machine-specific limits should always govern. If your machine cannot hold the screw in the forward position at elevated backpressure, an alternative technique helps: perform short, high-speed injection shots manually to drive the compound forward at velocity, concentrating the scrubbing action on the check valve and nozzle area.
Screw speed during purging should be moderate — fast enough to generate meaningful rotational shear across the screw flights, but not so fast that the compound blows through the barrel without adequate residence time. Rapid screw recovery pushes material past contamination instead of grinding against it. Conversely, very slow rotation reduces shear below the threshold needed to dislodge stubborn deposits. A good starting point is the mid-range of your machine's RPM capability, adjusted upward or downward based on the visual cleanliness of the extrudate.
Temperature profiles during purging should generally match or slightly exceed the outgoing resin's processing range. Why slightly above? Adhered deposits — especially carbonized layers and pigment films — soften faster at elevated temperatures, making them easier for the mechanical compound to peel away. However, pushing temperatures too high risks thermally degrading the purging compound itself, which defeats the purpose entirely. If you are bridging a large temperature gap during a material transition, ramp up gradually while purging rather than jumping straight to the upper limit.
Dosage Calculations and Shot-Size Ratios
Here is where most processors go wrong — and it is one of the least-documented aspects of purging material injection moulding operations. The question sounds simple: how much compound do I need? The answer requires understanding what "barrel capacity" actually means.
A common misconception is that barrel capacity equals maximum shot size. It does not. Barrel capacity — the total volume of material contained in the screw flights — is typically between 2x and 2.5x your machine's maximum shot size. This distinction matters because if a purging protocol calls for "one barrel volume" of compound, you actually need at least two times your maximum shot size to fill the barrel, not one.
With that baseline established, dosage scales with contamination severity:
- Light contamination (color-to-color change within the same resin family, similar shades): 1 to 1.5 barrel volumes of compound, purged in small incremental shots. This is often sufficient for routine transitions where minimal residue clings to surfaces.
- Moderate contamination (dark-to-light color change, or switching between different resins within a similar temperature range): 2 to 3 barrel volumes. The extra volume ensures enough compound cycles through the system to displace pigment films and partially degraded material from low-shear zones.
- Heavy contamination (carbon-speck remediation, engineering-resin transitions with large temperature gaps, or extended shutdown recovery): 3 to 5 barrel volumes, potentially combined with soak-and-purge cycling. Severe carbonized deposits require repeated passes of fresh compound — diluted or spent compound has already lost much of its cleaning capacity.
Under-dosing is the single most common mistake processors make. Using too little compound means the first shots pick up some contamination, and by the time the last shots pass through, the compound is so diluted with production resin that it has lost its viscosity advantage. The result? Incomplete cleaning, frustration, and a second round of purging that uses even more total compound than a properly dosed single pass would have required.
Shot size itself also matters. Rather than purging with a few large, full-barrel shots, small-shot purging using 10 to 20 percent of maximum shot size is significantly more effective. Smaller shots keep material moving in the feed zone, cycle the check ring more frequently, and increase agitation within the screw flights. Each short injection drives a fresh slug of concentrated compound through the nozzle area, scrubbing more effectively than one massive shot that simply pushes material forward in a single wave.
Soak Time and Cycle Count Recommendations
Mechanical purging compounds generally do not require soak time the way chemical grades do — their cleaning action is driven by movement, not by a time-dependent reaction. However, there are specific situations where a brief soak period dramatically improves results.
When heavy carbonized buildup resists removal after multiple purge shots, stopping the screw for 3 to 5 minutes while the barrel remains at temperature allows the high-viscosity compound to soften the outermost layers of the carbon deposit through sustained thermal contact. The compound is not reacting with the carbon — it is simply holding heat against a surface that needs time to reach softening temperature. When screw rotation resumes, the loosened layers shear away far more easily than they would under continuous flow.
Soak-and-purge cycling works particularly well for mold purging scenarios and shutdown recovery, where carbonization has had hours or days to build up. A typical cycle looks like this: purge 5 to 8 short shots, soak for 3 to 5 minutes, purge another round, and repeat until the extrudate clears.
How do you know when to stop? Visual inspection of the extrudate or purge patties is your primary guide. You are looking for:
- Uniform color with no streaking or swirls from the previous material
- No black specks or dark particles embedded in the purge slug
- Consistent texture — graininess or rough surface often indicates residual filler or degraded polymer still exiting the system
- Stable viscosity — if the purge shot feels noticeably thinner or more fluid than the previous one, production resin is diluting the compound and more fresh material is needed
For critical applications — medical-grade parts, optical components, or light-colored cosmetic surfaces — some processors go further, collecting purge patties on a white surface and examining them under magnification for micro-contamination that is invisible to the naked eye.
Dialing in these parameters transforms mechanical purging from a guessing game into a controlled, repeatable process. But parameters alone do not account for every variable a processor faces. Color changes, material transitions, shutdowns, and carbon remediation each demand different sequences, timing, and decision points — and the details of those step-by-step procedures make the difference between a five-minute changeover and a thirty-minute headache.
Step-by-Step Purging Procedures for Every Scenario
Parameters tell you how to run the machine. Procedures tell you what to do and when. The difference matters because a color change, a resin-family transition, a weekend shutdown, and a black-speck emergency each follow a distinct sequence — and skipping steps or running them out of order wastes compound, time, and parts. Below are actionable, scenario-specific protocols you can adapt to your own floor.
Before diving into individual scenarios, every purge event — regardless of type — should begin with the same preparation. Skipping any of these baseline steps is the fastest way to turn a routine changeover into a prolonged headache.
- Verify the hopper is completely empty — run the screw until shots begin to short, confirming most production resin has cleared the feed zone.
- Confirm the barrel temperature profile — ensure zones match the outgoing resin's processing range (or the purging compound's recommended range, whichever is appropriate for the scenario).
- Check that the nozzle or die is open — never purge against a closed shut-off nozzle or blocked die. Pressure spikes can damage heaters, deform tips, or create safety hazards.
- Prepare a collection container — position a metal tray or bucket below the nozzle to catch purge slugs for visual inspection.
- Record the starting condition — note the current resin, color, barrel temperatures, and any visible contamination in the last production shots. This baseline helps you evaluate purge effectiveness and builds data for your maintenance log.
Color-Change Procedure for Injection Molding
Color transitions are the most frequent reason processors reach for an injection mold purging compound, and the procedure is relatively straightforward — with one major caveat depending on direction.
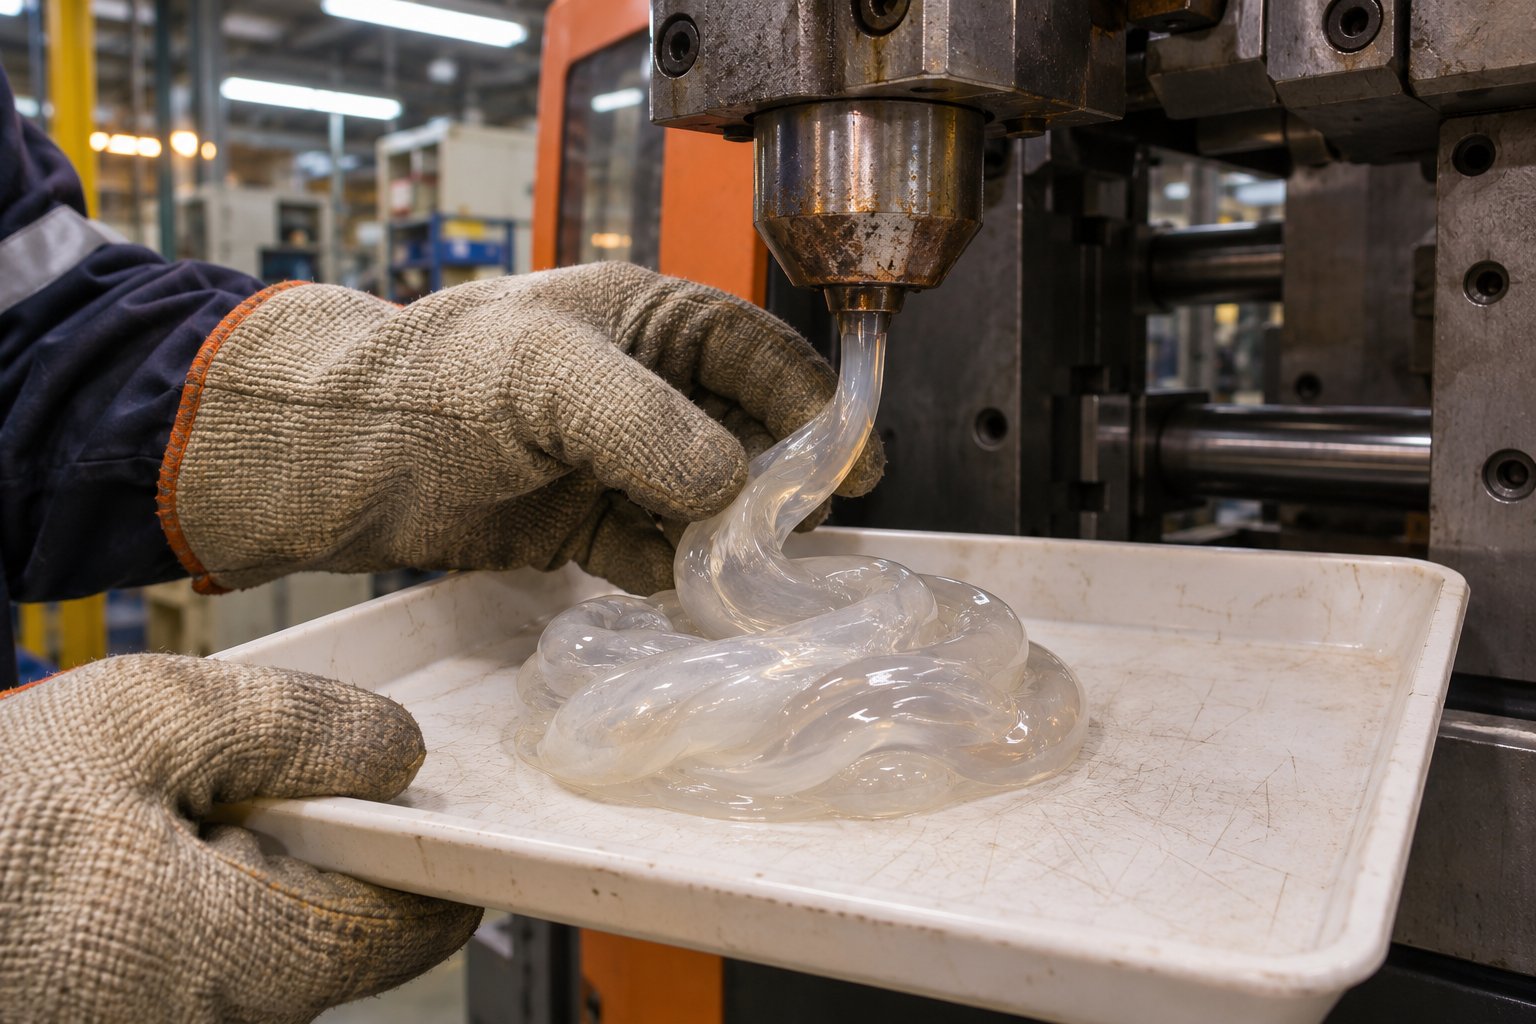
After completing the pre-purge checklist above, introduce the mechanical purging compound into the empty hopper. Begin cycling short shots — 10 to 20 percent of maximum shot size — at moderate screw speed and elevated backpressure (100 to 200 psi hydraulic, depending on your machine). Watch the extrudate exiting the nozzle. Early shots will carry heavy pigment from the previous run. Continue cycling until the purge slugs show uniform color with no streaking or swirls.
For a light-to-dark transition, this process typically moves quickly because trace amounts of the lighter pigment disappear visually inside the darker incoming color. One to 1.5 barrel volumes of compound is often enough.
A dark-to-light change is a different story. Dark pigment clings in thin films along screw flights and barrel walls, and even microscopic residue shows up starkly against a white or natural part. Expect to use two to three barrel volumes. If streaking persists after that amount, stop the screw for a 3- to 5-minute soak at processing temperature, then resume short-shot purging. The soak gives the high-viscosity compound sustained thermal contact with stubborn pigment films, softening them for easier removal on the next pass.
Once the extrudate runs clean, flush the remaining purging compound out of the barrel by introducing the new production resin. Because mechanical grades leave no reactive residue, the new color can follow immediately — no secondary displacement step is required.
Material-Transition and Shutdown-Startup Protocols
Switching between different resin families adds a layer of complexity that color changes within the same polymer do not. The core concern is temperature bridging: the purging compound's processing window must overlap with both the outgoing and incoming resin.
For a transition like ABS to polycarbonate — where the temperature gap can exceed 100 °F — purge the ABS out at its own processing temperature first. Then gradually raise barrel zones toward the polycarbonate range while continuing to cycle compound through the system. This staged ramp prevents ABS residue from charring at the higher temperature before it has been displaced. Your purging compound selection should be a grade whose thermal window spans both materials; if no single grade covers the gap, use an intermediate polyolefin flush before the mechanical purge.
Shutdown purging serves a fundamentally different purpose. The goal is not to transition to a new material — it is to seal the barrel with a thermally stable compound that prevents oxidation and carbon formation during idle periods. After thoroughly cleaning the barrel with normal purge cycling, charge the entire barrel with fresh compound, stop screw rotation, and turn off all heaters. The compound solidifies inside the barrel, displacing oxygen and shielding metal surfaces from the degradation that occurs when production resin sits at elevated temperatures.
Startup purging reverses this process. Power the machine on, raise temperatures to the recommended operating range, and allow a proper heat soak before rotating the screw — rotating a screw that is not fully heat-soaked risks breaking a screw tip. Once temperatures stabilize, slowly begin screw rotation and purge the shutdown compound out of the barrel. If any contamination appears in the discharged material, introduce additional fresh compound and flush until clean. Then bring in your production resin and begin normal operation.
Carbon and Black-Speck Remediation
Carbon remediation is the most aggressive purging scenario, and it demands patience. The deposits you are fighting have cross-linked and mechanically interlocked with the barrel's surface roughness over days, weeks, or even months of production. A quick flush will not cut it.
Start by raising barrel temperatures 10 to 20 °F above your normal processing range. This extra heat softens the outermost layer of carbonized buildup, giving the mechanical compound's abrasive fillers something to grip and shear away. Be careful not to exceed the purging compound's upper temperature limit — degrading the compound creates new contamination rather than removing old deposits.
Increase backpressure toward the upper end of your machine's safe range. Cycle 5 to 8 short shots, then stop the screw and hold for 3 to 5 minutes. Resume short-shot purging. Repeat this soak-and-purge cycle multiple times — three to five rounds is common for moderate carbonization.
After each round, collect a purge patty on a clean white surface. Examine it for black specks, dark streaks, or embedded particles. For critical applications, use a magnifying loupe or low-power microscope. Remediation is complete when consecutive patties show no visible specks under magnification and the extrudate maintains a clean, uniform appearance across multiple shots.
If contamination persists after five or more soak-and-purge cycles with adequate compound volume, the root cause may not be surface carbon alone. Worn screw flights, a failing check ring, or barrel-wall deterioration can harbor deposits in places no purging compound can reach — a topic addressed in the next section.
Extrusion and Blow Molding Considerations
Everything discussed so far applies primarily to injection molding, where the reciprocating screw and shot-based cycle create natural opportunities for short-shot purging. Extrusion and blow molding introduce different mechanics.
In extrusion, the screw operates continuously rather than reciprocating. There are no discrete "shots" to cycle. Instead, you introduce the purging compound and vary screw speed throughout the process — alternating between high and low RPM to create fluctuating shear that dislodges contamination more effectively than a steady flow. Stopping the screw periodically allows the compound to settle into dead areas before resuming rotation. The die head adds residence volume that must be flushed as well; expect to use more compound than the barrel calculation alone suggests.
Blow molding adds yet another variable: accumulator heads. These large-volume chambers hold melt before parison formation, and residual material inside the accumulator acts as a secondary contamination reservoir. Purging compounds for extrusion and blow molding applications need to account for this additional residence volume when calculating total dosage. Failing to flush the accumulator fully is a common reason why contamination reappears in the first few parisons after a changeover.
Regardless of the specific process type, the underlying principle remains the same: match the compound's viscosity and temperature to the outgoing material, generate enough shear and pressure to displace contamination, and verify cleanliness visually before introducing production resin.
These procedures cover the scenarios you will face most often. Yet even with perfect technique and the right compound, certain situations consistently resist cleaning — and knowing when a mechanical purging compound is the wrong tool for the job prevents wasted effort and points you toward the approach that will actually solve the problem.
When NOT to Use Mechanical Purging Compounds
Every tool has boundaries, and pretending otherwise leads to wasted compound, lost machine time, and mounting frustration. A mechanical purging compound is the right choice for a wide range of cleaning challenges — but it is not the right choice for every cleaning challenge. Recognizing those boundaries before you load the hopper saves far more money than discovering them after three failed purge cycles.
Equally important, some defects that look like contamination have nothing to do with residual resin at all. Reaching for any purging compound — mechanical, chemical, or hybrid — when the real culprit is elsewhere on the machine is one of the most expensive habits on the production floor.
Complex Hot-Runner and Micro-Channel Geometries
Hot-runner systems are where mechanical grades hit their hardest limitation. The same high viscosity that makes these compounds such effective barrel scrubbers works against them inside narrow manifold channels, valve-gate orifices, and micro-mold flow paths. Tight clearances simply do not allow a thick, filler-laden melt to develop the displacement force needed for effective cleaning.
Dead spots make the problem worse. Many hot-runner designs include areas of low or zero flow — stagnation zones where material sits and eventually degrades. A high-viscosity mechanical compound follows the path of least resistance through the manifold, bypassing those pockets entirely. The contamination stays put, and the processor wonders why black specks keep appearing in cavities fed by specific gates.
Industry guidance reinforces this point. Hot-runner purging experts caution that glass-filled mechanical grades are generally not recommended for hot runners or highly polished molds, and that processors should always verify minimum gate clearances before attempting to push any purge compound through the manifold system. When contamination concentrates in specific gate areas, closing off unaffected gates and running high-velocity short shots through each affected gate individually can improve localized cleaning — but even this technique has limits in extremely tight geometries.
Chemical purge compounds offer a genuine advantage here. Their foaming action generates gas expansion that pushes cleaning material into dead spots, stagnation zones, and low-flow manifold passages where a viscous mechanical melt physically cannot reach. If your contamination problem lives inside the hot runner rather than the barrel, a chemical or hybrid grade is likely the better injection molding purging method for that specific job. You can still use a mechanical compound for the barrel and screw, then switch to a chemistry-driven product for the manifold — a two-stage approach that plays to each type's strengths.
Extreme-Temperature and Specialty Resin Scenarios
Ultra-high-temperature polymers push mechanical compounds to their thermal ceiling. PEEK processed above 370 °C (roughly 700 °F), PEI blends running near 400 °C, and certain liquid-crystal polymers demand barrel temperatures that exceed the thermal stability of standard mechanical formulations. At those extremes, the carrier resin in a standard grade loses viscosity rapidly — or worse, begins to degrade and char, turning the purging compound itself into a contamination source.
Purpose-built high-temperature mechanical grades do exist for this range, as discussed in the resin-compatibility section. However, even these specialized formulations have an upper boundary, and processors working at the very top of that boundary should verify performance with trial runs rather than assuming the datasheet numbers translate perfectly to their specific machine and cycle conditions.
Chemically sensitive resins introduce a different concern. Certain medical-grade or optical-grade polymers may interact unpredictably with the mineral or glass-fiber fillers present in mechanical formulations. Residual filler particles — even in trace amounts — can create haze in transparent parts, trigger biocompatibility concerns in medical applications, or act as nucleation sites that alter crystallization behavior in semi-crystalline polymers. For these specialty scenarios, low-residue chemical compounds or unfilled purge packets designed specifically for sensitive applications may deliver a cleaner result with fewer downstream risks.
When the Root Cause Is Not Contamination
This is the limitation that costs processors the most money — not because the purging compound fails, but because purging was never the right response in the first place.
Imagine this: black specks appear in molded parts. The operator loads a mechanical purging compound and runs a full cleaning cycle. The specks return within 20 shots of production. Another purge cycle. Specks again. A third cycle with extra soak time and elevated temperature. Still specks. By now, the machine has been down for over an hour, compound inventory is depleted, and the actual problem — a worn check ring shedding metal particles, a blocked vent causing localized burn marks, or undried hygroscopic resin flashing into splay — has not been touched.
Purging compounds cannot fix defects that originate outside the contamination pathway. Before committing to a purge cycle, especially a repeat one, check for these warning signs that the root cause is something else entirely:
- Consistent defect location tied to gate or vent position: If burn marks or discoloration always appear in the same spot on the part — particularly near the last area to fill or at a vent location — trapped gas and inadequate venting are far more likely culprits than barrel contamination. No amount of purging will fix a plugged vent.
- Moisture splay patterns: Silvery streaks radiating from the gate, especially in hygroscopic resins like nylon, PC, or ABS, typically indicate insufficient material drying — not residual contamination. Pre-drying hygroscopic materials and checking dryer performance resolves splay that purging never will.
- Dimensional variation unrelated to color or material: If parts warp, sink, or shift dimensionally without any corresponding change in resin, color, or visible contamination, the issue likely lives in cooling-channel balance, mold temperature control, or packing-pressure profiles — none of which a purging compound can influence.
- Defects that appear immediately after a verified clean purge: When you have just completed a thorough purge with clean extrudate and contamination reappears within the first few production shots, the source is almost certainly downstream of the barrel — inside the hot runner, at a worn nozzle tip, or within the mold itself.
- Metallic specks or unusual particle shape: Carbon contamination typically appears as soft, dark, irregularly shaped flakes. Hard, shiny, or metallic-looking particles suggest wear debris from screw flights, barrel liner, or check-ring components — a hardware problem that requires inspection and possible replacement, not more purging.
The disciplined approach is straightforward: diagnose first, purge second. Systematic troubleshooting methodology calls for preserving good and bad samples, recording cavity and machine data, and classifying the symptom before adjusting any variable. Changing multiple settings — or launching into a purge cycle — before identifying the mechanism hides the true cause and makes the next corrective action impossible to evaluate.
This discipline pays off quickly. Every unnecessary purge cycle burns 15 to 45 minutes of machine time, consumes compound inventory, and generates scrap — all without moving one step closer to solving the actual defect. A five-minute root-cause check before reaching for any purging compound eliminates the most expensive waste of all: effort aimed at the wrong problem.
Of course, sometimes the diagnosis does point back to contamination — and the purge still does not work. When cycle after cycle of properly dosed, properly executed purging fails to produce clean extrudate, the problem may have shifted from the compound to the hardware it runs through.
How Barrel and Screw Condition Affects Purging Performance
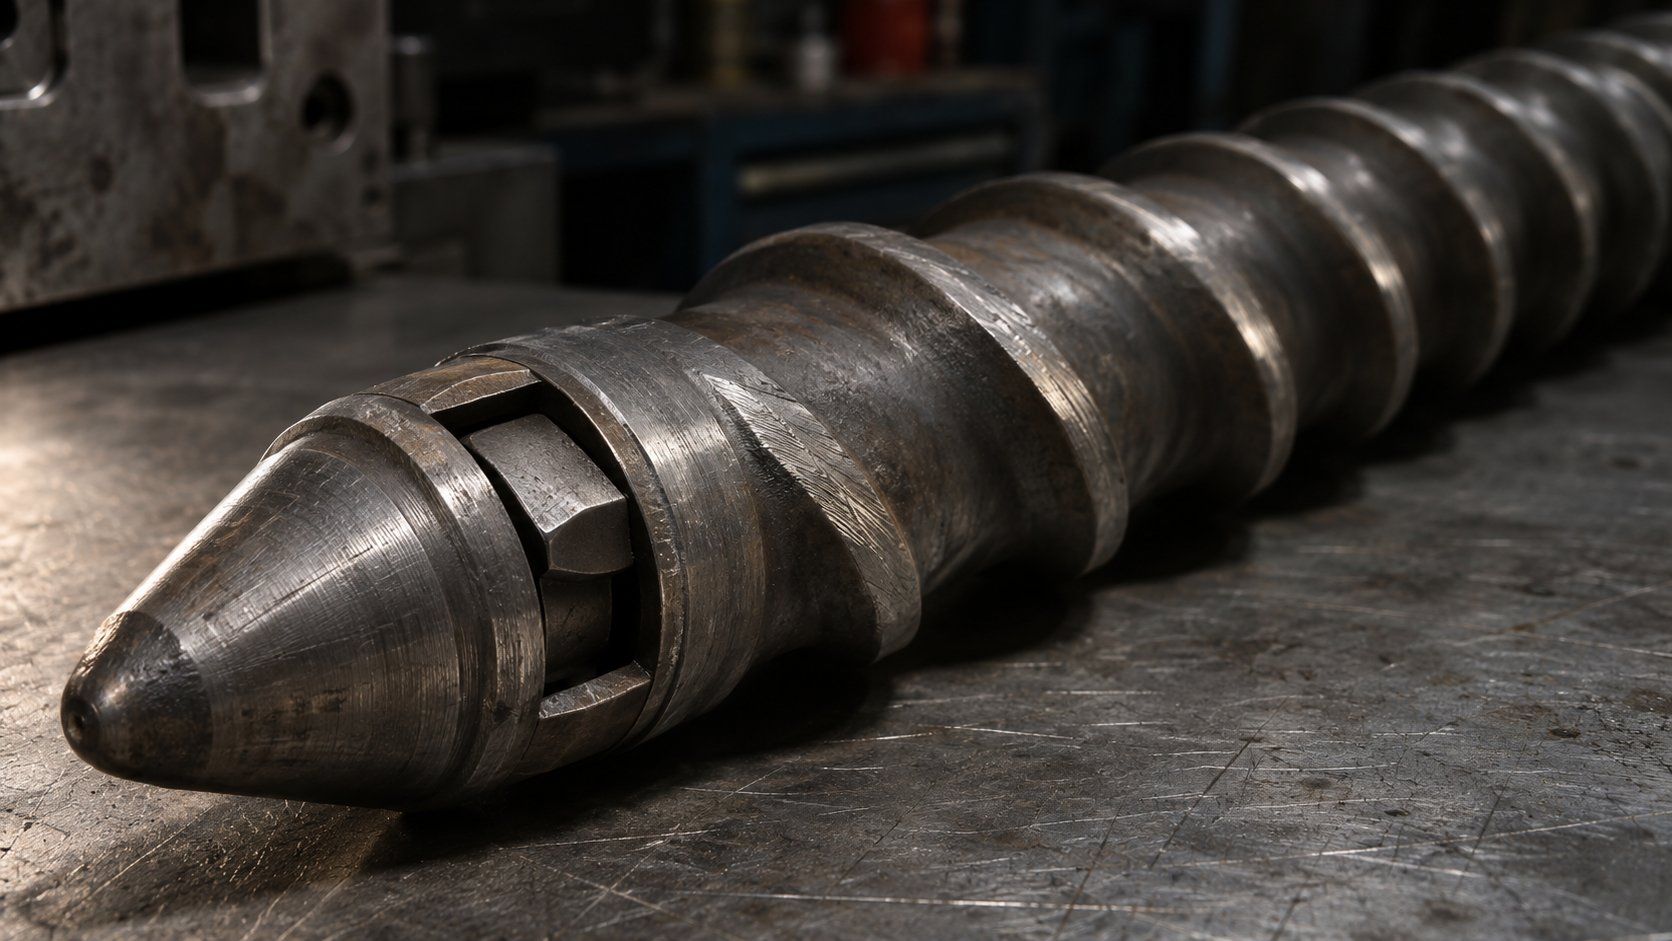
A mechanical purging compound depends entirely on shear stress and viscous displacement to clean. Both of those forces originate from the interaction between the compound and the metal hardware it moves through — screw flights, barrel bore, check ring, and nozzle passages. When that hardware degrades, the physics degrade with it. No formulation, no matter how well engineered, can compensate for a plasticizing system that has worn past its functional limits.
This is the connection most troubleshooting guides overlook. Processors blame the compound, switch brands, increase dosage, extend soak times — and still see contamination return within a few production cycles. The missing variable is not the purge. It is the machine.
How Screw Wear Undermines Purge Effectiveness
Screw flights are precision-machined to maintain a specific compression ratio — the relationship between the channel depth in the feed zone and the channel depth in the metering zone. That compression ratio is what generates the pressure gradient a mechanical purging compound needs to develop its full cleaning force along the barrel wall.
As flight lands wear down, the gap between the screw outer diameter and the barrel bore widens. Material slips over the flights instead of being compressed forward. The result is a measurable drop in shear stress — exactly the force your purge compound relies on to dislodge pigment films and carbonized deposits. You will notice longer purge times, more compound consumed per changeover, and contamination that seems to clear only to reappear a few shots into production.
The check ring compounds the problem. A worn or damaged non-return valve allows compound to flow backward past the screw tip during injection, bleeding off the pressure that should be driving material through the nozzle at high velocity. Industry analysis confirms that a leaking check valve causes inconsistent shot sizes, erratic backpressure behavior, and backflow that mixes contaminated melt back into the screw channel — all conditions that directly sabotage purge performance. Whether you are running a polyethylene purging compound for a commodity color change or an aggressive carbon-remediation cycle in engineering resins, the outcome is the same: the compound cannot build the displacement force it was designed for.
If purge-after-purge fails to clean the barrel despite correct dosage and parameters, the plasticizing hardware itself is very likely the bottleneck — not the compound selection.
Barrel Condition and Material-Retention Zones
Barrel wear follows a similar pattern but creates a different class of problem. Over thousands of hours of operation, abrasive resins — glass-filled nylons, mineral-loaded compounds, even standard slide purging compound formulations with aggressive fillers — erode the barrel's internal surface. What starts as a mirror-smooth bore develops micro-pockets, scoring, and rough patches where degraded resin accumulates and bonds.
These retention zones act like tiny reservoirs. During production, they fill with molten polymer that degrades over time into carbonized deposits. During purging, the high-viscosity compound flows past these pockets without fully penetrating them — the geometry is simply too small and irregular for bulk displacement to reach. The contamination stays anchored, leaching back into the melt stream within a few production cycles and producing the intermittent black specks that drive operators to purge again and again.
The same principle applies in demanding sectors like aerospace purging compounds applications, where zero-defect standards leave no room for recurring contamination. Even the most thorough mechanical purge protocol cannot fully scour a barrel whose internal surface has deteriorated beyond normal tolerances. The contamination will keep returning until the root cause — the worn bore itself — is addressed.
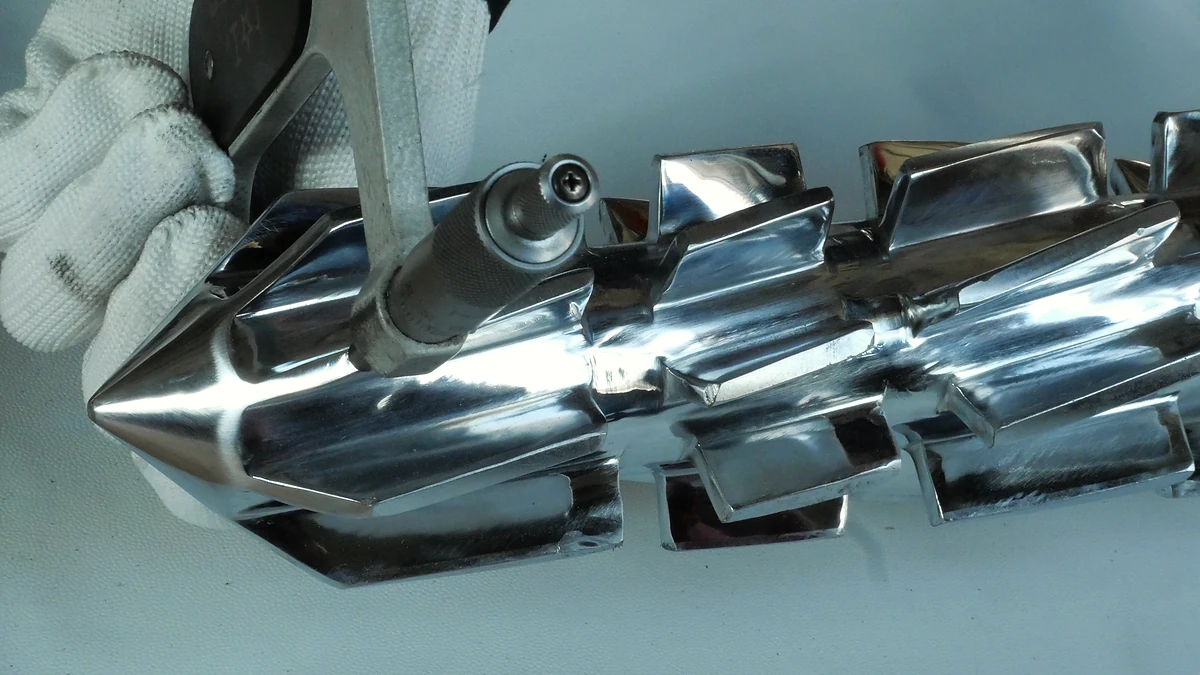
When repeated purging fails to resolve contamination despite verified procedures and adequate compound volume, evaluating the screw and barrel for replacement becomes a logical next step. Suppliers such as NANHAIYA manufacture custom injection molding screw barrels engineered around specific machine specifications, resin characteristics, and shot requirements. Their technical review process considers screw geometry, existing wear patterns, melting efficiency, mixing performance, and material-retention concerns — matching the replacement hardware to the actual application rather than offering a generic off-the-shelf fit. This type of tailored assessment is one option among broader hardware-evaluation approaches, but the underlying principle holds regardless of supplier: effective purging and well-maintained plasticizing hardware are complementary, not interchangeable.
A purging program is only as effective as the hardware it runs through — worn screws, failing check rings, and deteriorated barrel bores undermine even the best mechanical purging compound before it has a chance to work.
Recognizing when hardware condition is the limiting factor shifts the conversation from reactive purging — throwing more compound at a persistent problem — toward a preventive maintenance framework that keeps both the compound and the machine working at full capability. That broader program, including scheduled purging cadences, plasticizing-system inspections, and cost tracking, is where long-term contamination control actually lives.
Building a Preventive Purging and Maintenance Program
Reactive purging — waiting until black specks show up in parts or a color change drags on for forty-five minutes before reaching for compound — is the most expensive way to manage contamination. Every unplanned purge cycle interrupts production, generates scrap, and burns through compound inventory without a clear baseline to measure against. It is the manufacturing equivalent of changing your oil only after the engine starts knocking.
A preventive approach flips that equation. Scheduled purging at defined intervals, combined with routine plasticizing-system inspection and disciplined cost tracking, turns injection molding purging from a fire drill into a controlled maintenance activity — one that actually reduces total spend over time rather than spiking it unpredictably.
Establishing a Scheduled Purging Cadence
The shift from reactive to preventive starts with a simple question: how often should you purge, independent of whether a visible problem exists?
The answer depends on your production profile. A facility running the same natural-colored polyolefin around the clock may only need periodic preventive purges to clear early-stage carbon accumulation — perhaps weekly or at every scheduled maintenance window. A shop cycling through four or five colors per shift on engineering resins needs a purge protocol embedded into every changeover, plus a deeper carbon-remediation cycle on a monthly cadence.
What matters more than the specific interval is consistency. A plastic purge performed routinely at defined touchpoints prevents the slow accumulation of degraded resin that eventually triggers emergency remediation. Think of it as compound interest working in your favor — small, regular investments in cleaning prevent the massive lump-sum cost of a barrel packed with carbonized deposits.
How do you know whether your purging program is actually working? You measure it. The following metrics give maintenance teams and production supervisors a clear, shift-by-shift picture of purging performance over time:
- Purge compound used per changeover — tracked by weight or number of barrel volumes. A rising trend signals either increasing contamination severity or declining equipment condition.
- Number of shots to clean — count every purge shot from first introduction of compound to verified clean extrudate. This is your most direct efficiency metric.
- Scrap produced during transition — weigh or count all rejected parts produced between the last good part of the old run and the first good part of the new run. This captures the true cost of each changeover.
- Downtime minutes per changeover — clock the total elapsed time from production stop to production restart. Combine with scrap data to calculate changeover cost in dollars per event.
Logging these numbers consistently — even on a simple spreadsheet — reveals patterns that intuition alone cannot detect. You might discover that one particular machine consistently takes twice as long to purge as an identical press running the same resin. Or that Monday-morning startups after weekend shutdowns consume three times the compound of mid-week color changes. Each pattern points toward a specific, actionable root cause: a worn screw on that troublesome press, or an inadequate shutdown-sealing procedure that allows weekend oxidation.
As purging specialists have argued, the mindset shift from viewing purging as a task to recognizing it as a proactive investment changes the entire cost dynamic. Once the benefits of consistent, correctly executed purging are understood, what once looked like an expense reveals itself as a savings opportunity — through minimized downtime, lower scrap rates, and extended intervals between emergency maintenance events.
Integrating Purging with Plasticizing-System Maintenance
A purging program does not exist in isolation. It sits inside a broader maintenance ecosystem that includes periodic screw and barrel inspection, check-ring assessment, nozzle-tip evaluation, and heater-band verification. Neglecting any of these undermines even the most disciplined auto purging schedule.
Consider building purging checkpoints into your existing preventive-maintenance calendar:
- Every changeover: Execute the standard purge protocol, log metrics, and visually inspect the last purge patty for anomalies.
- Monthly (or every 500 operating hours): Perform a deeper carbon-remediation purge with soak-and-purge cycling, regardless of whether black specks are visible. Compare shot-to-clean counts against baseline data. If counts are trending upward, flag the machine for hardware inspection.
- Quarterly (or semi-annually for unfilled resins): Pull the screw for visual inspection. Measure flight-land outer diameter against the original specification to quantify wear. Check the barrel bore with a bore gauge. Inspect the check ring for scoring, wear, and sealing integrity. Screw and barrel maintenance experts recommend establishing wear trends over multiple inspection intervals so that replacements can be scheduled proactively rather than reactively — before wear reaches the threshold where purging effectiveness collapses.
When inspection reveals wear beyond acceptable limits — flight-land clearance doubled from original spec, barrel bore out of round, or a check ring that no longer holds backpressure — sourcing replacement components tailored to the specific machine and resin requirements restores the compression, shear, and sealing performance that mechanical purging compounds depend on. Manufacturers like NANHAIYA offer custom injection molding screw barrels engineered around machine specifications, resin characteristics, and shot requirements, with a technical review covering screw geometry, melting efficiency, mixing performance, and material-retention concerns. Restoring plasticizing hardware to spec is not an alternative to purging — it is what makes purging work the way it should.
Evaluating the Economics of Your Purging Program
Every purging decision carries a cost — and a return. The goal is not zero contamination at any price. It is an optimized balance between purging investment and production efficiency, where every dollar spent on compound, downtime, and labor delivers a measurable reduction in scrap, rejects, and changeover duration.
Imagine two scenarios. In the first, a processor skips preventive purging to save on compound cost, only to face a two-hour emergency remediation when carbon specks contaminate a critical run — burning through five times the compound that scheduled purging would have used, plus the scrap from two hours of rejected parts. In the second, a processor purges aggressively after every single cycle regardless of contamination risk, consuming compound on transitions that barely needed it and adding fifteen unnecessary minutes to every changeover.
Both extremes waste money. The sweet spot lives in the data you have been collecting. Track compound cost per changeover against the scrap savings from faster, cleaner transitions. Monitor how changeover duration trends as your team refines procedures and builds familiarity with the compound's behavior on each machine. Watch for diminishing returns — the point where additional purge shots produce no visible improvement in extrudate quality, signaling that you have reached practical cleanliness and further effort adds cost without value.
Over time, a well-managed purging program pays for itself several times over. Reduced scrap from cleaner transitions, shorter changeover windows that free up machine capacity, extended intervals between screw pulls, and fewer emergency shutdowns all contribute to a return that far exceeds the line item for compound purchases. The processors who capture those returns are not the ones spending the most on purging material — they are the ones who measure, schedule, and integrate purging into a maintenance strategy where every component, from the compound in the hopper to the screw flights turning inside the barrel, works together toward the same goal: consistent, contamination-free production.
Frequently Asked Questions About Mechanical Purging Compounds
1. What is the difference between a mechanical and a chemical purging compound?
A mechanical purging compound cleans through physical force — high-viscosity displacement, shear stress, and abrasive scrubbing fillers — requiring no soak time and leaving no reactive residue. A chemical purging compound uses heat-activated agents that decompose inside the barrel to produce foaming gases, expanding into dead spots and micro-channels that viscous mechanical melts cannot reach. Mechanical grades offer broader resin compatibility and simpler handling at lower cost per purge, while chemical grades excel in complex hot-runner manifolds and tight valve-gate geometries where gas expansion is needed to dislodge thin-film contamination.
2. How much mechanical purging compound should I use per changeover?
Dosage depends on contamination severity and barrel capacity — which is typically 2x to 2.5x your machine's maximum shot size, not the shot size itself. For light contamination like a same-family color change, 1 to 1.5 barrel volumes is usually sufficient. Moderate contamination such as dark-to-light transitions calls for 2 to 3 barrel volumes. Heavy carbon remediation or large temperature-gap resin transitions may require 3 to 5 barrel volumes combined with soak-and-purge cycling. Under-dosing is the most common processor mistake — it dilutes the compound before cleaning is complete, leading to repeated purges that consume more total material than a single properly dosed pass.
3. Can I use a mechanical purging compound in hot-runner molds?
Mechanical purging compounds have limited effectiveness in hot-runner systems. Their high viscosity and abrasive filler content make it difficult for them to flow through narrow manifold channels, valve-gate orifices, and stagnation zones where contamination accumulates. Glass-filled mechanical grades are generally not recommended for hot runners or highly polished molds. For hot-runner cleaning, chemical or hybrid purging compounds that produce foaming action to expand into dead spots are typically more effective. A practical two-stage approach uses a mechanical compound for the barrel and screw, then switches to a chemical grade for the manifold system.
4. Why does my barrel still show contamination after multiple purge cycles?
Persistent contamination after repeated, properly executed purging often points to worn plasticizing hardware rather than an inadequate compound. Worn screw flights reduce the compression ratio that generates shear force, while a damaged check ring allows compound to flow backward instead of building displacement pressure. Barrel-wall erosion creates micro-pockets where degraded resin accumulates beyond the reach of any purge. If shot-to-clean counts keep rising despite correct dosage and parameters, pulling the screw for inspection and measuring barrel bore tolerances will often reveal wear as the true bottleneck. Restoring hardware to spec — through custom replacement screw barrels matched to your machine and resin — is what makes purging effective again.
5. What backpressure and screw speed settings work best for mechanical purging?
Elevated backpressure is the single most influential parameter during a mechanical purge because it compresses the high-viscosity melt against barrel walls and forces compound into low-flow zones behind the check ring and around the nozzle tip. A practical starting range for most injection molding machines is 100 to 200 psi of hydraulic backpressure, adjusted within your machine's safe limits. Screw speed should be moderate — high enough to generate rotational shear across the flights but not so fast that compound passes through without adequate surface contact. Start at your machine's mid-range RPM and adjust based on visual cleanliness of the extrudate. Barrel temperatures should match or slightly exceed the outgoing resin's processing range to soften adhered deposits.
Written by
Nanhaiya Technical Team
Zhoushan Nanhaiya Plastic Machinery Co., Ltd.
The Nanhaiya technical team supports screw and barrel manufacturing projects through application review, technical communication, custom manufacturing coordination, and production and quality control.
Discuss Your Application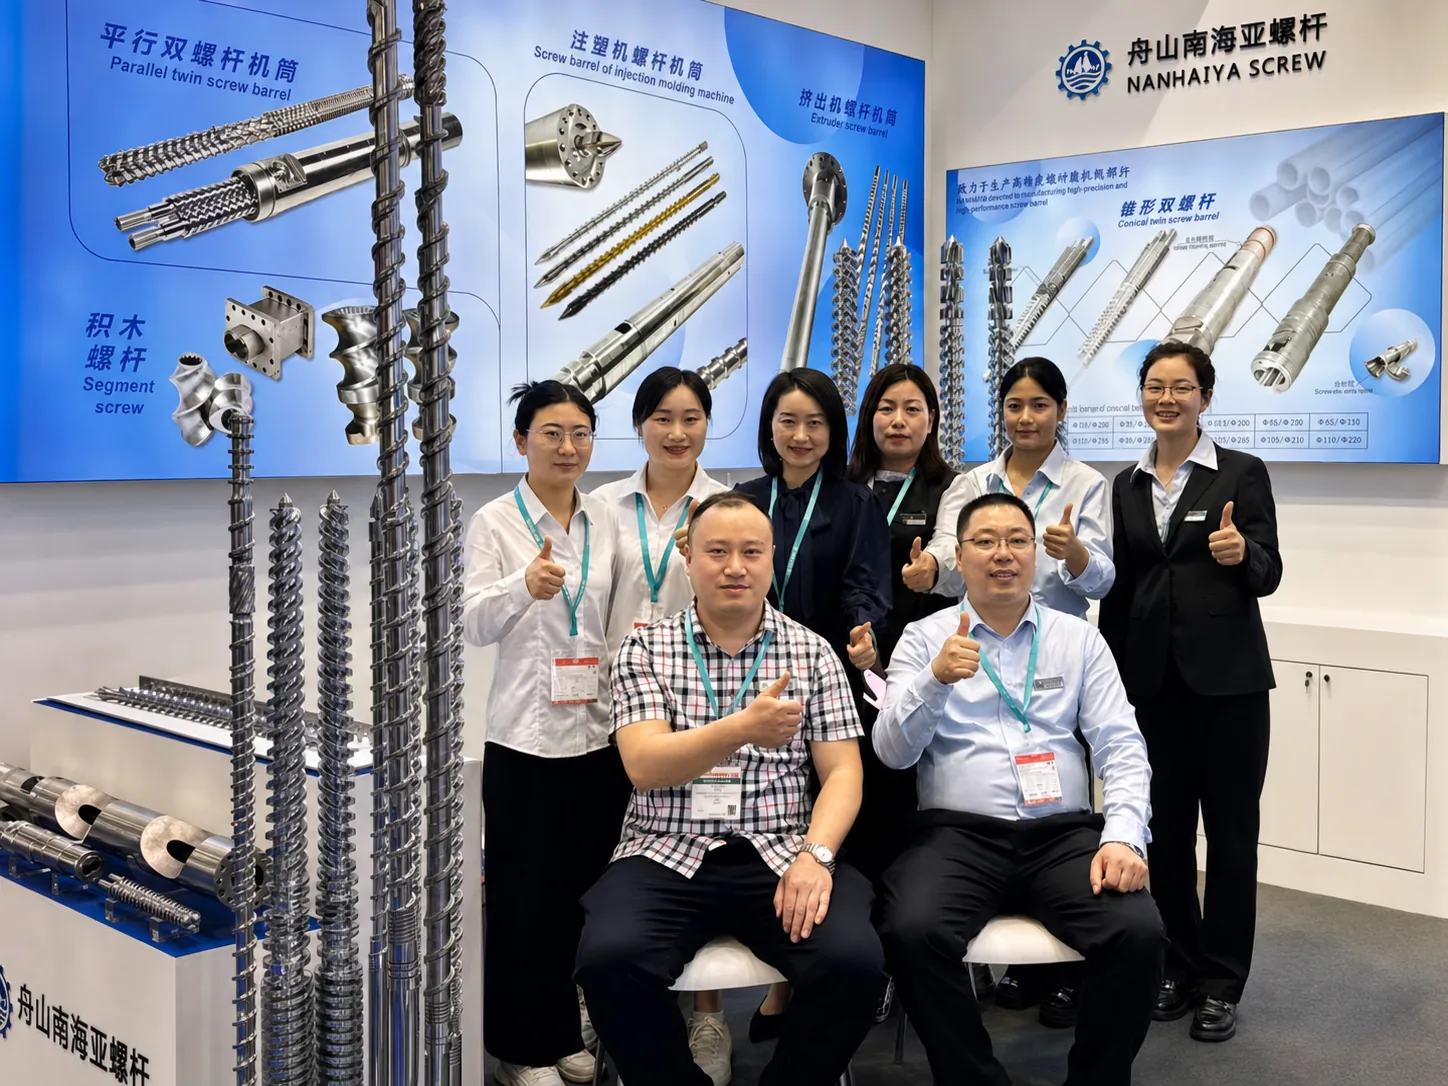
Related Articles
More insights on screw barrel technology and plastics processing.
Purging Compound Decoded: Barrel Chemistry To Bottom-Line Savings
Nov 5, 2026
Learn how purging compounds clean barrels, screws, and hot runners. Compare chemical vs mechanical types, step-by-step procedures, selection tips, and cost savings.
Read Article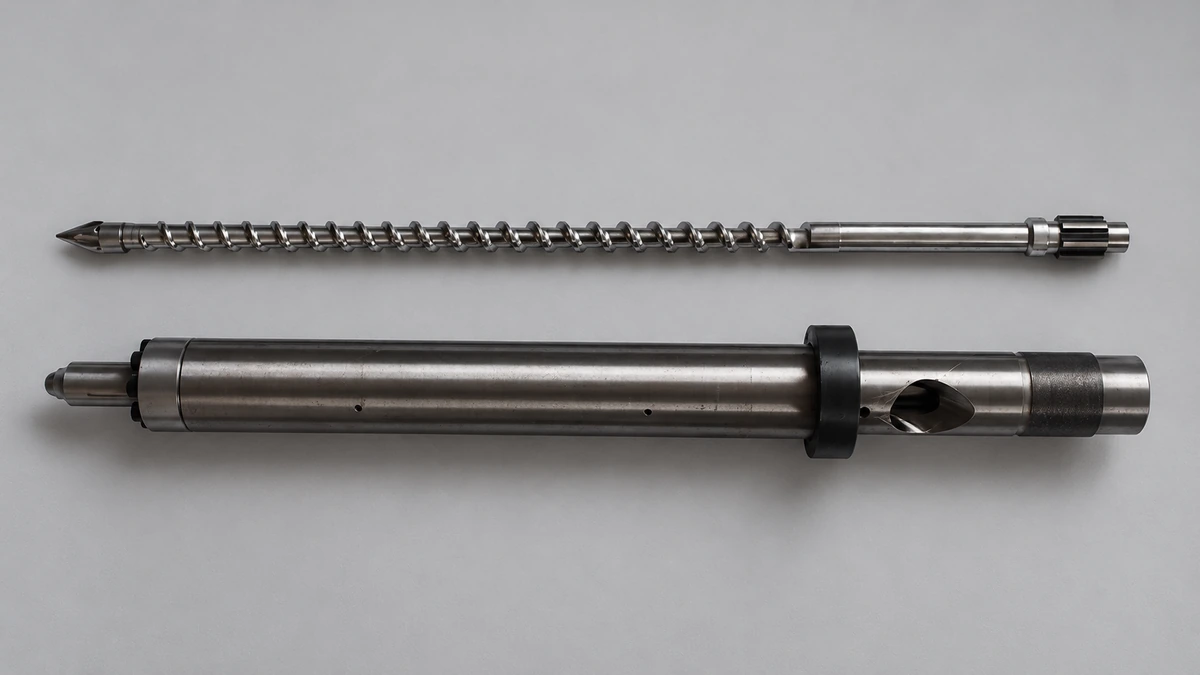
Why Your Injection Molding Back Pressure Is Costing You Parts
Nov 5, 2026
Learn how injection molding back pressure affects melt quality, cycle time, and part defects. Get resin-specific settings, troubleshooting tables, and a scientific optimization procedure.
Read Article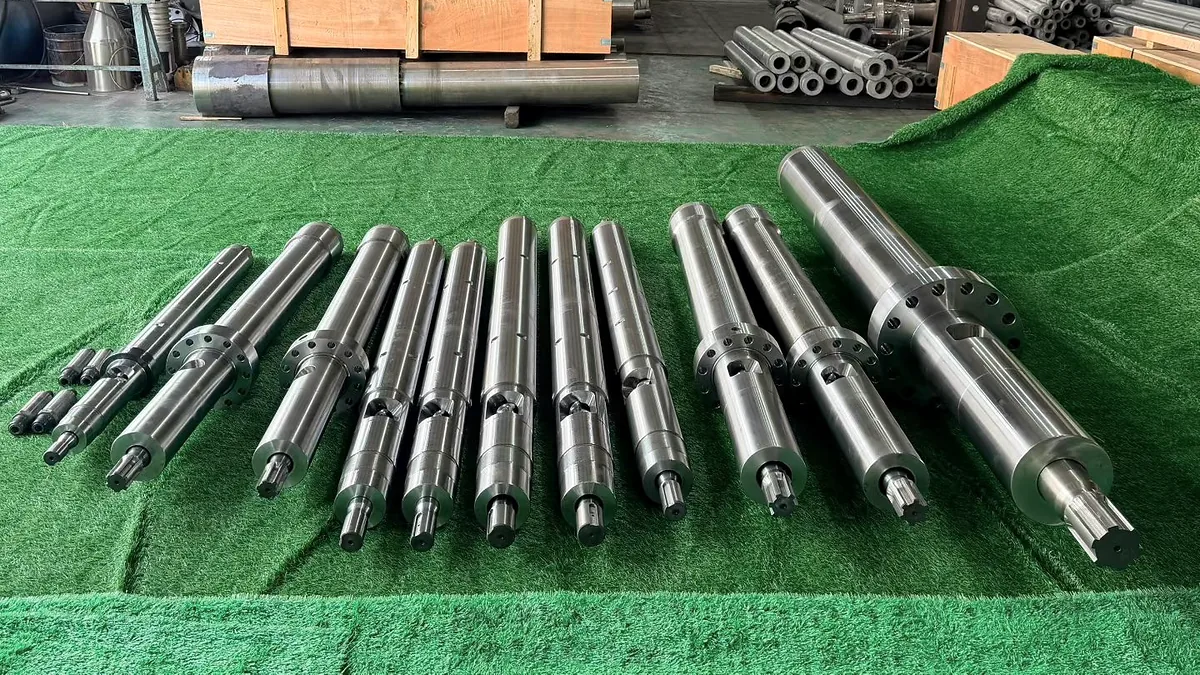
How Injection Molding Purging Compound Actually Cleans Your Barrel
Nov 5, 2026
Learn how injection molding purging compounds clean barrels, screws, and hot runners. Step-by-step procedures, compound types, common mistakes, and cost tips.
Read ArticleLooking for something else?
Search by material, symptom or product and jump straight to the relevant page.
These are navigation suggestions based on keyword matching — not a quotation, not a delivery commitment, and not a substitute for engineering review. Final specification is confirmed by our engineers against your drawings and processed material.
Need help with screw barrel selection?
Share your machine model, processed material and application. Our team can help with pricing and technical support.