

What Purging Compounds Are and Why Selection Decides the Outcome
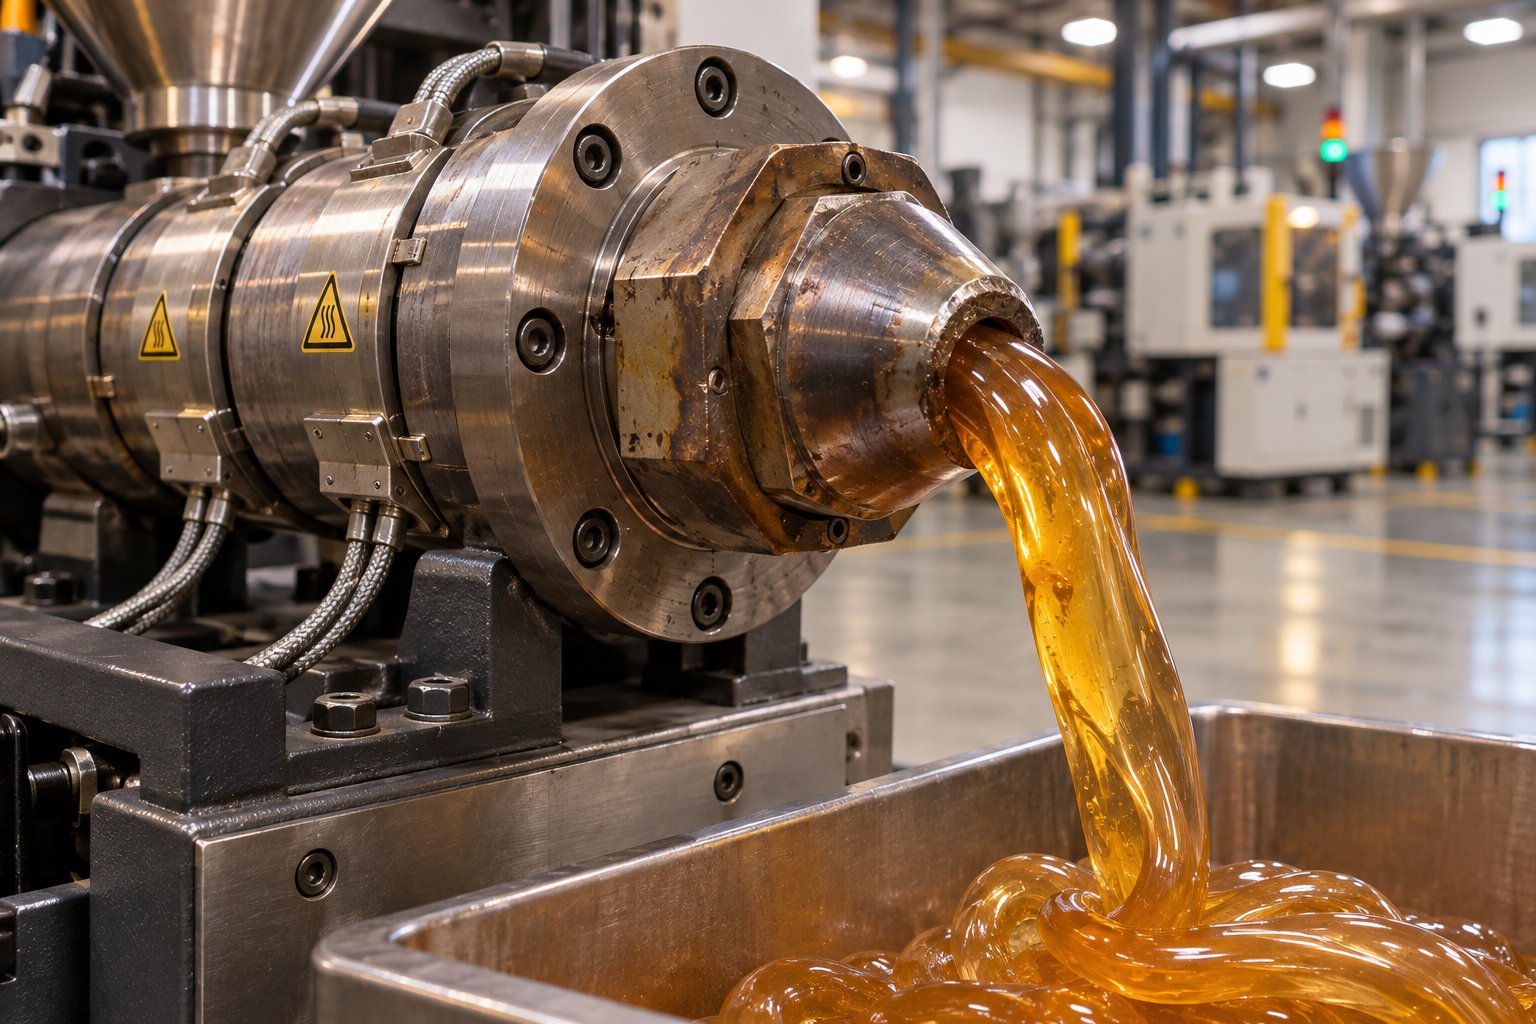
A purging compound is a specially engineered material designed to clean residual resin, colorant, and degraded polymer from the barrel, screw, and flow path of plastics processing equipment. Unlike production resins, purge compounds exist for one purpose: removing contamination that ordinary materials leave behind.
Most processors already know what a purging compound does. The real problem is how they choose one. Selection — not just usage — is the variable that separates a fast, effective cleaning cycle from a frustrating waste of time, material, and machine capacity. Yet most published guides on this topic come from compound manufacturers, and their advice naturally steers toward their own product lines. This guide takes a different approach. Every recommendation here prioritizes the processor's decision-making needs, not any single supplier's catalog.
What Purging Compounds Actually Do Inside the Barrel
Imagine the inside of a barrel after hours of processing dark-pigmented engineering resin. Residual polymer clings to screw flights, carbonized deposits sit in low-flow dead spots, and thin films of degraded purging material coat metal surfaces. A purging compound has to interact with all of it.
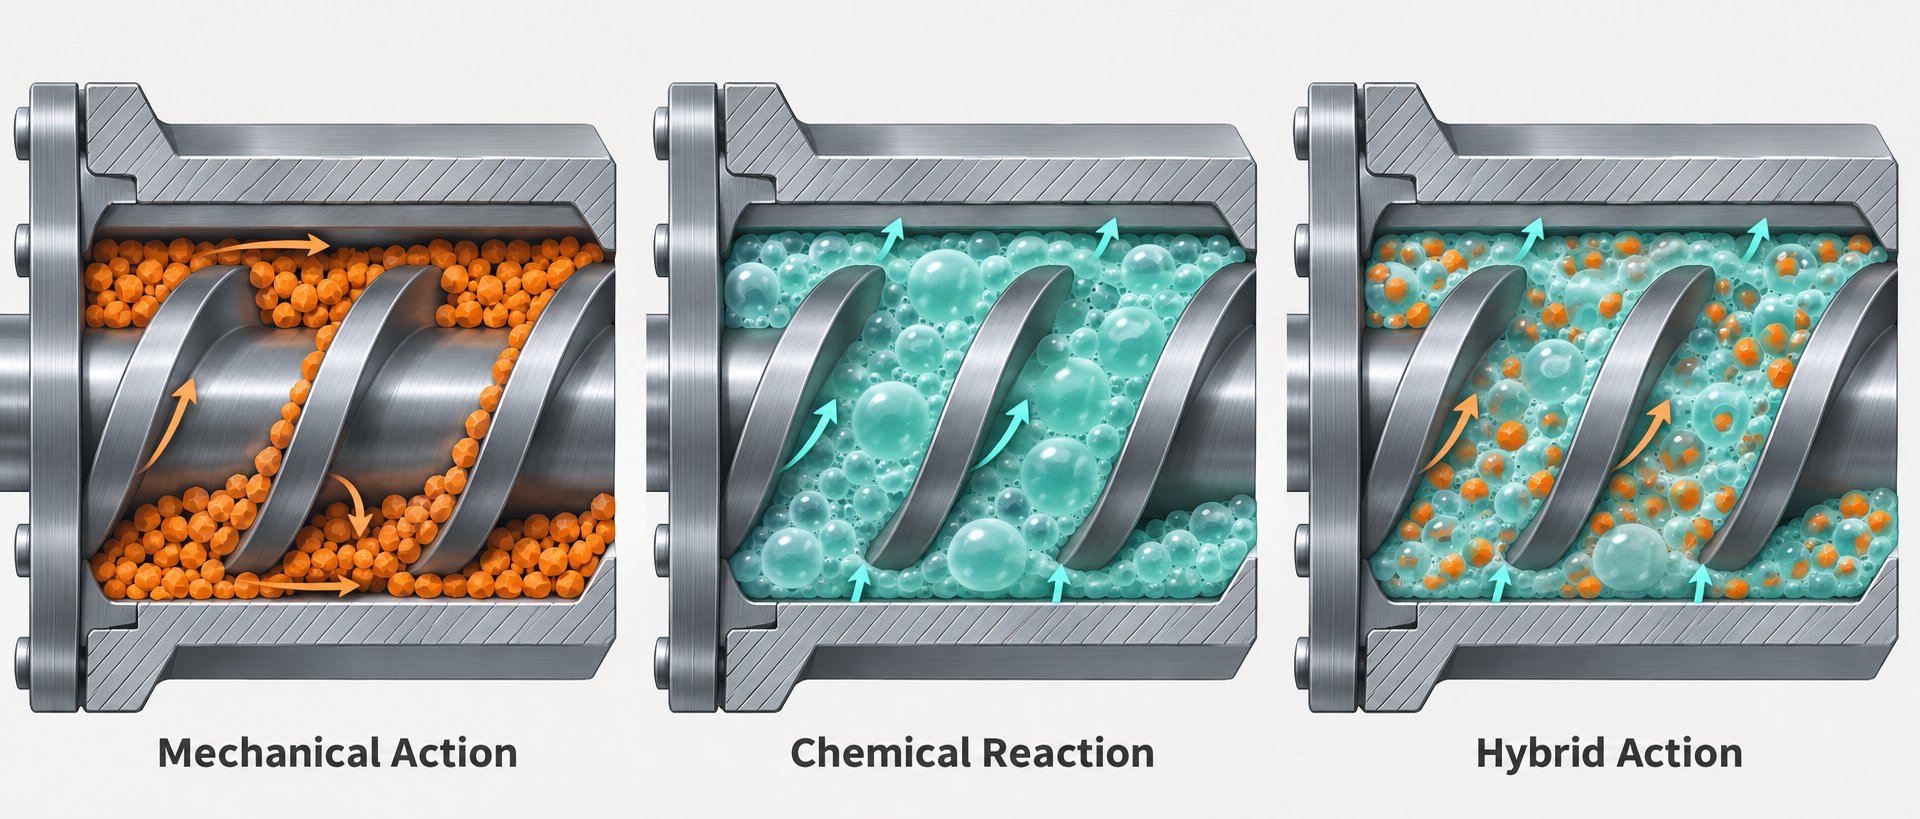
At a high level, purge compounds clean through three core mechanisms: physical scrubbing action that displaces residue through viscosity and shear, chemical reactions that break the molecular bond between degraded resin and metal surfaces, and foaming or gas expansion that reaches areas bulk flow alone cannot. Each mechanism suits different contamination and equipment scenarios — which is exactly why a one-size-fits-all approach to selection fails. The compound must match both the contamination type and the equipment geometry it needs to clean.
Why the Wrong Purging Compound Wastes More Than It Saves
Choosing the wrong compound does not just result in a mediocre cleaning cycle. It compounds costs in ways that are easy to overlook. Incomplete cleaning forces repeated purging cycles, burning through extra material and extending downtime. Residue left behind contaminates the next production run, generating startup scrap. In certain cases, an incompatible compound can even create safety hazards — a scenario processors working with PVC and POM-based materials should take especially seriously, as the wrong pairing can trigger a dangerous exothermic reaction inside the barrel.
Choosing a purging compound is a process engineering decision, not a purchasing shortcut.
The sections that follow break purging compound selection into a structured decision framework — from compound types and contamination categories to resin compatibility, temperature constraints, and equipment-specific variables. Each factor narrows the field, and skipping any one of them is where most selection mistakes begin.
Mechanical vs Chemical vs Hybrid Purging Compounds Compared
Every processor reaches the same crossroads eventually: you know you need a purging compound, but which type? The answer shapes everything — cycle time, cleaning effectiveness, material cost, and whether you'll be running clean parts or pulling the screw for a manual teardown. Before diving into specific selection variables, you need a clear picture of the fundamental categories available and what each one actually does inside your equipment.
The table below lays out the core comparison across the major types of purging compounds. Use it as a reference point, but keep in mind that each category contains a range of grades with different formulations — no single row tells the full story.
| Compound Type | Cleaning Mechanism | Best Use Cases | Temperature Range Suitability | Limitations | Equipment Compatibility |
|---|---|---|---|---|---|
| Mechanical (glass-filled or abrasive-filled) | Physical scrubbing via shear, pressure, and high-viscosity flow | Color changeovers, material transitions, loosely adhered residue | Broad range; depends on carrier resin (typically 180–340 °C) | May struggle with carbonized buildup in dead spots; abrasive grades can accelerate wear on softer metals | Injection molding, standard extrusion with active screw rotation |
| Chemical (heat-activated reactive agents) | Thermally triggered chemical reactions that break molecular bonds between residue and metal surfaces; often includes foaming action | Carbon and black-speck removal, degradation deposits, deep-cleaning maintenance | Activation dependent on temperature; most effective at mid-to-high processing temps | Requires a soak or dwell period (typically 5–30 minutes); may leave residue requiring a displacement flush | Extrusion, blown film, hot runners, manifolds, die heads, low-flow zones |
| Liquid / Concentrate | Chemical or surfactant-based cleaning; dispensed into hopper or blended with carrier resin on-site | Hot runner systems, clear and natural resin applications, areas where residue control and resin compatibility are critical | Determined by the carrier resin the processor selects for blending | Cleaning intensity may be lower for severe carbon deposits; requires accurate blending ratios | Injection molding, extrusion, blow molding — versatile across equipment types |
| Hybrid (mechanical + chemical) | Combined scrubbing action and heat-activated chemical reaction | Situations requiring both displacement speed and deep cleaning; moderate-to-severe contamination | Varies by formulation; generally covers a wide processing window | Newer category with fewer established grades; cost per unit often higher than pure mechanical | Injection molding, extrusion, blow molding — designed as multi-process solutions |
Mechanical Purging Compounds and When They Excel
Mechanical purging compounds are the workhorses of everyday color and material changeovers. They rely on physical scrubbing action — driven by screw rotation, shear forces, and high-viscosity fillers — to dislodge and flush out residual pigment, resin, and loosely adhered contamination. Think of them as the pressure washer of the purging world: effective through force and flow rather than chemical reaction.
Because they clean through movement, mechanical grades perform best in processes with active screw rotation and adequate back pressure — injection molding is the classic fit. Higher screw speed and back pressure directly increase their effectiveness. They don't require a soak cycle, which makes them faster to use and simpler to train operators on. For routine changeovers where the contamination isn't deeply bonded to metal surfaces, a mechanical compound often gets the job done quickly and at a lower per-use cost.
The limitations show up when contamination is more stubborn. Carbonized buildup that has oxidized and bonded to screw flights or barrel walls resists physical displacement alone. Dead spots — areas of low flow behind check rings, in mixing sections, or at the ends of barrier flights — are harder for a mechanically driven compound to reach. And abrasive-filled grades, while aggressive cleaners, demand careful evaluation. If the abrasive filler is harder than your barrel or screw surface, repeated use can accelerate wear over time. That trade-off is worth weighing before committing to an abrasive mechanical grade as your standard.
Chemical Purging Compounds and Their Reactive Advantage
Chemical purging agents take a fundamentally different approach. Instead of relying on physical force, they use heat-activated reactions to break the bond between degraded resin and metal surfaces. At processing temperature, active ingredients in the compound trigger foaming, gas generation, or surfactant action that penetrates areas mechanical flow alone cannot reach.
This reactive mechanism makes chemical grades especially effective for carbon removal, black-speck elimination, and cleaning equipment with complex flow paths — die heads, film dies, hot runner manifolds, melt pumps, and static mixers. The foaming and internal turbulence created during the chemical reaction allow the compound to push into negative-flow areas and dead spots where contamination accumulates over time. For processors running extrusion, blown film, or any system where screw shear alone doesn't reach every surface, chemical compounds often deliver a deeper, more thorough clean.
The trade-off is time. Chemical grades typically require a soak cycle — a period where the screw stops rotating, and the compound sits at temperature inside the barrel to allow the reaction to develop. Soak times generally range from 5 to 30 minutes depending on the grade and contamination severity. After the soak, screw rotation resumes to flush the loosened material. Some chemical compounds may also leave their own residue, requiring a brief displacement purge with production resin before the next run begins.
Two subcategories within this space deserve more attention than most guides give them. Liquid purging compounds are dispensed directly into the hopper and flow through the system in a fluid state, reaching tight geometries and thin-film areas that pelletized compounds may bypass. Concentrated purging compound grades, meanwhile, are blended with a carrier resin selected by the processor on-site. This gives the processor control over resin compatibility — a meaningful advantage in clear, natural, or specialty resin applications where any foreign residue is unacceptable. Both formats are underrepresented in typical selection advice, yet they fill real gaps that neither standard mechanical nor standard chemical pellets address on their own.
Hybrid Compounds and Emerging Formulations
Hybrid purging compounds combine mechanical scrubbing action with heat-activated chemical cleaning in a single formulation. The idea is straightforward: get the displacement speed of a mechanical grade along with the deep-penetration chemistry of a reactive grade, all in one product. Some hybrid formulations recommend a minimal soak time to activate the chemical component, while others can be used in a purely mechanical fashion and still deliver a degree of chemical cleaning effect.
This category is the newest of the three and continues to evolve. Hybrid grades can be a practical choice when a processor faces moderate-to-severe contamination but doesn't want the longer soak cycle of a fully chemical product. They're also useful in facilities that run both injection molding and extrusion — a single compound that adapts to different equipment profiles simplifies inventory and operator training.
Here's the honest takeaway, though: the mechanical-versus-chemical debate oversimplifies how real-world purging compound selection actually works. A compound category is a starting point, not a final answer. The correct choice depends on what kind of contamination you're cleaning, what equipment geometry it has to flow through, and what production resins are involved. Those variables — contamination type, equipment design, and resin compatibility — are the real selection drivers, and they're exactly what the next sections break down.
Selecting by Purging Purpose Instead of Product Label
Most processors pick a purging compound by reading a product label or scanning a supplier's recommendation chart. The compound category comes first, and the contamination problem gets squeezed into whatever that product can handle. That sequence is backwards. The more reliable approach flips the order entirely: define the cleaning task, then let that task dictate the compound characteristics you need.
Why does this matter? Because different types of purging compounds excel at fundamentally different jobs. A grade engineered for fast pigment displacement may accomplish almost nothing against baked-on carbon deposits. A compound formulated for deep chemical cleaning might be overkill — and too slow — for a straightforward color swap. When you start with the problem, the field of suitable options narrows quickly and logically.
Color Changeover Purging vs Carbon Removal Purging
Color changeovers and carbon removal sit at opposite ends of the cleaning spectrum, yet they're routinely treated as the same task. In a color changeover, the goal is speed and complete displacement of pigment from every surface in the flow path. The residue isn't chemically bonded to metal — it's clinging to barrel walls, screw flights, and nozzle passages through adhesion and mechanical trapping. Certain pigments, particularly dark blues, reds, and purples, are more aggressive at impregnating metal surfaces, which is why specialty purging compound formulations are often the only practical way to avoid hours of flushing and excessive scrap.
Carbon and black-speck removal is a different animal. Here, the contamination has oxidized, degraded, and chemically bonded to metal surfaces over extended processing time. Physical scrubbing alone often can't break those bonds — the compound needs reactive chemistry and dwell time to do its job.
The ideal compound characteristics for each purpose look nothing alike:
- Color changeover: High-viscosity base for maximum displacement force, fast cycle with no required soak time, strong shear-driven scrubbing action, clean transition with minimal residue left behind
- Carbon removal: Heat-activated chemical reaction to break oxidized bonds, foaming or gas expansion to reach dead spots and low-flow zones, soak period at processing temperature for full activation, effective on baked-on deposits that resist physical displacement
Treating these two tasks as interchangeable is one of the most common mistakes in purging compound selection — and one of the most expensive. A mechanical grade used for carbon removal often leads to repeated cycles that consume material and time without solving the problem. A chemical grade used for a simple color swap introduces unnecessary soak time and may leave its own residue requiring an extra flush step.
Shutdown and Startup Purging Demands
Shutdown and startup purging serve protective rather than corrective purposes, and they demand a different set of compound characteristics entirely. During shutdown, residual production resin sits stagnant inside the barrel at elevated temperature. Without intervention, that resin degrades, oxidizes, and carbonizes — creating the exact contamination that will plague the next production run.
Shutdown purging displaces production resin with a thermally stable compound that resists degradation during idle periods. Think of it as sealing the barrel against oxygen and thermal damage. One practical approach recommended by processing specialists involves filling the barrel with purge compound before weekend or holiday shutdowns, which eliminates oxygen exposure and prevents early-stage carbon buildup from forming while the machine sits idle.
Startup purging, on the other hand, must displace that protective compound and prepare the system for production resin. As controlled startup procedures emphasize, the barrel and hot runner need to be cleared of all residual material before new resin enters the system. Degraded purge material left behind during startup introduces contamination from the very first shot.
Both shutdown and startup compounds must maintain thermal stability across sustained temperature exposure. A compound that begins degrading at the barrel's idle temperature defeats its own purpose. Processors purging extruders face this challenge acutely, since extruder barrels often hold larger volumes of stagnant material across longer flow paths than injection molding barrels.
Preventive Maintenance Purging as a Scheduled Practice
Preventive purging takes a proactive approach. Instead of waiting for contamination to become visible in parts — black specks, color streaks, degraded material — the processor schedules purging cycles between production runs or at fixed intervals to keep buildup from accumulating in the first place.
The logic is straightforward: if contamination never reaches a severe stage, you don't need an aggressive compound to remove it. A milder, faster-acting grade can handle light residue effectively, with shorter cycle times and less material consumed per purge. Practical experience supports this. One case documented by a purging agents injection molding specialist illustrates the point well — after discovering that layers of old color had built up on the screw over ten months of production, a processor implemented a scheduled purge program that prevented the layering from recurring, eliminating the need for manual screw pulls entirely.
A typical preventive maintenance program might include mechanical purging of the screw and barrel as a baseline cleaning step, intermittent purging every two to three days during active production, dedicated shutdown and startup purges for extended idle periods, and periodic purging through the hot runner and manifold system to clear downstream contamination.
The key insight here is that the severity of contamination dictates the intensity of the compound required. Preventive purging reduces severity over time, which means your compound selection for scheduled maintenance cycles can be lighter and more cost-effective than the heavy-duty grades needed for reactive, crisis-driven cleaning.
Define the contamination problem first, then select the compound category — not the other way around.
This purpose-first framework reshapes the entire selection process. But even after identifying whether you need a color-change grade, a carbon-removal formulation, or a shutdown-protection compound, one critical variable still filters the field: the production resin itself. The carrier resin inside your purging compound must play well with whatever polymer it contacts — and for certain resin families, getting that wrong creates problems far more serious than a dirty barrel.
Resin Compatibility and Carrier Resin Matching
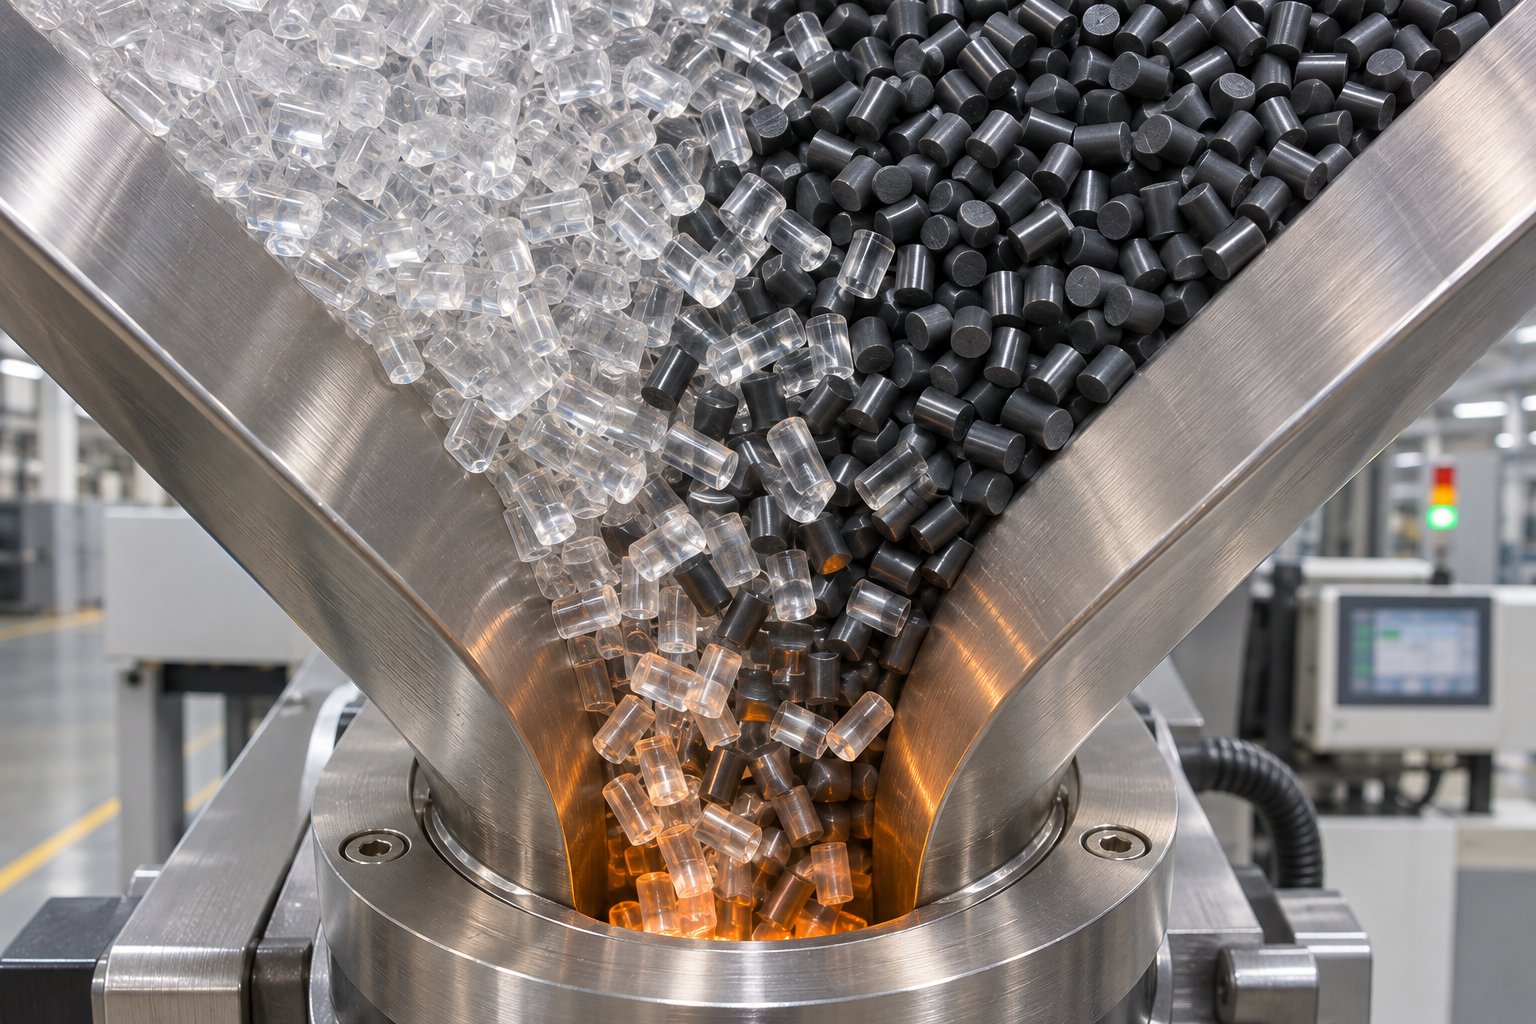
Every purge compound has a hidden ingredient that rarely gets the attention it deserves: the carrier resin. It's not an active cleaning agent. It's not an additive. It's the base polymer that holds the entire formulation together — and it quietly determines whether your purging cycle succeeds, fails, or introduces a brand-new contamination problem into the barrel.
Processors spend significant time evaluating cleaning mechanisms and compound categories, yet many never ask a basic question: what resin is this purging compound actually made from? That oversight can turn a routine changeover into a costly headache — or, in extreme cases, a genuine safety hazard.
Why the Carrier Resin Matters More Than You Think
The carrier resin is the backbone of any purge compound. It controls melt viscosity, flow behavior, thermal stability, and — critically — how the compound interacts with whatever production resin is already inside your equipment. When you introduce a purging compound into the barrel, the carrier resin must be compatible with both the outgoing material and the incoming one. An incompatible carrier doesn't just clean poorly. It can smear across metal surfaces, leave its own residue behind, or chemically react with residual production resin to create deposits that are harder to remove than the original contamination.
Think of it this way: if the carrier resin and your production polymer have similar polarity and melt behavior, the purge compound is more likely to "pick up" contamination rather than slide over it. Carrier resin compatibility reduces smearing and re-deposition because the purge compound wets metal surfaces effectively and displaces residual polymer through chemical affinity — not just mechanical force.
The core compatibility principles every processor should verify before selecting a purge compound include:
- Similar melt temperature range: The carrier resin must process cleanly within the temperature window of both the outgoing and incoming production resins. A carrier that doesn't fully melt at your operating temperature can't clean. One that degrades at your processing temperature becomes a new contamination source.
- No adverse chemical reaction: The carrier must be chemically inert relative to the production resins it contacts. Reactive combinations can generate off-gassing, discoloration, or — in the worst case — dangerous decomposition.
- Clean displacement without residue: After the purge cycle, the carrier resin itself must flush out easily when production resin is reintroduced. A carrier that clings to screw flights or barrel walls defeats the purpose of purging in the first place.
Viscosity plays a role here too. A carrier with too-low viscosity moves through the system quickly but lacks the shear force needed to scrub residue from metal surfaces. A carrier that's too viscous can increase screw torque and trap contamination in stagnant zones rather than flushing it out. The ideal match depends on your specific equipment and resin pairing — which is why requesting supplier data on the carrier resin's melt flow behavior is just as important as reviewing the compound's cleaning performance claims.
Resin Families That Demand Special Attention
Not all production resins present equal purging challenges. Some families create conditions that narrow your compound options significantly, while others carry risks that go well beyond cleaning performance.
Engineering resins (PC, PA, PET, PEEK): These materials process at elevated temperatures — often 260 °C and above, with high-performance grades like PEEK reaching 400 °C. Residual engineering resin left on metal surfaces degrades quickly at these temperatures, creating stubborn carbon deposits and black specks that resist mechanical displacement. As processors working with Nylon, PET, and Polycarbonate routinely experience, higher processing temperatures increase the likelihood of polymer degradation, carbon formation, and material hang-up points throughout the barrel and hot runner system. Chemical purging grades or high-temperature mechanical compounds with thermally stable carriers are typically required — a general-purpose purge compound formulated for commodity resins will underperform or degrade in these applications.
PVC and POM — a critical safety consideration: This is not a performance issue. It's a danger-to-personnel issue that every processor running either of these materials must understand.
PVC and POM (acetal) must never contact each other inside processing equipment. Even small residual amounts of either resin can catalyze violent decomposition of the other, generating extreme gas pressures capable of blowing apart barrel sections, hoppers, and endcaps. Any purge compound with a POM-based carrier is strictly incompatible with PVC — and vice versa. Verify carrier resin composition before every use in PVC or acetal applications.
This is not a theoretical risk. As injection molding safety expert John Bozzelli has documented, real-world incidents have sent hoppers through roofs and barrel fragments through walls. The gases produced during PVC-POM decomposition generate pressures that overwhelm the structural limits of standard processing equipment. No matter how thoroughly you purge between jobs, small amounts of residual resin remain on screw flights — and even trace quantities can trigger the catalytic reaction. If the same machine must process both resins, disassembly and manual cleaning of the barrel and screw are required before switching.
Glass-filled, mineral-filled, and reinforced resins: These materials leave behind abrasive residue that can damage softer purge compound carriers and resist displacement by low-viscosity formulations. The fillers themselves may accumulate in check ring gaps, nozzle tips, and mixing sections. In purge injection molding applications involving reinforced resins, processors often need a higher-viscosity mechanical compound — or a concentrated purging compound blended with a compatible carrier — to generate sufficient shear force to clear embedded filler particles without causing additional wear.
Polyolefins (PE, PP): Running at lower temperatures than most engineering resins, polyolefins are sometimes used as DIY purging materials — processors simply flush the barrel with natural PE or PP between runs. While this approach costs less per kilogram, it's significantly less efficient than a dedicated purge compound. Polyolefins lack the cleaning agents, viscosity modifiers, and surface-active properties that make formulated compounds effective. You'll typically use far more material, run more purge cycles, and still end up with residual contamination that a purpose-built compound would have removed in a fraction of the time.
Building a Resin-to-Compound Compatibility Approach
Here's the uncomfortable truth: no universally published, comprehensive compatibility matrix exists that maps every production resin to every purging compound on the market. Supplier data sheets cover their own products, but the processor is ultimately responsible for confirming compatibility in their specific application.
That gap doesn't mean you're flying blind. It means you need a structured approach to build your own institutional knowledge over time. Start with these practical steps:
- Request carrier resin data from suppliers. Ask specifically what base resin the compound uses and what resin families it has been tested against. If a supplier can't or won't disclose this, treat that as a red flag.
- Conduct small-scale trials before full deployment. Run the purge compound through a single machine with your specific production resin before rolling it out across the plant. Document the results — cleaning effectiveness, residue left behind, any discoloration or reaction.
- Organize internal records by resin family. Create a simple reference document that tracks which purge compounds have been used successfully with each resin you process. Over time, this becomes one of your most valuable process engineering resources.
- Always cross-check temperature ranges. Verify that the purge compound's published effective temperature window overlaps with your production resin's processing range. A compound rated for 180–280 °C is not suitable for a resin you process at 320 °C — regardless of how well it cleans at lower temperatures.
Compatibility isn't a one-time checkbox. As you introduce new resins, switch suppliers, or adjust processing parameters, the interaction between your purge compound and your production materials can shift. Treating carrier resin matching as an ongoing process engineering practice — rather than a purchasing afterthought — protects both cleaning performance and equipment safety.
Of course, even a perfectly compatible compound can fail if it's asked to perform outside its thermal limits. Temperature doesn't just influence resin behavior — it determines whether the purging compound itself can activate, clean, and exit the barrel without becoming part of the problem.
How Processing Temperature Filters Your Compound Options
Temperature is the gatekeeper. You can match the right compound category to your contamination type, confirm carrier resin compatibility down to the molecular level, and still end up with a failed purge — because the compound couldn't handle the heat. Or, just as problematic, because it never got hot enough to activate in the first place.
Every purging agent has a defined effective operating temperature range. Step outside that window in either direction, and you're not just getting reduced performance. You're getting a fundamentally different outcome: incomplete cleaning, new contamination from the compound itself, or a barrel full of material that has no cleaning action at all. That reality makes processing temperature the single hardest filter in the selection process — the one constraint that eliminates options before any other variable even enters the conversation.
Temperature Range as a Hard Selection Constraint
Picture this: a processor running polypropylene at 210 °C selects a chemical purging compound and gets excellent results — fast activation, thorough carbon removal, clean transition to the next run. Encouraged by the success, the same facility tries the identical compound on a machine running polycarbonate at 310 °C. The result? Smoke, off-gassing, and dark residue left behind by the compound itself. The purge material degraded before it could do its job.
The reverse scenario is equally common. A compound formulated for high-temperature engineering resins gets deployed on a polyolefin line running at 190 °C. It flows through the barrel, exits the nozzle — and accomplishes almost nothing. The chemical agents inside never reached their activation threshold, so the compound behaved like an expensive, inert filler rather than a cleaning tool.
These aren't edge cases. They're the predictable result of ignoring the temperature window printed on the supplier's data sheet — or, more often, never checking it in the first place. Before evaluating cleaning mechanism, carrier resin, cost per kilogram, or any other selection factor, confirm that the compound's effective temperature range actually overlaps with your production conditions.
The key temperature variables to verify for any compound under consideration include:
- Minimum activation temperature for chemical grades: Below this threshold, the reactive agents in the compound do not trigger. No foaming, no bond-breaking chemistry, no cleaning action beyond whatever passive displacement the carrier resin provides on its own.
- Maximum safe temperature before compound degradation: Above this point, the compound's carrier resin or active ingredients begin to thermally decompose. Instead of removing contamination, the compound generates its own degradation byproducts — char, discoloration, and off-gassing that coat barrel and screw surfaces.
- Overlap zone with production resin processing range: The compound must perform effectively across the full temperature profile of your barrel zones, not just at a single setpoint. If your barrel runs a gradient from 200 °C at the feed throat to 290 °C at the nozzle, the compound needs to function across that entire span without degrading at the hot end or sitting inert at the cool end.
This overlap zone is the actual selection window. A compound rated for 180–280 °C being used on a machine profiled at 260–320 °C has only a narrow band of overlap — and the front zones of the barrel exceed the compound's safe ceiling. That mismatch doesn't produce a slightly less effective purge. It produces a purge that creates new contamination in the very zones where cleaning matters most.
High-Temperature Applications and Thermal Degradation Risks
High-performance polymers like PEEK, PEI (ULTEM), PSU, and high-temperature nylons push processing conditions into ranges where most purging compounds simply cannot survive. Super-engineering resins are commonly molded at temperatures between 280 °C and 420 °C — a range that exceeds the thermal stability of many standard purge formulations. At these sustained temperatures, a compound designed for mid-range processing doesn't just underperform. It actively degrades, generating char and decomposition residue that becomes a new source of the very contamination you're trying to eliminate.
The consequences go beyond poor cleaning. Degrading purge material can produce visible smoke and noxious off-gassing inside the barrel, creating both a process failure and a workplace safety concern. Some processors mistakenly assume that any commercially available compound handles any temperature — an assumption that leads to wasted material, repeated purge cycles, and sometimes costly manual teardowns to remove the compound's own residue from the screw and barrel surfaces.
Packaging purging compounds and general-purpose grades formulated for commodity resin lines typically top out around 280–300 °C. Running them at PEEK or PEI processing temperatures doesn't just reduce their effectiveness — it fundamentally changes what they do inside the barrel. Instead of cleaning, they cook. The solution for high-temperature applications is straightforward: use a purging compound specifically engineered and rated for the temperature range you're actually processing at. High-temperature-grade compounds are formulated with thermally stable carrier resins and reactive agents that maintain their structural integrity and cleaning action at sustained elevated temperatures without generating their own degradation byproducts.
For processors who frequently transition between super-engineering resins and lower-temperature materials, a two-step purging strategy is often more effective than relying on a single compound. The first step uses a high-temperature-rated compound to clean the barrel while the system is still hot. The second step introduces a general-purpose grade as temperatures are reduced to the range of the incoming production resin. This staged approach prevents the layering and ghosting that occur when residue from a high-temperature polymer encounters a lower-temperature environment where it can no longer flow.
Temperature Ramp Protocols During Purging
Some purging compounds don't perform best at a single static temperature — they require deliberate temperature adjustments during the purging process itself. You might need to raise barrel zone temperatures above normal production setpoints to accelerate chemical activation, or lower them during a final displacement phase to ensure clean transition to the next resin. These aren't optional tweaks. They're part of the compound's engineered cleaning protocol.
When transitioning from a high-temperature resin to a lower-temperature material, the recommended approach is to purge at the higher temperature first, then gradually reduce heat while continuing to run purge material through the system. Allowing the barrel to sit static during a temperature transition — screw stopped, material stagnant — risks trapping residue in dead zones where it degrades further. Keeping the screw turning slowly during temperature ramps, even at minimal speed, helps prevent material from sitting idle and carbonizing.
The critical takeaway? Follow the supplier's recommended temperature protocol precisely for each compound grade. Deviating — whether by skipping a temperature hold, ramping too quickly, or running the compound outside its specified range — undermines the cleaning mechanism the product was designed around. A purging compound is a chemical system engineered to work within defined thermal boundaries. Treating temperature as a suggestion rather than a constraint is one of the fastest ways to turn a purging cycle from a solution into a new problem.
Temperature determines what your compound can do. But the barrel, screw, nozzle, and hot runner system determine where it can reach — and that's where equipment geometry enters the selection equation.
Equipment Design Variables That Shape Compound Choice
A purging compound doesn't clean in a vacuum. It cleans inside a specific barrel, around a specific screw, through a specific nozzle, and — in many injection molding applications — across a specific hot runner manifold. Every one of those hardware elements creates unique flow dynamics, dead zones, and restrictions that determine whether the compound can actually reach and remove the contamination you're targeting.
Yet most purging compound selection guides skip this entirely. They'll tell you which compound type suits a given contamination problem or temperature window, then stop — as if the compound operates in an idealized, geometry-free barrel. In practice, equipment design is one of the strongest filters in purging compound selection, and ignoring it explains many cases where a theoretically correct compound delivers disappointing results on a particular machine.
Screw Design and L/D Ratio Influence on Purging
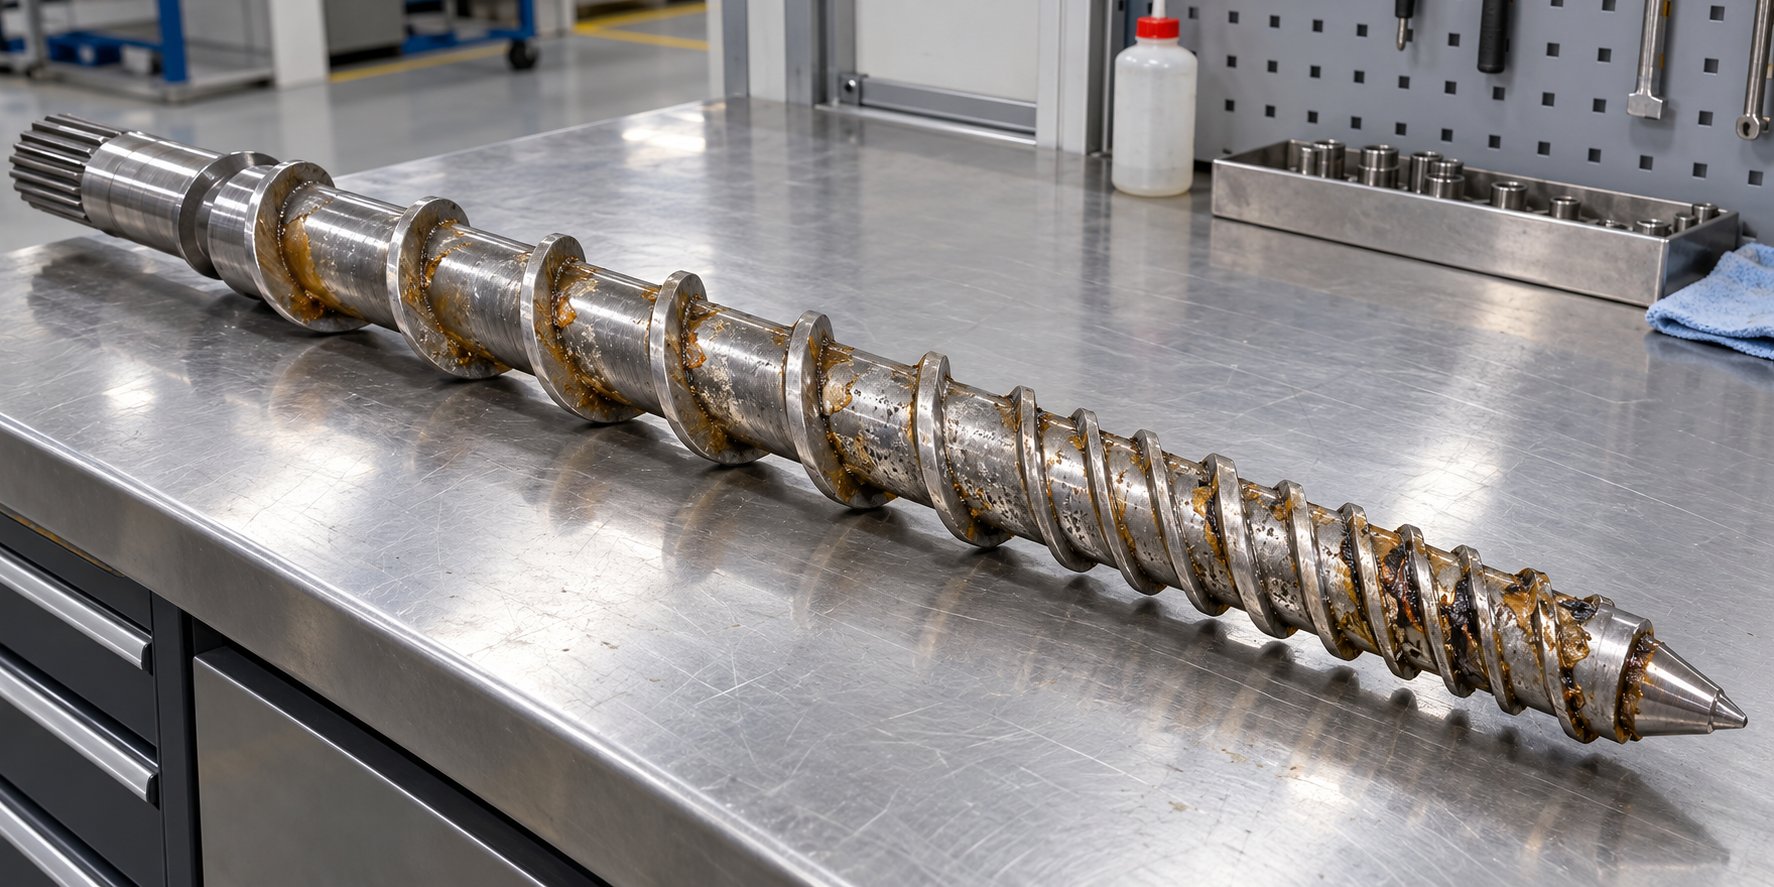
The screw is the engine of any purge cycle. Its geometry — flight depth, pitch, compression ratio, barrier sections, mixing elements — dictates how your purge purging compound flows through and contacts the barrel's interior surfaces. Two machines sitting side by side on the same production floor can demand completely different compound approaches if their screw designs differ.
Consider the difference between a general-purpose three-zone screw and a barrier screw. A standard three-zone design has a relatively open channel that allows purging material to flow with consistent contact across the barrel wall. A barrier screw, by contrast, adds a secondary flight in the melting section that separates melt from solids into distinct channels. While this improves production melting efficiency, it also creates areas where residual material can become trapped behind the barrier flight — especially if the compound's viscosity is too low to generate the shear needed to dislodge it. Compounds with higher viscosity or foaming action may be necessary to penetrate these confined channels effectively.
The screw's length-to-diameter (L/D) ratio adds another layer. A longer L/D — say 30:1 versus 20:1 — means more barrel surface area the compound must clean, but also more residence time for chemical grades to react and work. For purging compounds for extrusion, where L/D ratios commonly range from 24:1 to 34:1, this extended flow path gives chemical and hybrid grades a meaningful advantage: more contact time with contaminated surfaces. Shorter L/D screws favor faster-acting mechanical grades that don't depend on dwell time.
Mixing sections — Maddock, pin, wave, or pineapple-style heads positioned near the metering zone — increase shear and cross-flow, which boosts mechanical cleaning action. If your screw lacks a dedicated mixing section, the compound itself must compensate for that missing turbulence, often requiring a more aggressive formulation or additional purge cycles to achieve the same cleanliness.
Here's the factor most processors overlook: when screw flights wear down over time, the clearance between the flight tip and the barrel wall increases. That widening gap reduces the shear force the screw applies to the purging compound, degrading cleaning effectiveness even if the compound and procedure haven't changed. Similarly, damaged or worn check rings lose their sealing function, allowing material to flow backward past the screw tip and creating stagnant pockets where contamination accumulates. In these situations, increasing compound aggressiveness or running more cycles treats a symptom, not the cause. The root problem is hardware condition. When worn or mismatched screw geometry contributes to persistent material retention and cleaning difficulties, a tailored plasticizing assembly — such as custom injection molding screw barrels manufactured around the machine's specifications and resin characteristics — can reduce dead spots and improve purge efficiency by addressing the hardware side of a problem processors often try to solve with compound selection alone.
Nozzle and Check Ring Considerations
The nozzle is the narrowest restriction in most injection molding flow paths, and it's a prime collection point for contamination. Residual pigment, degraded resin, and carbon deposits accumulate in the nozzle tip, the nozzle body, and the transition area between the barrel and nozzle seat. Mold purging effectiveness depends heavily on whether the compound can flow through these tight clearances without bridging or bypassing the contaminated surfaces.
Mechanical purging compounds — particularly glass-filled or high-viscosity grades — may struggle to pass through narrow-tip nozzle designs. If the nozzle orifice is significantly smaller than the barrel bore, the compound's effective cleaning pressure drops as it squeezes through the restriction, reducing contact force against the inner nozzle walls. Chemical grades can compensate here because their cleaning action relies on reactive chemistry rather than flow velocity alone. The expanding gases and surfactant activity of a chemical compound continue working even in low-flow areas where a mechanical grade would simply stream past.
Check rings present a related challenge. A properly functioning check ring seals during injection to prevent backflow, but during purging it creates a zone of restricted flow around the screw tip. Residue builds up behind the check ring and in the gaps between its sliding surfaces. If the check ring is worn — which reduces its sealing action — material can shuttle back and forth during purge cycles without ever being displaced from the system. Processors who notice that purge cycles seem effective at the nozzle but contamination reappears in subsequent shots should examine the check ring as a likely retention point.
Hot Runner Systems and Manifold Complexity
Hot runner systems present the most demanding geometry for any purging compound. Unlike the barrel and screw — where cleaning relies on controlled flow through a relatively simple cylinder — a hot runner manifold routes material through a network of channels, drops, bends, and gate restrictions that vary dramatically from mold to mold.
Each element adds complexity. Manifold channels run at sustained elevated temperatures and often include low-flow or zero-flow areas where material stagnates and degrades between cycles. Valve gate pins introduce tight mechanical clearances that can trap particulate or clog if the compound leaves solid residue behind. Multi-drop systems mean the compound must flow evenly through all cavities — an uneven distribution leaves some gates clean while others retain contamination.
Industry guidance on hot runner purging consistently recommends checking gate clearance before selecting a compound grade and using short, high-velocity shots to promote turbulence within the manifold. For extremely difficult purges involving dead spots or low-flow areas, chemical purging compounds that expand into confined spaces tend to outperform mechanical types. Liquid purging compounds also excel in hot runner applications — their fluid state allows them to reach thin-channel areas and complex geometries that pelletized grades may not fully penetrate.
Glass-filled mechanical compounds are generally not recommended for hot runner systems. The abrasive filler particles can damage polished gate surfaces, score valve pins, and become trapped in manifold dead spots where they create new contamination rather than removing existing deposits. Always confirm with both your compound supplier and your hot runner manufacturer before running any abrasive-filled grade through the system.
Equipment geometry doesn't change the chemistry of your purging compound — but it absolutely changes whether that chemistry can reach the surfaces that need cleaning. A compound that performs flawlessly in a simple open-nozzle barrel may accomplish nothing in a complex multi-drop hot runner on the machine next to it. Matching compound characteristics to equipment architecture is what separates a selection decision that works on paper from one that works on the production floor — and the procedural steps you follow during the purge cycle itself determine whether even the right compound delivers its full potential.
Purging Procedures and Protocols by Compound Type
You've identified the contamination type, matched the compound category, confirmed carrier resin compatibility, verified the temperature window, and accounted for your equipment geometry. That's five layers of selection work done right. And none of it matters if the operator runs the purge incorrectly.
Procedural execution is where purging compound selection meets reality. The best compound on the market, perfectly matched to your resin, temperature, and equipment profile, will underperform if it's introduced at the wrong time, run at the wrong speed, dosed at the wrong quantity, or pulled from the barrel before it finishes working. Yet most published selection guides end right where the procedural questions begin — leaving processors to rely on trial-and-error habits that waste material and extend downtime.
The procedures below cover the essential protocols for mechanical and chemical compound types. Specific shot counts, soak durations, and RPM settings vary by manufacturer and grade — always consult the supplier's data sheet for the compound you're using. What follows is the procedural logic that applies regardless of brand.
Mechanical Purging Procedure Essentials
Mechanical compounds clean through physical force — shear, viscosity, and displacement pressure. The procedure must maximize those forces while minimizing wasted material and cycle time. Getting this right is the difference between a three-minute color change and a thirty-minute wrestling match with persistent streaking.
Barrel temperature setting: Set barrel zones to the temperature recommended for the production resin being removed — or to the compound supplier's specified range, whichever is appropriate. Running too cold reduces the compound's melt flow and limits its ability to generate shear. Running too hot can thin the compound's viscosity to the point where it slides past contamination rather than scrubbing it. When transitioning from a high-temperature resin to a lower-temperature one, purge at the higher temperature first, then reduce gradually while continuing to cycle compound through the barrel.
Screw RPM during purging: Moderate-to-high screw speed generates the shear forces that make mechanical compounds effective. Screw rotation creates the scrubbing action between compound and barrel wall, flight surfaces, and check ring gaps. A common mistake is running purge cycles at the same screw speed used for production — which is often too slow. Consult the compound supplier's recommended RPM range, but the general principle holds: faster rotation means more aggressive cleaning.
Shot technique: Small, repeated shots outperform fewer large ones. Scientific purging methodology recommends using 10% to 20% of the machine's maximum shot size per purge shot. Why? Smaller shots keep material moving in the feed zone, cycle the check ring more frequently, and increase agitation within the screw flights — all of which improve displacement and scrubbing. Large, slow shots allow contamination to settle back into dead zones between cycles.
Signs the purge is complete: Inspect every purge slug on a clean metal surface. You're looking for uniform color with no streaks, swirls, or specks. Consistent texture and viscosity across consecutive slugs indicate the barrel is clean. If variation persists — dark streaks in a light compound, intermittent specks, or gritty particles — contamination is still exiting the system, and additional cycles are needed.
Here's the balance to strike: under-purging leaves residual contamination that will show up in the next production run as scrap, streaking, or black specks — effectively wasting the previous production effort. Over-purging burns through expensive compound and machine time without delivering any additional cleaning benefit. The visual inspection of purge slugs is the feedback mechanism that tells you when to stop.
Chemical Purging Soak Times and Activation Protocols
Chemical compounds operate on a fundamentally different timeline. Their cleaning power doesn't come from screw-driven shear alone — it comes from heat-activated reactions that need time to work. Skipping or shortening the soak period is the single most common reason chemical purges disappoint.
The general protocol follows a distinct sequence. First, run the compound through the barrel at normal processing speed until it emerges uniformly from the nozzle or die, confirming that the compound has fully displaced the production resin throughout the flow path. Then stop screw rotation and allow the compound to sit in the barrel at processing temperature for the supplier-specified soak time. During this dwell period, the reactive agents in the compound activate — generating foaming, gas expansion, or surfactant action that breaks the bond between degraded deposits and metal surfaces. After the soak period, resume screw rotation and flush the loosened contamination out of the system.
Soak time varies by compound grade, contamination severity, and system geometry. As field experience with chemical purging demonstrates, the distance between the point where compound enters the barrel and where it exits the die matters. In large extrusion systems with extensive downstream plumbing — breaker plates, screen packs, static mixers, melt pumps — the increased residence time can consume the compound's chemical activity before it reaches the die end. In those situations, processors may need to increase screw RPM above the minimum to maintain visible chemical activity throughout the system, then begin the soak timer once consistent reactivity is confirmed at the exit point.
Two procedural mistakes undermine chemical purges more than any others. The first is soaking too briefly. If the reactive agents haven't fully activated, the compound displaces surface-layer residue but leaves bonded carbon and degradation deposits intact — leading to repeat purge cycles that consume more material and time than a single properly executed soak would have required. The second is allowing the compound to sit too long at elevated temperature after the reaction completes. Once the chemical activity is spent, the carrier resin itself becomes subject to thermal degradation. An over-soaked compound can leave its own residue behind, requiring an additional displacement flush with production resin.
Always follow the supplier's recommended soak time and temperature precisely. If the data sheet specifies 15 minutes at 260 °C, that's the tested protocol. Doubling the time "for extra cleaning" doesn't double the cleaning — it risks creating new contamination.
Barrel Capacity Calculations and Dosing
How much compound do you actually need per purge cycle? Guessing leads to one of two outcomes, and both hurt efficiency.
Under-dosing means the compound doesn't fill the barrel completely. Portions of the screw channel, dead spots, and the compression zone never contact the purge material at all, leaving contamination untouched. Over-dosing wastes compound — you're pushing clean material through a clean barrel, spending money without any cleaning return.
The starting point for accurate dosing is knowing your barrel capacity. Here's an important distinction most processors miss: barrel capacity is not the same as maximum shot size. Barrel capacity represents the total volume of material contained in the screw flights, and it's typically between 2x and 2.5x the machine's maximum shot size. Your machine manufacturer provides the maximum shot size — the barrel capacity requires accounting for screw geometry, flight depth, and L/D ratio.
This distinction matters for dosing. If you need a full barrel of purging compound, you'll need approximately 2 to 2.5 times the maximum shot size in compound weight — not a 1:1 match. Using only an amount equal to the maximum shot size fills roughly half the barrel, leaving the rear zones uncleaned. Supplier data sheets typically specify a recommended dosing quantity or a multiplier based on barrel capacity. Always use their recommended figure as the baseline, then adjust based on your observed results during trials.
One additional procedural consideration: maintain material in the barrel throughout the purge. Running the barrel completely empty — sometimes called "dry purging" — exposes residual material on the screw and barrel wall to oxygen and heat, accelerating degradation rather than preventing it. Keeping the barrel charged with compound or resin at all times, a practice known as "wet purging," ensures continuous displacement and eliminates the risk of baking residue onto metal surfaces during the purge cycle itself.
Pulling these procedural elements together, a generalized purge sequence applicable to most injection mold purging compound applications follows this order:
- Empty the barrel of production resin. Run production material down until shots begin to short, indicating the barrel is mostly cleared — but do not run it completely dry.
- Introduce the purging compound. Load the recommended dose into the hopper and begin screw rotation at the supplier-specified RPM to feed compound into the barrel.
- Execute purge cycles per compound type protocol. For mechanical grades: run repeated small shots at moderate-to-high screw speed, inspecting each slug. For chemical grades: run compound through until it emerges uniformly, stop the screw, allow the specified soak period, then resume rotation and flush.
- Verify cleanliness. Inspect purge slugs for consistent color, absence of specks or streaks, and uniform texture. Continue cycling only until consecutive slugs confirm a clean barrel.
- Transition to the next step. Introduce the next production resin or shutdown-protection compound, displacing the purge material until clean production-quality shots emerge.
This sequence isn't a rigid recipe — it's a framework. Every compound grade, every resin combination, and every machine geometry will require adjustment. The critical discipline is following the compound supplier's specific protocol for their product while applying the procedural principles that make any purge more efficient: proper dosing, correct shot technique, appropriate soak timing, and visual verification of cleanliness before transitioning.
Procedures determine whether a well-selected compound delivers its full cleaning potential. But even perfect execution raises a practical question every plant manager and procurement team will ask: what does all of this actually cost — and how do you prove the investment is worth it?
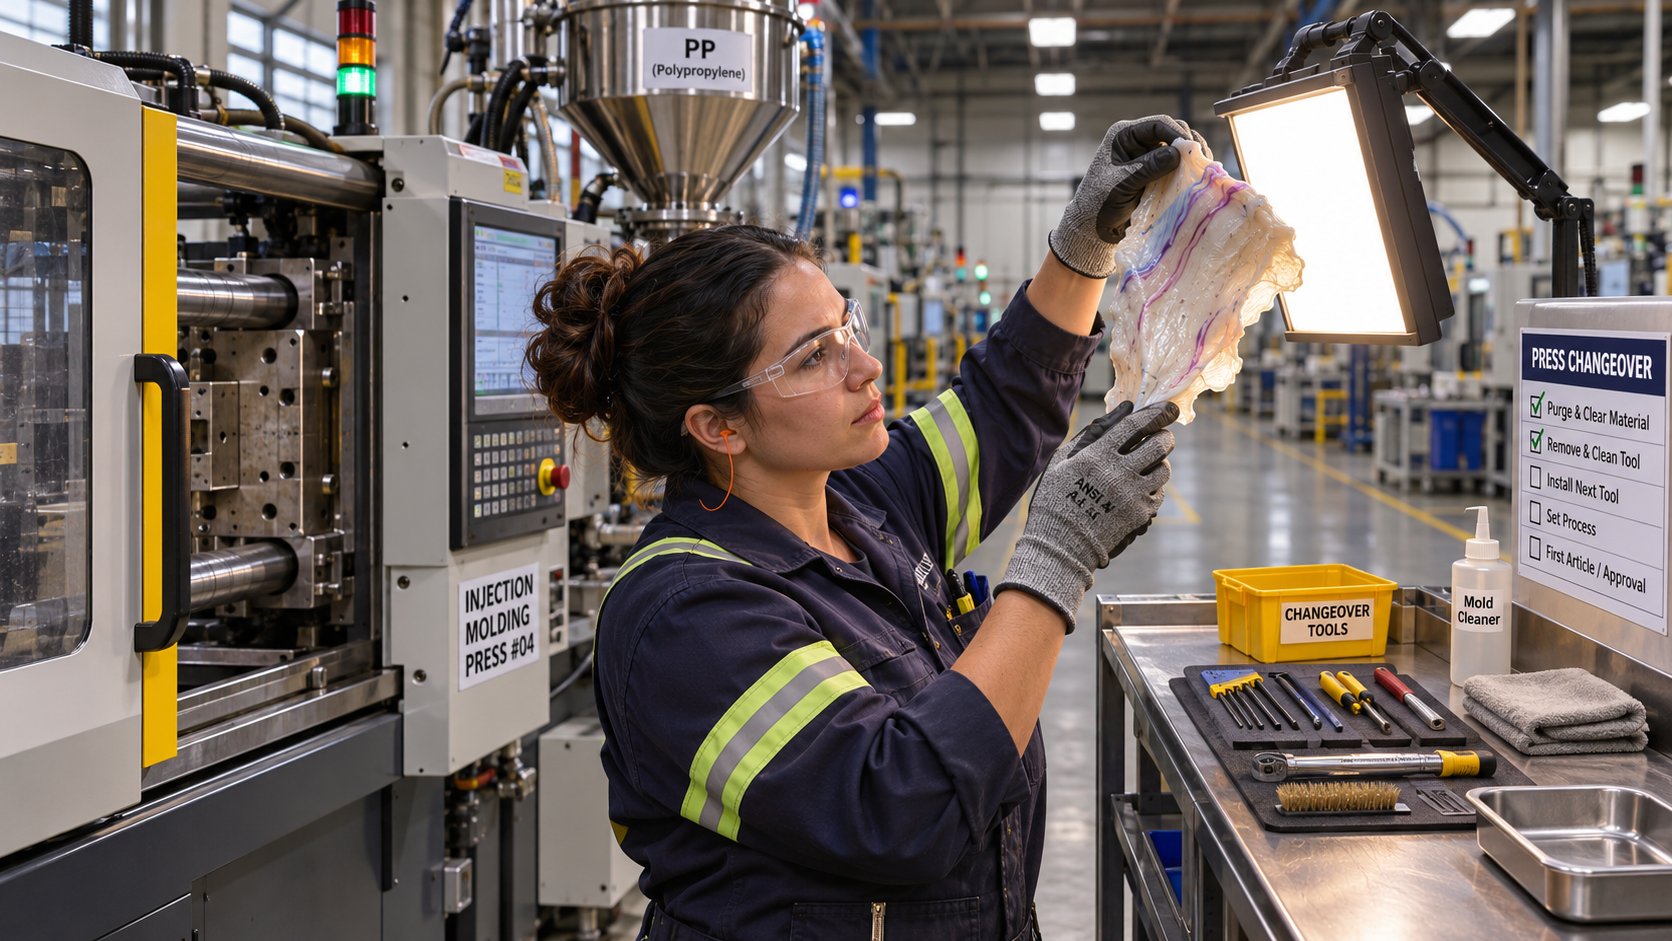
Calculating the True Cost of Purging Compound Decisions
Here's the conversation that plays out in plastics plants every day. An engineer identifies a purging compound that cleans faster, leaves less residue, and cuts changeover time in half. The procurement team pulls up the quote, sees a price per kilogram that's two or three times higher than the current product, and kills the request. Decision made. Money saved — or so it seems.
That logic feels sound on a spreadsheet, but it collapses under real-world math. The compound itself is only one line item in a much larger cost equation, and it's rarely the biggest one. Downtime, wasted resin, startup scrap, labor hours, and repeat purge cycles pile up invisibly — costs that never appear on the purging compound invoice but show up relentlessly in production reports. Understanding the full cost picture is what separates a strategic purging compound selection from a purchasing reflex.
Why Per-Kilogram Compound Cost Is Misleading
Imagine two processors comparing injection molding purging methods. Processor A uses a lower-cost compound at $4 per kilogram. Processor B uses a higher-performance grade at $12 per kilogram. On a purchase order, the choice looks obvious. But zoom out to what actually happens during each changeover.
Processor A's compound requires 6 kilograms and 90 minutes to achieve a clean barrel. During those 90 minutes, the machine produces nothing. Operators stand by, monitoring slugs and running extra cycles. When production restarts, the first 15 to 20 shots contain streaks or specks — all scrap. Processor B's compound requires 2 kilograms and 30 minutes. The machine restarts cleanly with minimal transition scrap.
The compound cost for Processor A: $24. The compound cost for Processor B: $24. Identical. Yet Processor A lost an additional 60 minutes of machine time, consumed more production resin flushing residue, generated more scrap parts, and tied up labor for three times as long. When you factor in machine hourly rates — which commonly range from $50 to $200 per hour depending on the press size and application — that extra hour of downtime alone can dwarf any per-kilogram savings on the compound itself.
This pattern is consistent across the industry. As industry cost analyses confirm, a lower-cost purge material becomes expensive quickly when it demands more pounds, longer machine downtime, higher labor involvement, or repeated purges before good parts are produced again. The real cost of purging is not the material used during the purge — it's the lost production time, wasted resin, rejected parts, and delayed orders that follow an inefficient changeover.
Evaluating chemical purge compounds or any other category on unit price alone is the most common and most costly mistake a processor can make. The metric that matters isn't cost per kilogram. It's cost per purge — the total expenditure required to get the machine from contaminated to production-ready.
Building a Total Purging Cost Framework
Proving the value of a better compound — or confirming that your current choice is already the right one — requires tracking variables that most plants don't measure consistently. You don't need complex software to do this. You need a structured list and the discipline to record data across a meaningful number of changeovers.
The variables every processor should track and calculate for each purge cycle include:
- Compound cost per purge cycle: Weight of compound consumed multiplied by cost per kilogram. This is the only number most plants track — and it's the least informative one on its own.
- Resin waste per purge: Kilograms of production resin consumed during flushing before, during, and after the purge. This includes resin used to displace the purge compound before restarting production.
- Downtime minutes per purge multiplied by machine hourly rate: Every minute the press sits idle has a calculable cost. Multiply total changeover time — from last good part of the previous run to first good part of the next run — by the machine's hourly operating rate.
- Scrap parts produced during color or material transition: Count the shots between introducing the new production resin and producing the first part that meets quality standards. Multiply by part value or material cost.
- Labor time per purge: Hours of operator and technician involvement, including setup, monitoring, slug inspection, and cleanup. In plants where labor is already stretched thin, extended purge cycles carry an opportunity cost that compounds across shifts.
- Number of purge cycles per week or month: A compound that saves $30 per purge across a facility running 20 changeovers per week generates $600 in weekly savings — over $31,000 annually. Frequency is the multiplier that turns marginal per-cycle differences into significant annual impact.
The most reliable way to evaluate a new compound option is to run a controlled trial. Select two or three machines that represent your typical production mix. Run your current purge method for a defined number of changeovers, recording every variable above. Then switch to the trial compound and measure the same factors over an equivalent number of cycles. Compare total cost per purge — not just compound cost — across the two methods.
This head-to-head approach eliminates reliance on supplier-quoted savings projections, which are inherently optimistic. Your machines, your resins, your contamination patterns, and your operators produce the only data that matters. A compound that delivers impressive results in a supplier's controlled lab environment may perform differently on a 15-year-old press with a worn screw running glass-filled nylon on a tight production schedule. Measure it yourself.
Industry-Specific Selection Constraints That Affect Cost
For processors in regulated industries, the cost equation adds variables that commodity-resin shops never encounter — and these constraints aren't negotiable.
Food-contact packaging: Purging compounds used on lines producing food-contact packaging must comply with applicable FDA regulations for indirect food contact. While the FDA does not directly regulate purging compounds as a product category, it does regulate their ingredients for specific end-use applications. As Plastics Today has reported, some suppliers have had their formulations independently evaluated for compliance with US FDA 21CFR requirements for indirect food contact. Processors in this space should request documented FDA compliance data from any compound supplier and verify that it covers the specific grades being considered — not just the supplier's product line broadly.
Medical devices: Medical molders face additional traceability and material certification requirements. Every material that contacts the production flow path — including purging compounds — may need to be documented within the facility's quality management system. Lot traceability, certificates of analysis, and material safety data sheets become part of the compound evaluation process, adding procurement complexity and sometimes limiting the pool of qualified suppliers.
Automotive and aerospace purging compounds: These sectors frequently require documented purging validation protocols — written procedures that specify the compound used, the purge sequence, verification criteria, and sign-off by quality personnel. Aerospace applications in particular may require evidence that the purge process eliminates all traces of previous material to prevent cross-contamination in safety-critical components. Switching compounds in these environments isn't a simple procurement decision; it can trigger revalidation activities that carry their own time and cost burden.
These regulatory and quality requirements narrow the field of available compounds and often increase per-unit cost. A food-safe or aerospace-qualified grade will typically carry a price premium over a general-purpose equivalent. That premium is the cost of compliance — not a mark-up to negotiate away. Attempting to substitute a non-compliant compound to save on material cost creates audit exposure, product liability risk, and potential customer disqualification that no per-kilogram savings can offset.
Cost, ultimately, is the language that connects the shop floor to the front office. An engineer who presents a purging compound recommendation backed by total-cost-per-purge data — not just cleaning performance observations — gives management a decision framework built on numbers the business already tracks: machine utilization, scrap rates, labor efficiency, and material waste. That's how compound selection moves from a maintenance line item to a production strategy. And like any strategy, it needs ongoing measurement to confirm it's still delivering — because the variables that drive purging performance don't stay static over time.
Evaluating Performance and Refining Your Selection Over Time
A production manager signs off on a purging compound after a successful trial. The compound cleans well, the cost-per-purge numbers look strong, and operators adapt to the new protocol within a week. Problem solved — permanently. Right?
Not quite. The variables that shaped the original purging compound selection — contamination patterns, resin mix, equipment condition, production volume — shift constantly. A compound that delivers excellent results today may underperform six months from now, not because the product changed, but because your operation did. Treating selection as a one-time purchasing event instead of an ongoing process engineering practice is where many processors quietly lose ground without realizing it.
Key Performance Metrics to Track After Selection
You can't improve what you don't measure. Yet most facilities track little more than how many kilograms of compound they order each quarter — a number that says almost nothing about whether the compound is actually doing its job efficiently. Meaningful evaluation requires tracking outcomes at the machine level, purge by purge.
The measurable indicators every processor should document for each injection molding purging cycle include:
- Number of purge shots to achieve clean parts: This is your clearest efficiency signal. If the shot count is climbing over time with the same compound and procedure, something in the system is changing.
- Total material consumed per purge cycle: Compound weight plus production resin used for displacement and transition. Rising consumption without a corresponding change in contamination severity indicates declining cleaning efficiency.
- Downtime reduction compared to previous compound or method: Track changeover time from last acceptable part of the outgoing run to first acceptable part of the incoming run. This is the metric that translates directly into machine utilization and revenue impact.
- Scrap rate during transition: Count the rejected parts between introducing production resin and achieving consistent quality. A compound that leaves residue behind — whether its own carrier resin or incompletely removed contamination — inflates this number.
- Frequency of black specks or contamination reappearing between purges: If contamination returns quickly after a purge cycle, the compound may not be reaching all affected surfaces, or degradation is recurring faster than your purge schedule addresses it.
Documenting these metrics consistently — even on a simple spreadsheet organized by machine, compound grade, and date — creates a baseline that makes future decisions objective rather than anecdotal. When an operator says "the purge doesn't seem to work as well anymore," you'll have data to confirm or disprove that observation and pinpoint where the degradation in performance is actually occurring.
When to Revisit Your Purging Compound Choice
Stable performance doesn't last forever. Several signals should prompt a formal re-evaluation of your current compound:
Increasing purge cycle times: If the same compound now takes 50% longer to achieve the same cleanliness standard, something has shifted. The contamination may be more severe, the procedure may have drifted, or the equipment may have changed.
Diminishing cleaning results: Persistent streaking, recurring black specks, or color ghosting that didn't appear during the initial trial period indicate the compound is no longer matching the cleaning challenge. This is especially common when facilities gradually introduce harder-to-clean resins — a polyethylene purging compound that performed well on a commodity PE line may struggle if the same machine starts running pigmented engineering grades.
Introduction of new production resins: Every new resin added to your production mix should trigger a compatibility check against your current purging compound. Carrier resin mismatches, temperature range gaps, and chemical incompatibilities don't announce themselves — they show up as unexplained contamination in the next production run.
Equipment changes or wear progression: This is the factor most processors overlook entirely. As barrel and screw surfaces wear over time, flight clearances widen, check rings lose sealing effectiveness, and surface roughness increases. These hardware changes create new dead spots and material-retention zones that didn't exist when the compound was originally selected. A slide purging compound or any other grade that once cleaned the barrel thoroughly may now leave contamination behind in worn areas it can no longer reach effectively.
When persistent material retention or declining purge effectiveness traces back to hardware rather than the compound itself, the answer isn't a more aggressive purge formulation — it's addressing the root cause. Worn or mismatched plasticizing components create cleaning challenges that no compound can fully overcome. NANHAIYA's technical review process for custom injection molding screw barrels evaluates screw geometry, wear patterns, and material-retention concerns — factors that directly influence how effectively any purging compound can do its job. For processors who have optimized their compound selection and procedure but still face persistent cleaning difficulties, a hardware assessment is the logical next step.
Shifts in contamination types: A facility that historically dealt with color changeovers but now faces increasing carbon and degradation issues — perhaps due to higher processing temperatures, longer production runs, or recycled-content resins — may need to shift from a mechanical-dominant compound to a chemical or hybrid grade. The contamination changed; the compound selection should follow.
Questions to Ask Your Purging Compound Supplier
Whether you're evaluating a new compound for the first time or reassessing your current supplier, a structured set of questions separates a productive conversation from a sales pitch. Bring this checklist to every supplier evaluation — and pay attention to which questions get clear answers and which get deflected:
- What is the carrier resin, and what is its compatibility range? If the supplier won't disclose the base resin or its tested compatibility with specific resin families, you're selecting blind.
- What is the effective temperature window? Get the minimum activation temperature and maximum safe operating temperature — not just a vague "suitable for engineering resins" claim.
- What soak time or shot count protocol is recommended? Specific numbers matter. A supplier that can't provide a tested protocol for their own product hasn't done the application work.
- Are independent test results or processor case references available? Supplier-generated data is a starting point. Independent validation or documented results from processors running similar resins and equipment adds credibility.
- What is the recommended dosing per barrel volume? This should be expressed as a multiplier of barrel capacity or a specific weight range per machine size — not a vague "use as needed" instruction.
- Is the compound safe for hot runner systems? If you run hot runners, this question is non-negotiable. Get explicit confirmation, including any gate-size or valve-type restrictions.
- What certifications or regulatory compliance does the compound carry? For food-contact, medical, automotive, or aerospace applications, request documentation — not verbal assurances.
A supplier who answers these questions thoroughly and transparently is one worth trialing. A supplier who responds with generalities or redirects to marketing literature is signaling that their product may not hold up under the kind of scrutiny your operation requires.
Purging compound selection is not a purchase — it is a process engineering discipline that improves with every cycle you measure, every variable you track, and every question you refuse to leave unanswered.
The processors who get the most from their purging programs are the ones who treat selection as a living decision — revisited when conditions change, validated by data rather than habit, and supported by hardware that's in proper condition to let the compound do its work. That continuous refinement loop is what turns a purging expense into a production advantage.
Frequently Asked Questions About Purging Compound Selection
1. What is the difference between mechanical and chemical purging compounds?
Mechanical purging compounds rely on physical scrubbing through high-viscosity fillers and shear force during screw rotation, making them ideal for fast color changeovers and loosely adhered residue. Chemical purging compounds use heat-activated reactions — including foaming and gas expansion — to break molecular bonds between degraded resin and metal surfaces. Chemical grades require a soak period at processing temperature but excel at removing carbonized buildup and reaching dead spots that mechanical flow alone cannot access. Hybrid formulations combine both mechanisms in a single product for moderate-to-severe contamination scenarios.
2. How do I choose the right purging compound for my injection molding machine?
Start by identifying the contamination problem you need to solve — color changeover, carbon removal, shutdown protection, or preventive maintenance. Then filter your options by three critical variables: carrier resin compatibility with your production resins, the compound's effective temperature range versus your processing temperatures, and your equipment geometry including screw design, nozzle configuration, and hot runner complexity. Barrel capacity and dosing calculations also matter — barrel volume is typically 2x to 2.5x the maximum shot size, and accurate dosing prevents both under-cleaning and material waste. Always request supplier data on carrier resin composition and run controlled trials on your specific machines before committing.
3. Can I use polyethylene or polypropylene instead of a dedicated purging compound?
While polyolefins like PE and PP are sometimes used as low-cost barrel-flushing materials, they lack the cleaning agents, viscosity modifiers, and surface-active properties engineered into dedicated purging compounds. This means processors typically consume significantly more material, run more purge cycles, and still end up with residual contamination that a formulated compound would remove faster. When you factor in extended downtime, higher resin waste, and increased startup scrap, the total cost of purging with polyolefins often exceeds the cost of using a purpose-built compound — even though the per-kilogram price is lower.
4. Why is the PVC and POM combination dangerous during purging?
PVC and POM (acetal) trigger a violent catalytic decomposition reaction when they contact each other inside processing equipment — even in trace residual amounts left on screw flights after a standard purge. The reaction generates extreme gas pressures that can rupture barrel sections, blow apart hoppers, and send equipment fragments through walls or ceilings. Any purging compound with a POM-based carrier resin is strictly incompatible with PVC applications, and vice versa. If a machine must process both materials, complete disassembly and manual cleaning of the barrel and screw are required before switching — no purging compound alone can eliminate this risk.
5. How do I calculate the true cost of a purging compound?
Per-kilogram compound price is misleading because it ignores the larger cost drivers in every purge cycle. To calculate true cost per purge, track these variables: compound weight consumed multiplied by unit cost, production resin wasted during flushing and transition, machine downtime in minutes multiplied by the press hourly rate, scrap parts produced before quality stabilizes, and operator labor time. Multiply the cost per purge by your weekly or monthly changeover frequency to see annualized impact. A compound costing three times more per kilogram but cleaning in one-third the time with less scrap often delivers a lower total purging cost. Run controlled head-to-head trials on your own machines to generate reliable comparison data.
Written by
Nanhaiya Technical Team
Zhoushan Nanhaiya Plastic Machinery Co., Ltd.
The Nanhaiya technical team supports screw and barrel manufacturing projects through application review, technical communication, custom manufacturing coordination, and production and quality control.
Discuss Your Application
Related Articles
More insights on screw barrel technology and plastics processing.
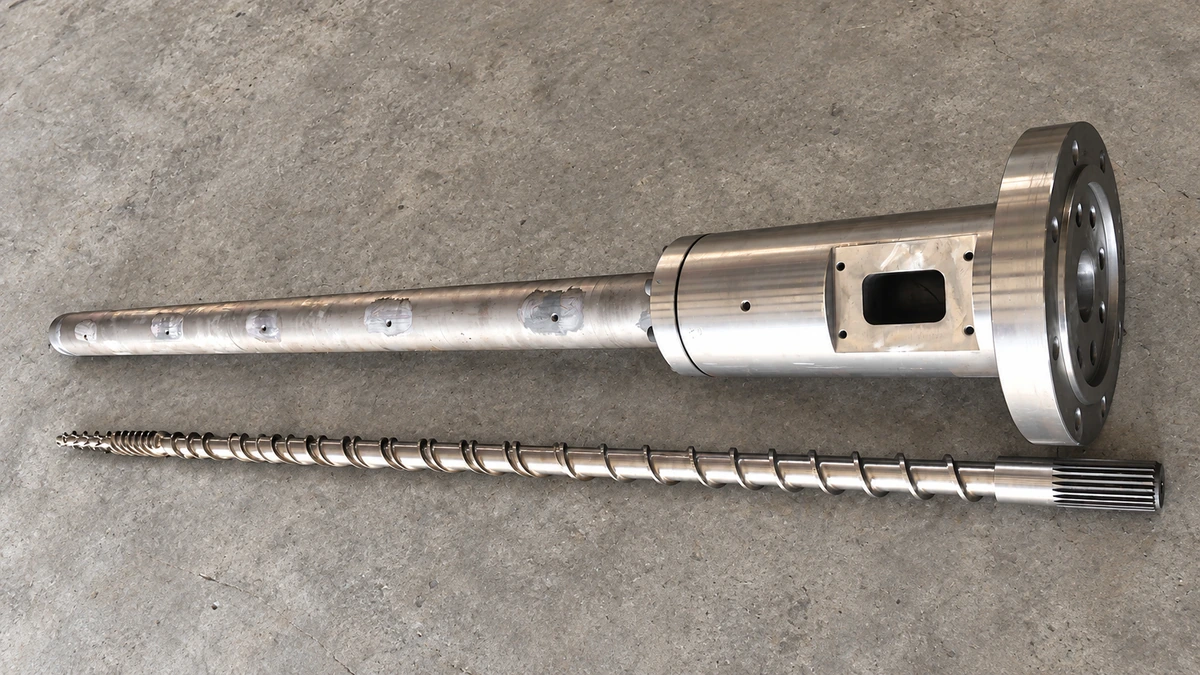
Why Your Single Screw Extruder Design Causes Extrusion Defects
Nov 13, 2026
Learn how single screw extruder design parameters—L/D ratio, compression ratio, channel depth, and mixing elements—affect melt quality, throughput, and defects.
Read Article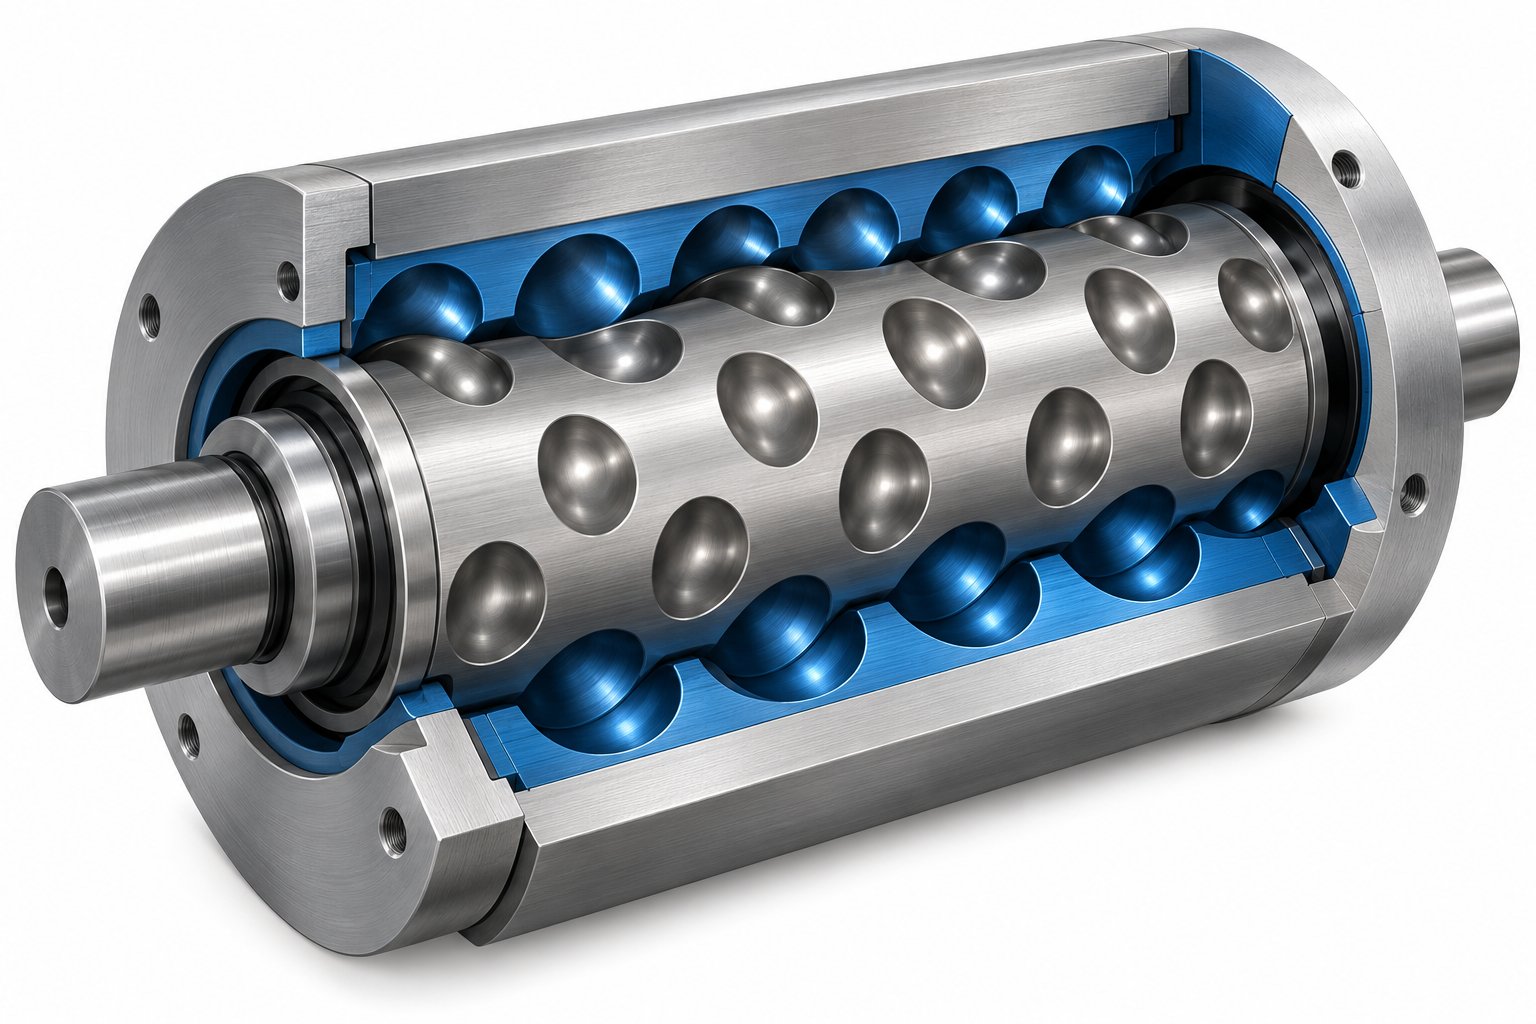
Cavity Transfer Mixer: The Blender Your Extruder Didn't Know It Needed
Nov 13, 2026
Learn how a cavity transfer mixer (CTM) upgrades single-screw extruder mixing. Covers working principles, key parameters, integration, applications, and comparisons.
Read Article
Extruder Barrel Alignment Decoded: Tolerances Most Plants Miss
Nov 13, 2026
Learn extruder barrel alignment tolerances, laser procedures, thermal offsets, and proactive schedules most plants miss — for single-screw and twin-screw lines.
Read ArticleLooking for something else?
Search by material, symptom or product and jump straight to the relevant page.
These are navigation suggestions based on keyword matching — not a quotation, not a delivery commitment, and not a substitute for engineering review. Final specification is confirmed by our engineers against your drawings and processed material.
Need help with screw barrel selection?
Share your machine model, processed material and application. Our team can help with pricing and technical support.